Create and Publish a GraphQL API
Follow the instructions in this tutorial to design, publish, and invoke a GraphQL API.
Note
For more information on GraphQL APIs, see Create a GraphQL API.
Step 1 - Design a GraphQL API
-
Sign in to the API Publisher Portal.
https://<hostname>:9443/publisherExample:
https://localhost:9443/publisherLet's use
adminas your username and password to sign in. -
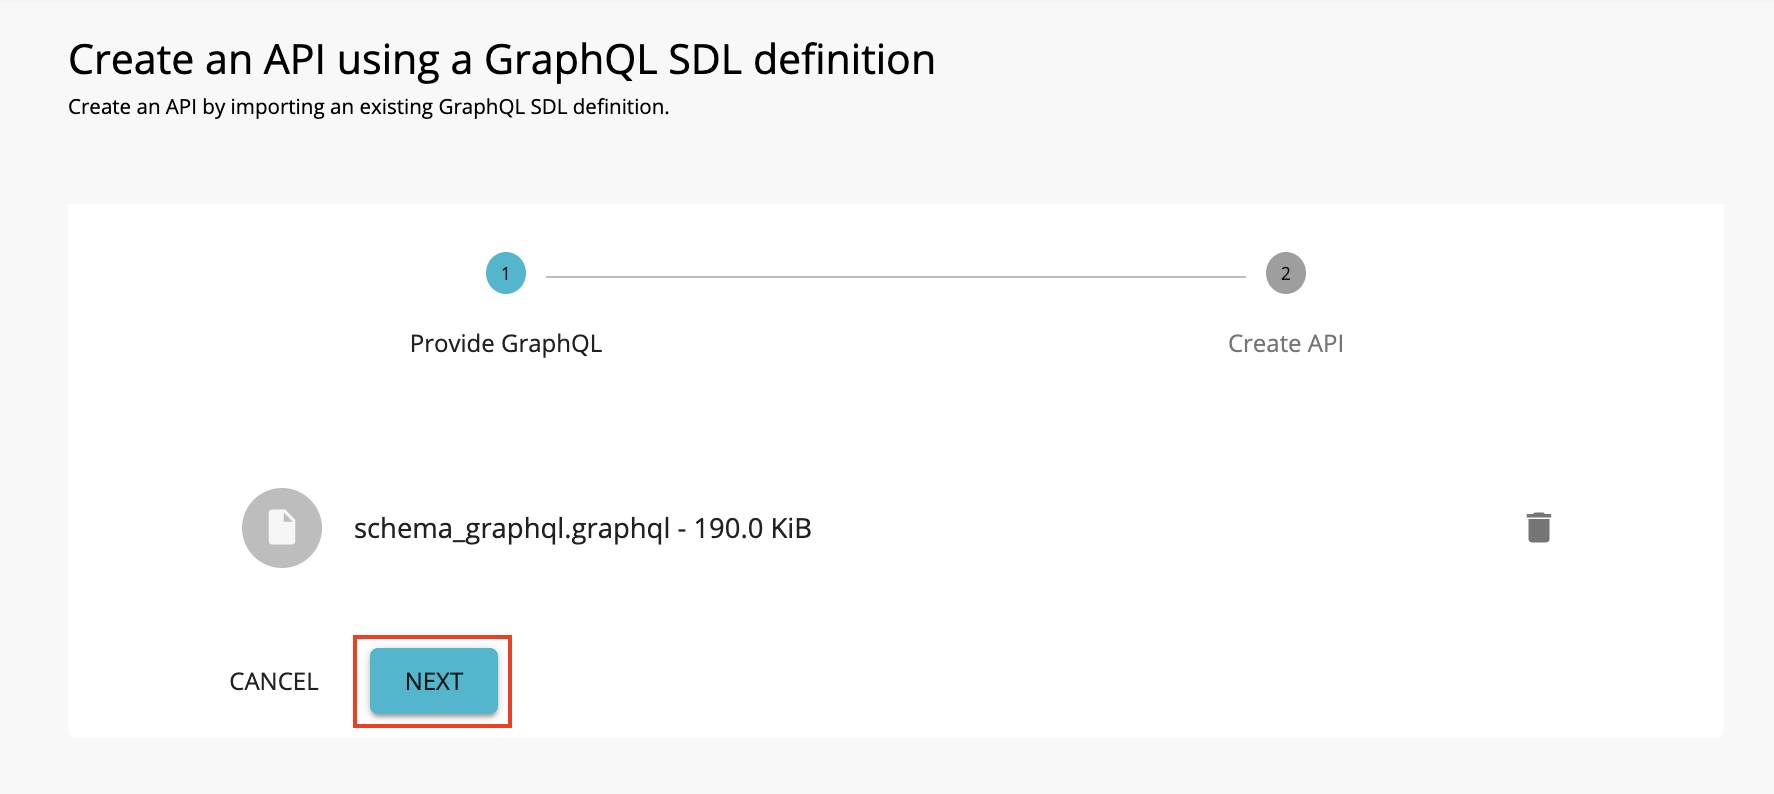
Click CREATE API and then click I Have a GraphQL SDL schema.

-
Import the schema and click Next.

Let's use the StarWarsAPI schema definition to create the schema file.
Note
-
You need to define the SDL Schema based on the GraphQL schema design best practices.
- The file extension can be either
.graphql,.txt, or.json. - The file name can be any name, which is based on your preference.
-
-
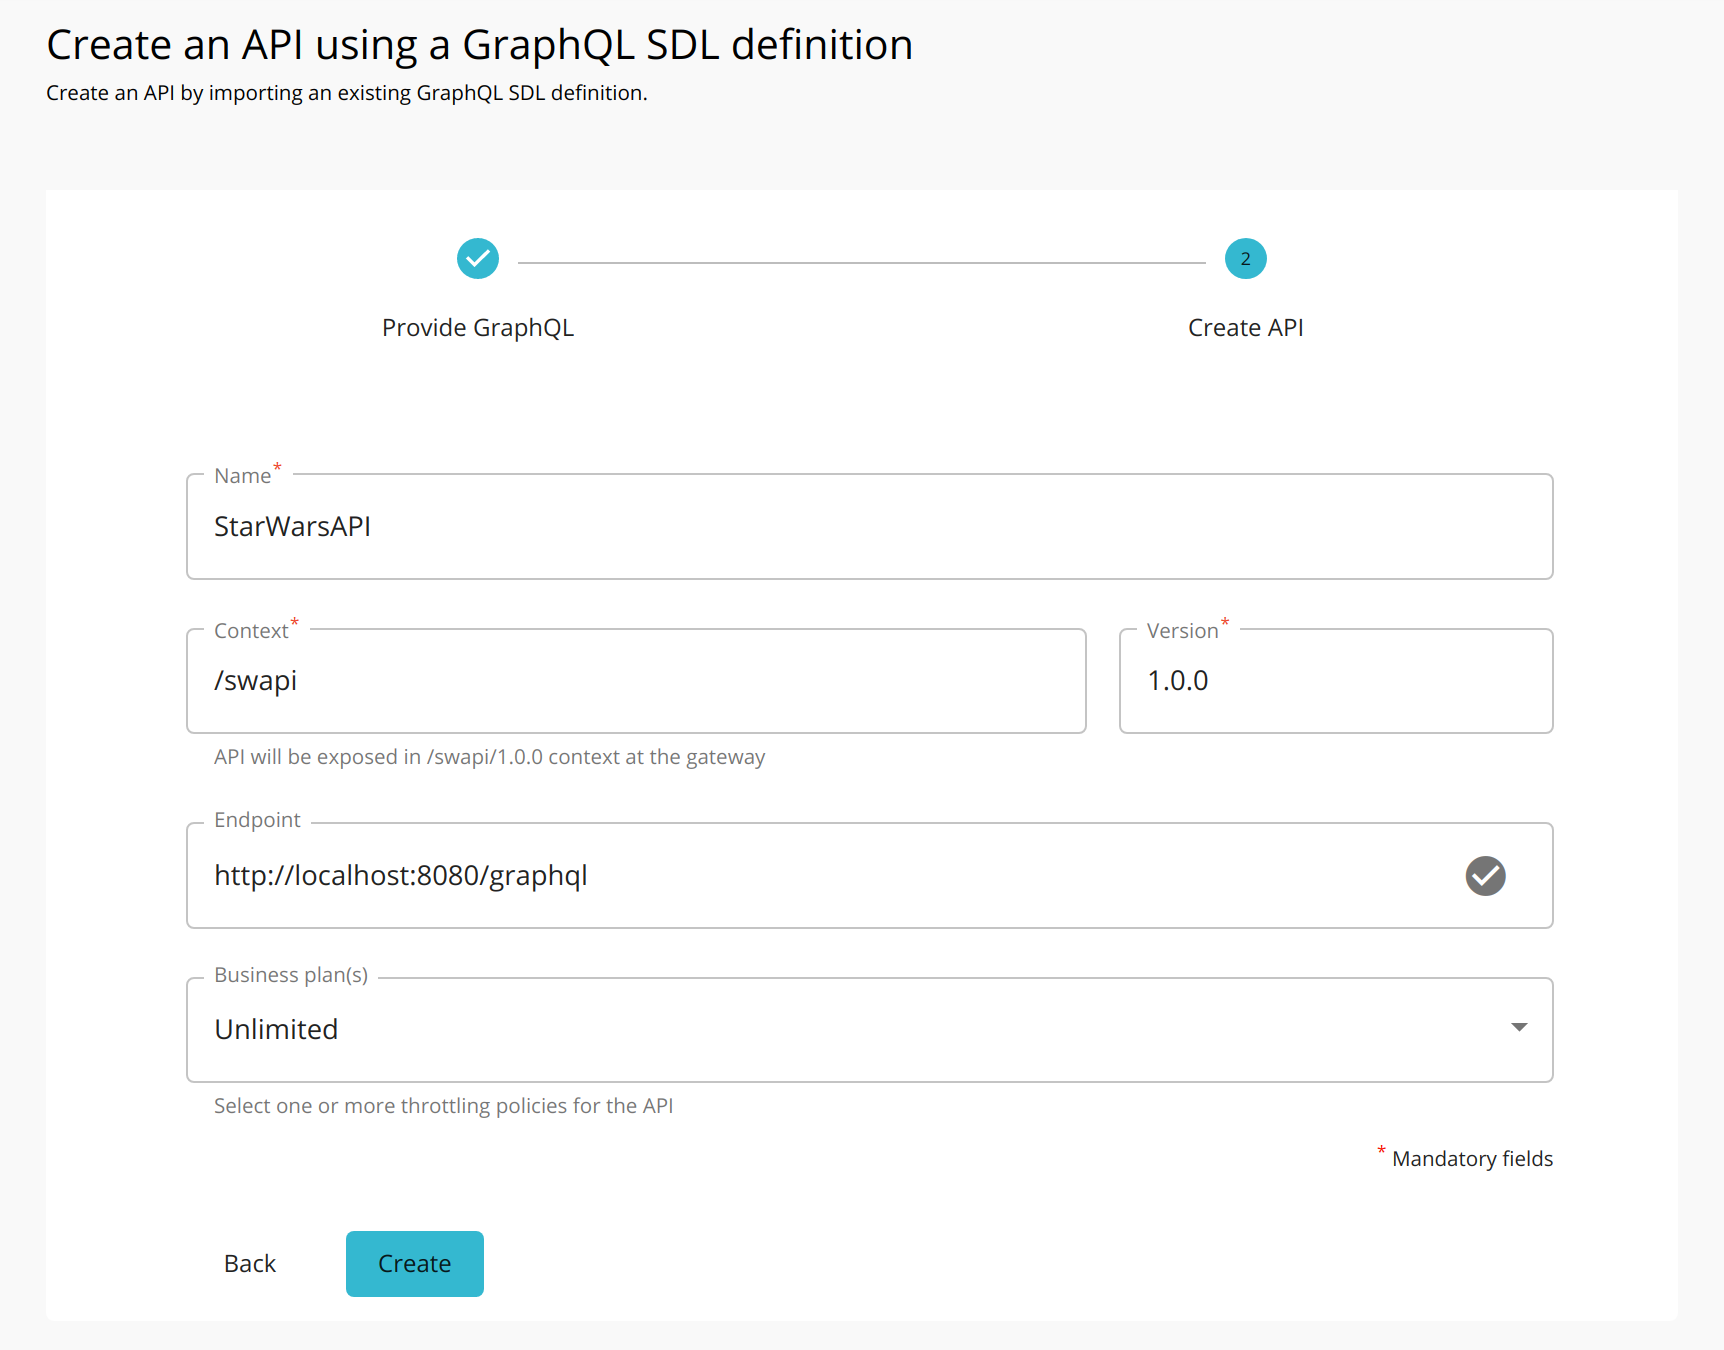
Enter the GraphQL API related details and click Create.
Important
Let's use the Star Wars sample backend server as the backend for our GraphQL API.
- Clone the WSO2 API Manager Samples repository.
git clone https://github.com/wso2/samples-apim - Navigate to
graphql-backenddirectory. - Run
npm installto install the necessary node modules. - Run
npm startto start the server.
Once the above steps are done, the Star Wars server will be running on
http://localhost:8080. We can usehttp://localhost:8080/graphqlas the endpoint when creating the API.Let's create an API named "StarWarsAPI" using the following sample data.
Protocol StateDescriptionName
StarWarsAPI
Context
/swapiVersion
1.0.0
Endpoint
http://localhost:8080/graphql Business Plans
Unlimited
- Clone the WSO2 API Manager Samples repository.
-
Optionally, modify the existing GraphQL schema definition.
-
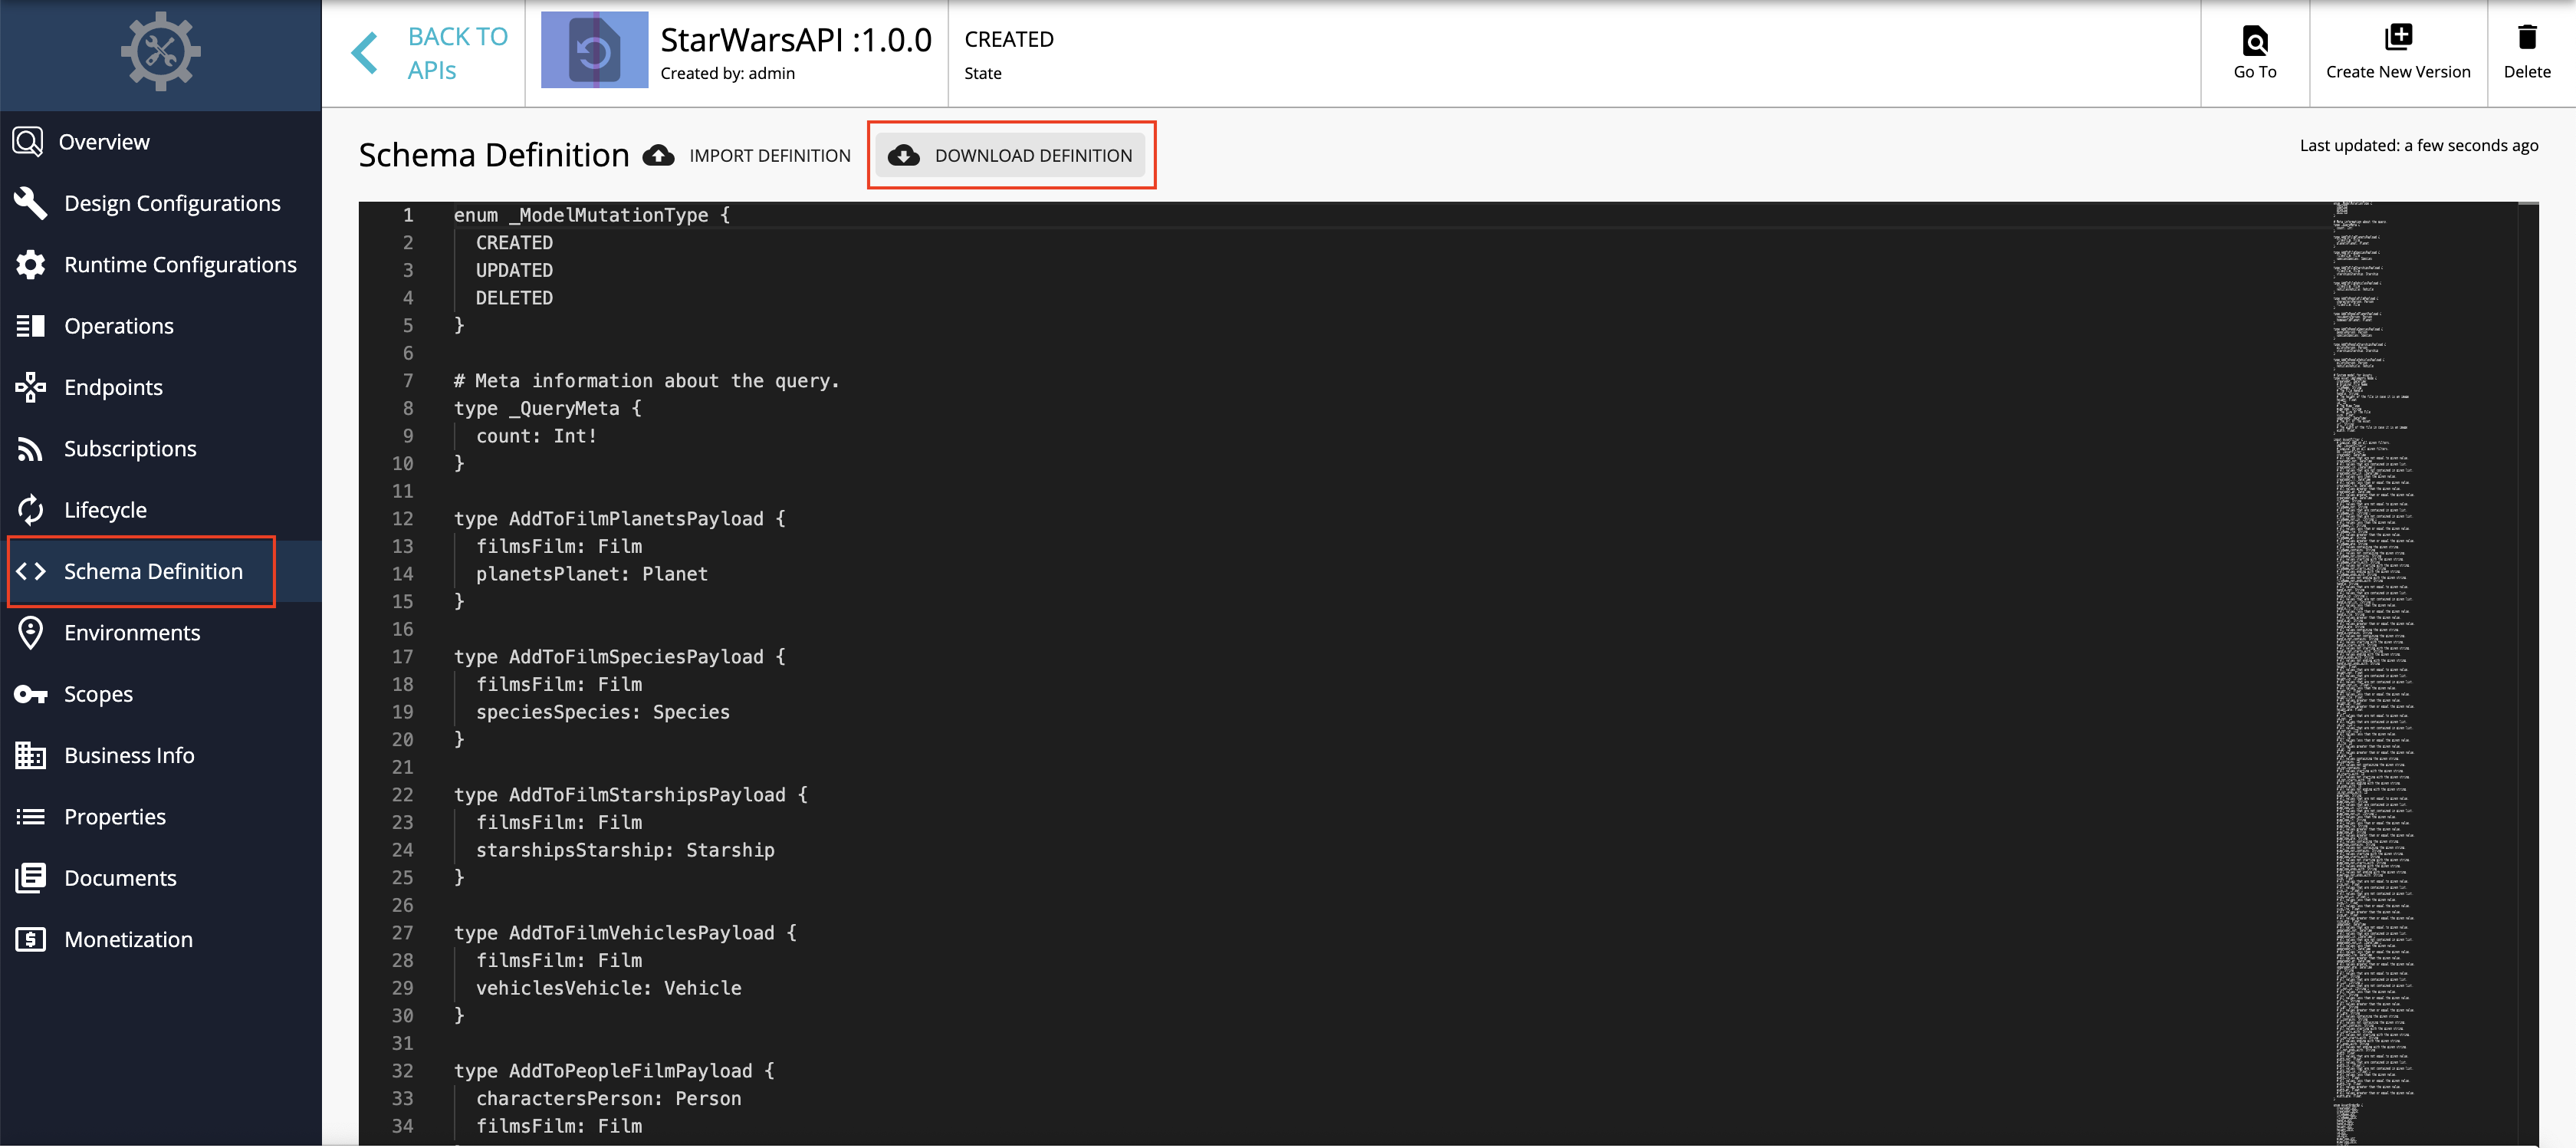
Click Schema Definition.
-
Click DOWNLOAD DEFINITION.
The existing GraphQL API schema gets downloaded.
-
Update the schema definition as required.
-
Click IMPORT DEFINITION to import the updated schema definition.
-
-
Update the GraphQL API operations as required.
Instead of resources, which get populated for REST APIs, operations get populated for GraphQL APIs.
-
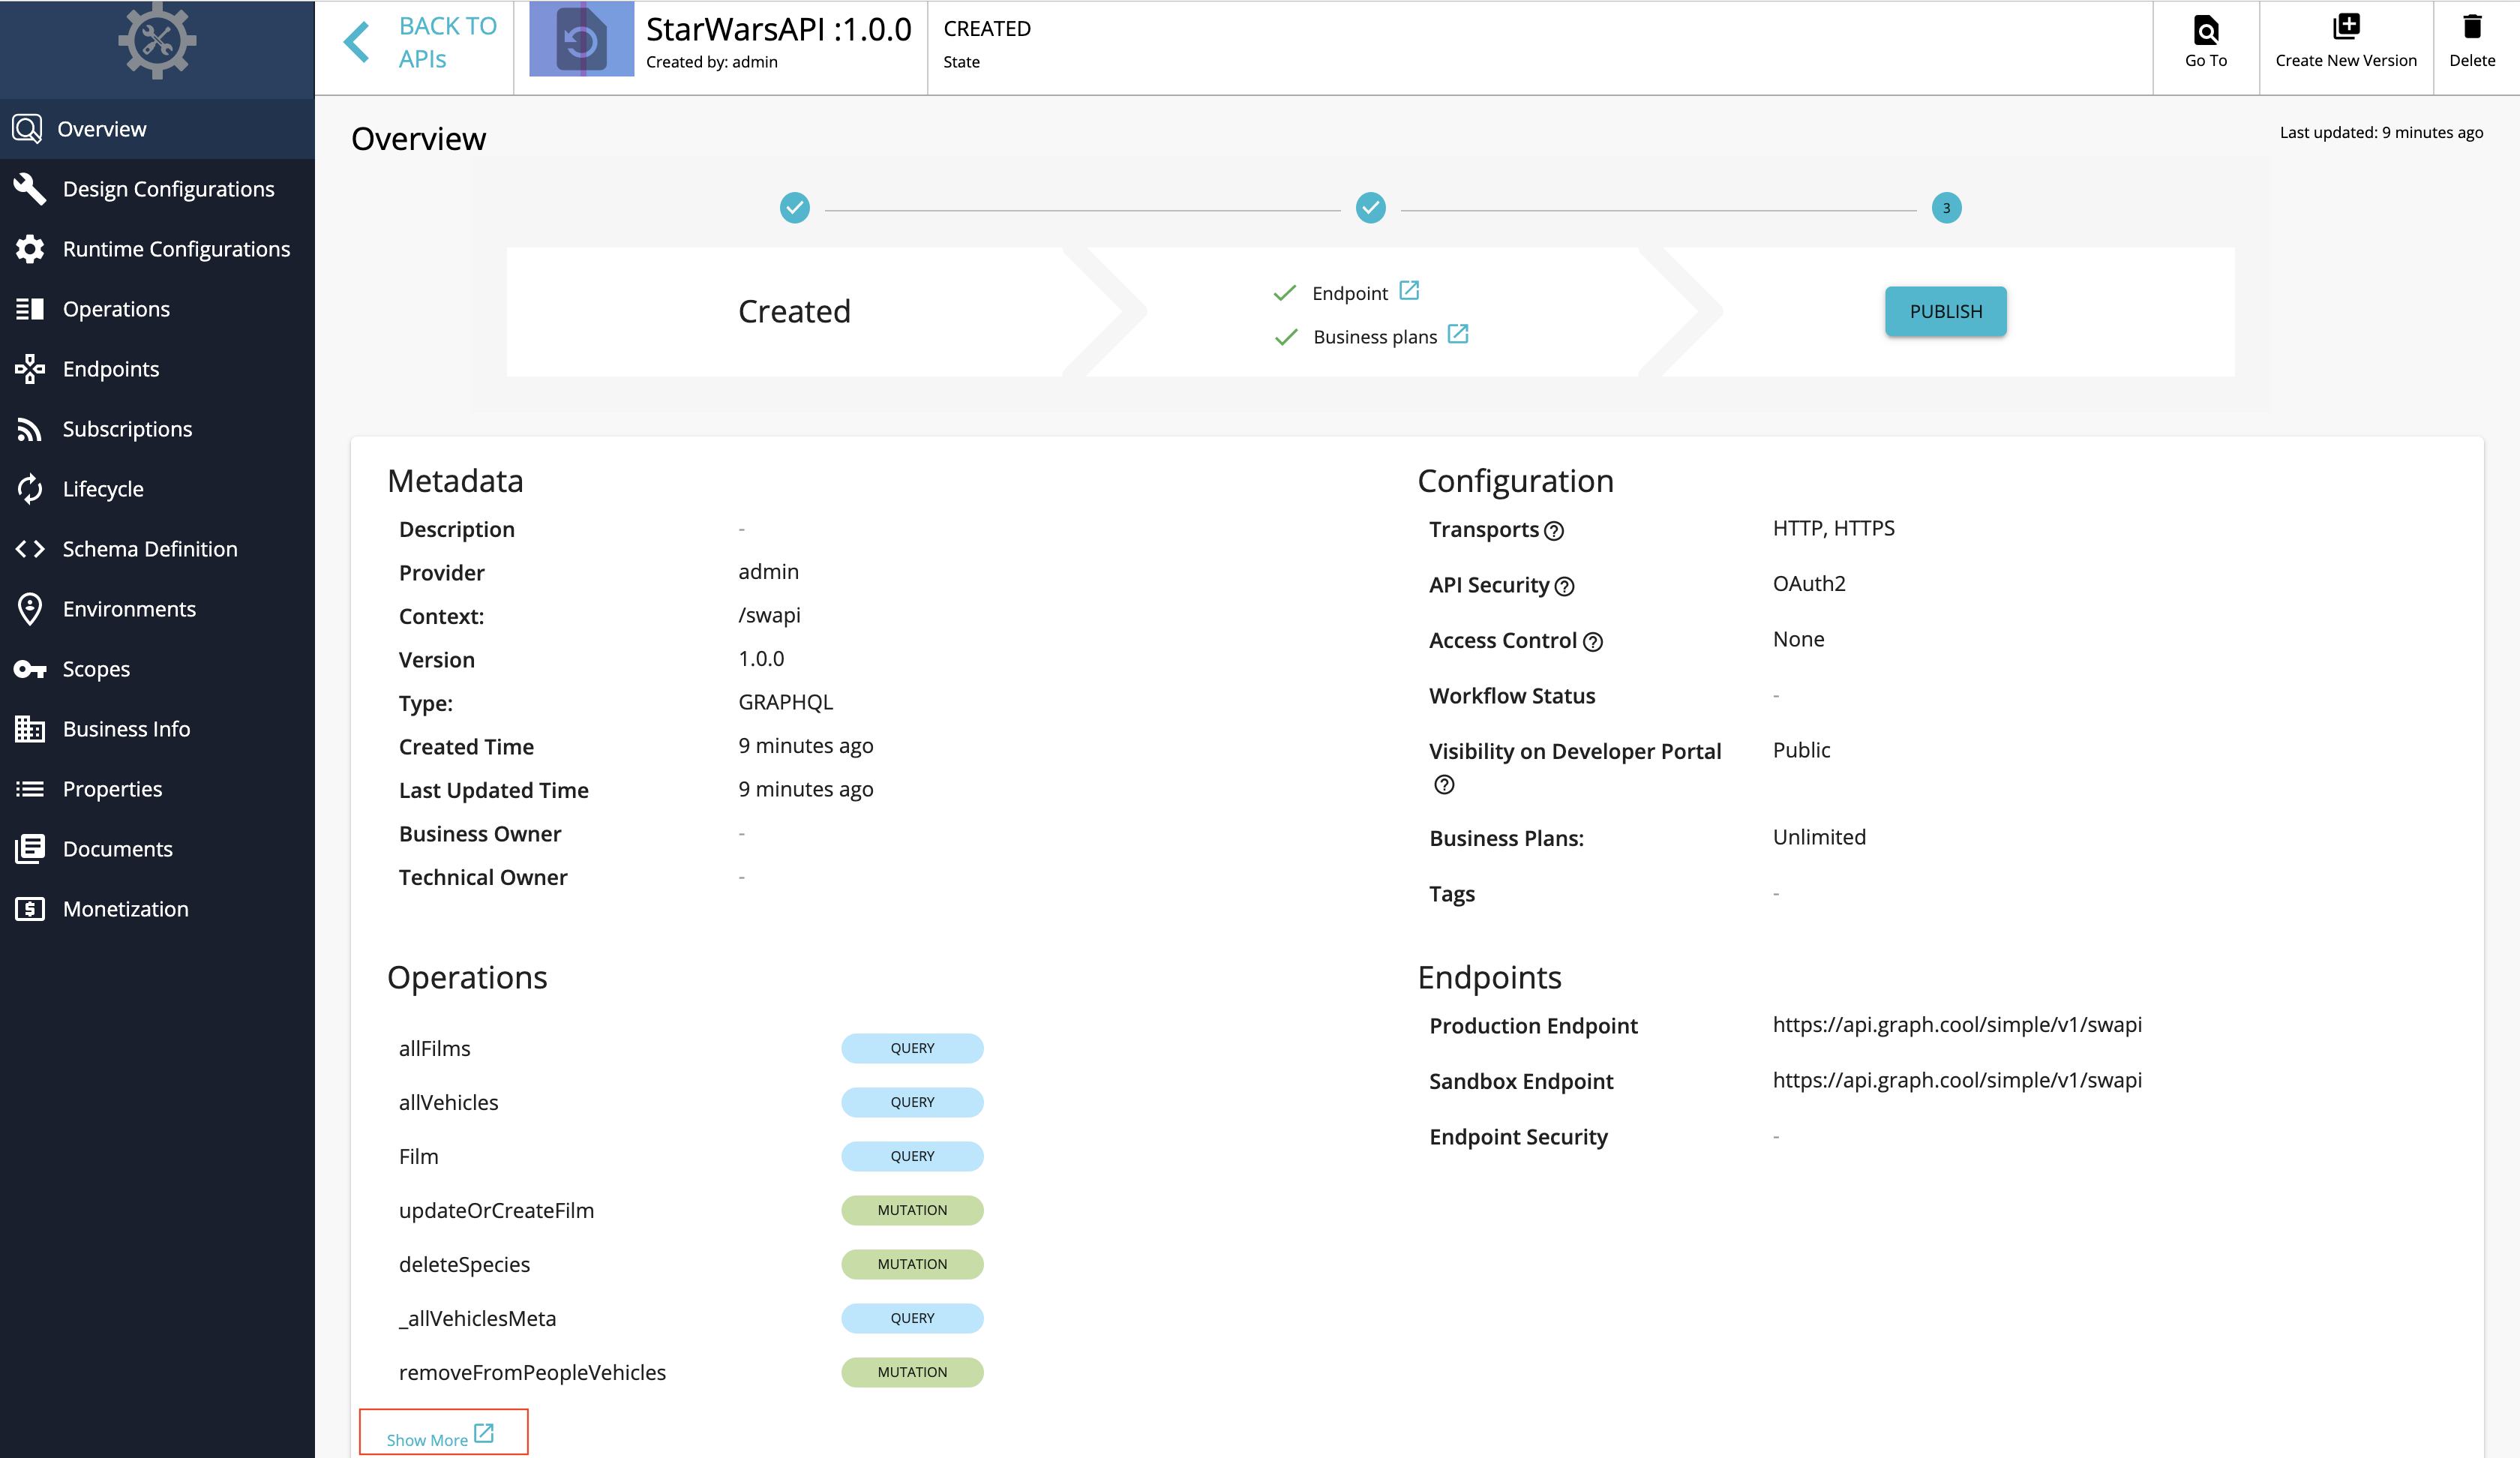
Click Show More under the Operations section in the OVERVIEW page to navigate to the operations page.
-
Update the operations as required.
The Publisher can add rate limiting policies, scopes, and enable/disable security for each of the GraphQL API operations.
-
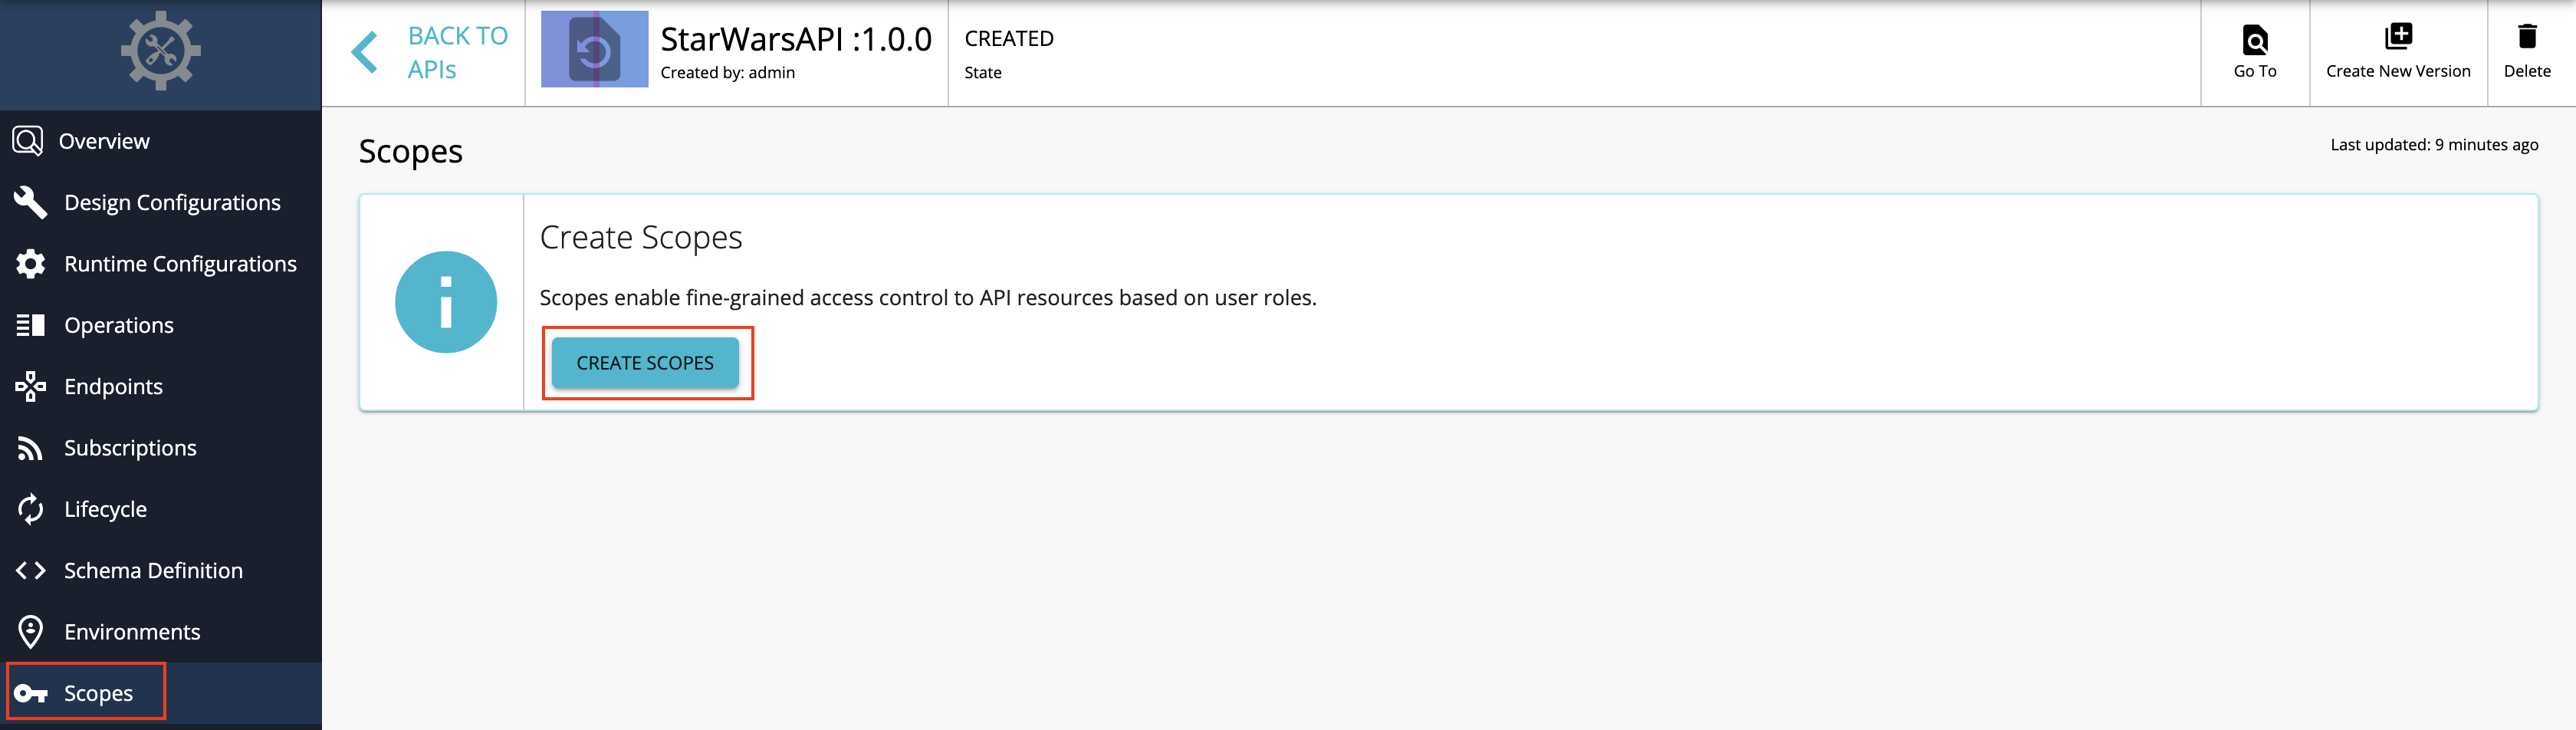
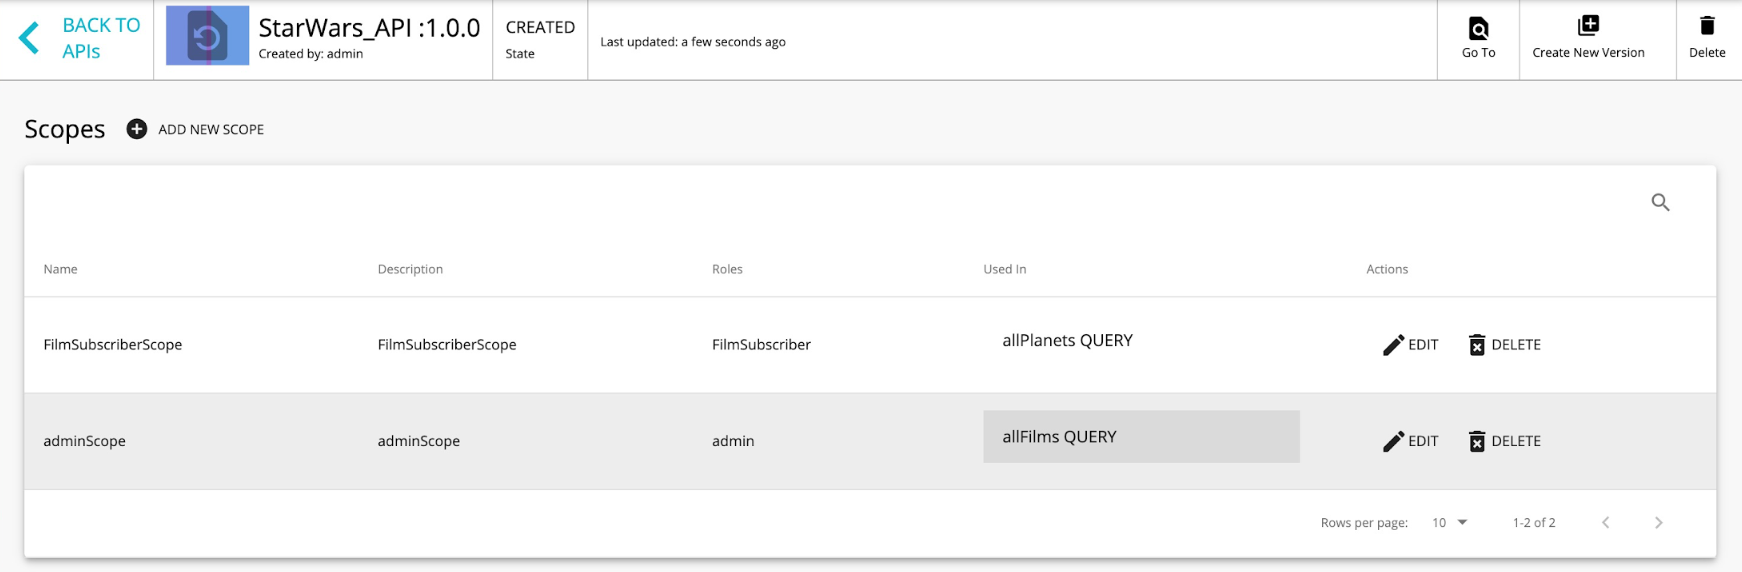
Create scopes.
Repeat the following sub-steps to create two scopes named
adminScopeandFilmSubscriberScope.-
Click Scopes > ADD NEW SCOPE.
-
Enter the required details.
Note
The role that you enter should be a valid role that already exists in WSO2 API Manager. Make sure to assign the role to the user.
Create a role named
FilmSubscriberand assign it to theadminuser for this example scenario. For more information, see Adding Users and Adding User Roles.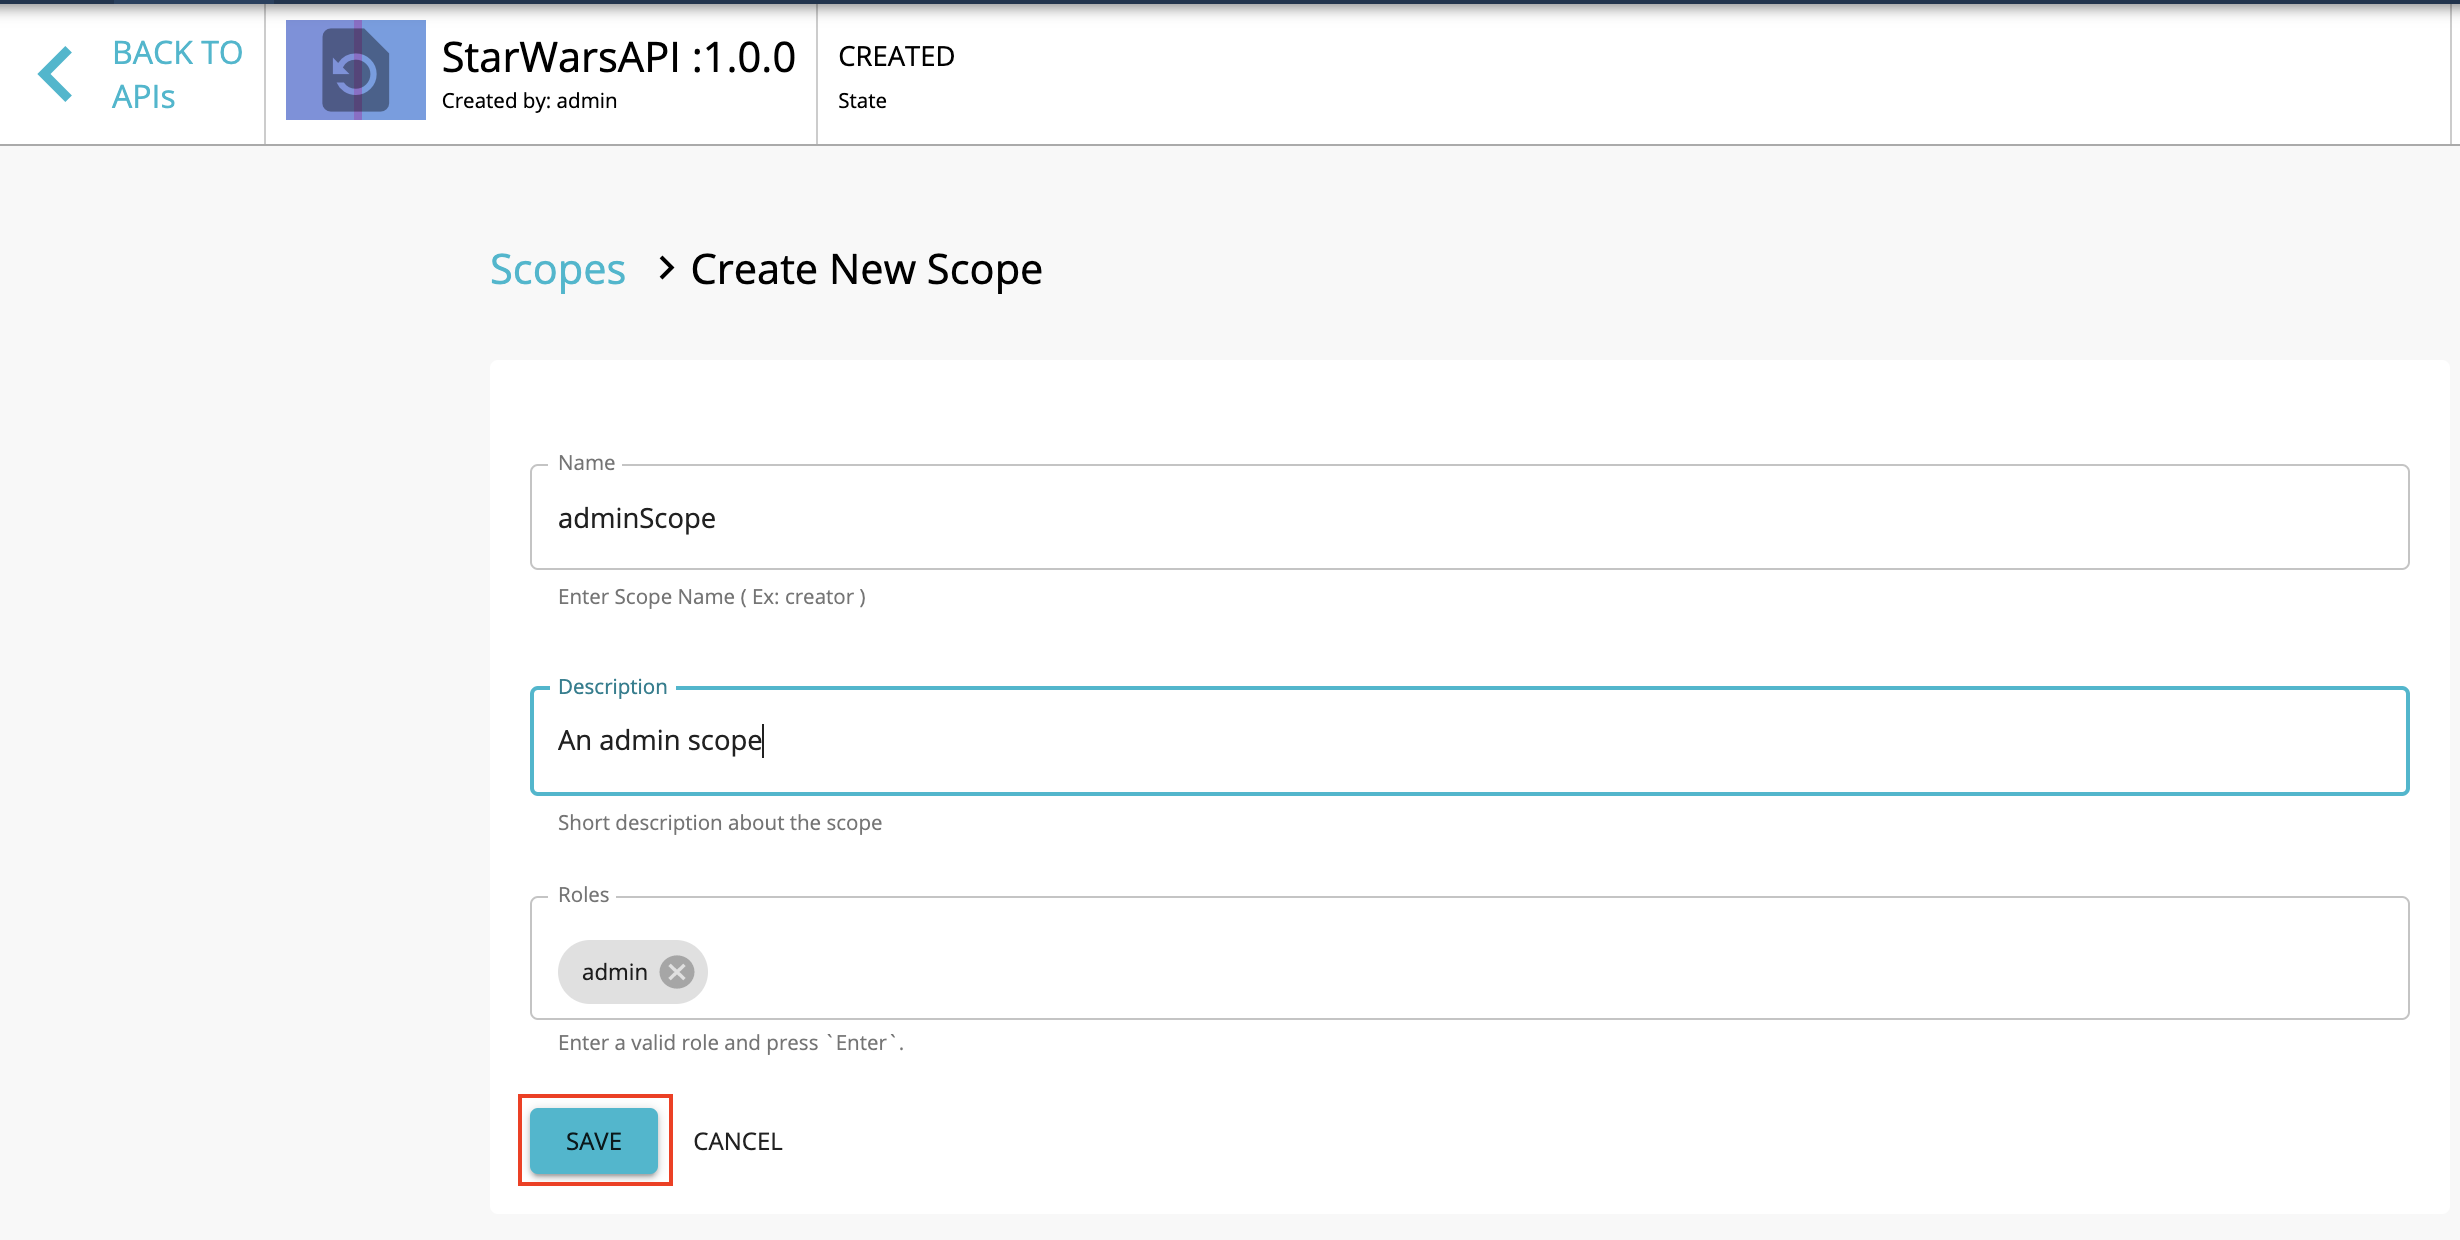
-
Press
Enterto add each scope. -
Click SAVE.
-
-
Define the operation level configurations.
-
Click Operations.
-
Click Operation Level to apply rate limiting for operations.
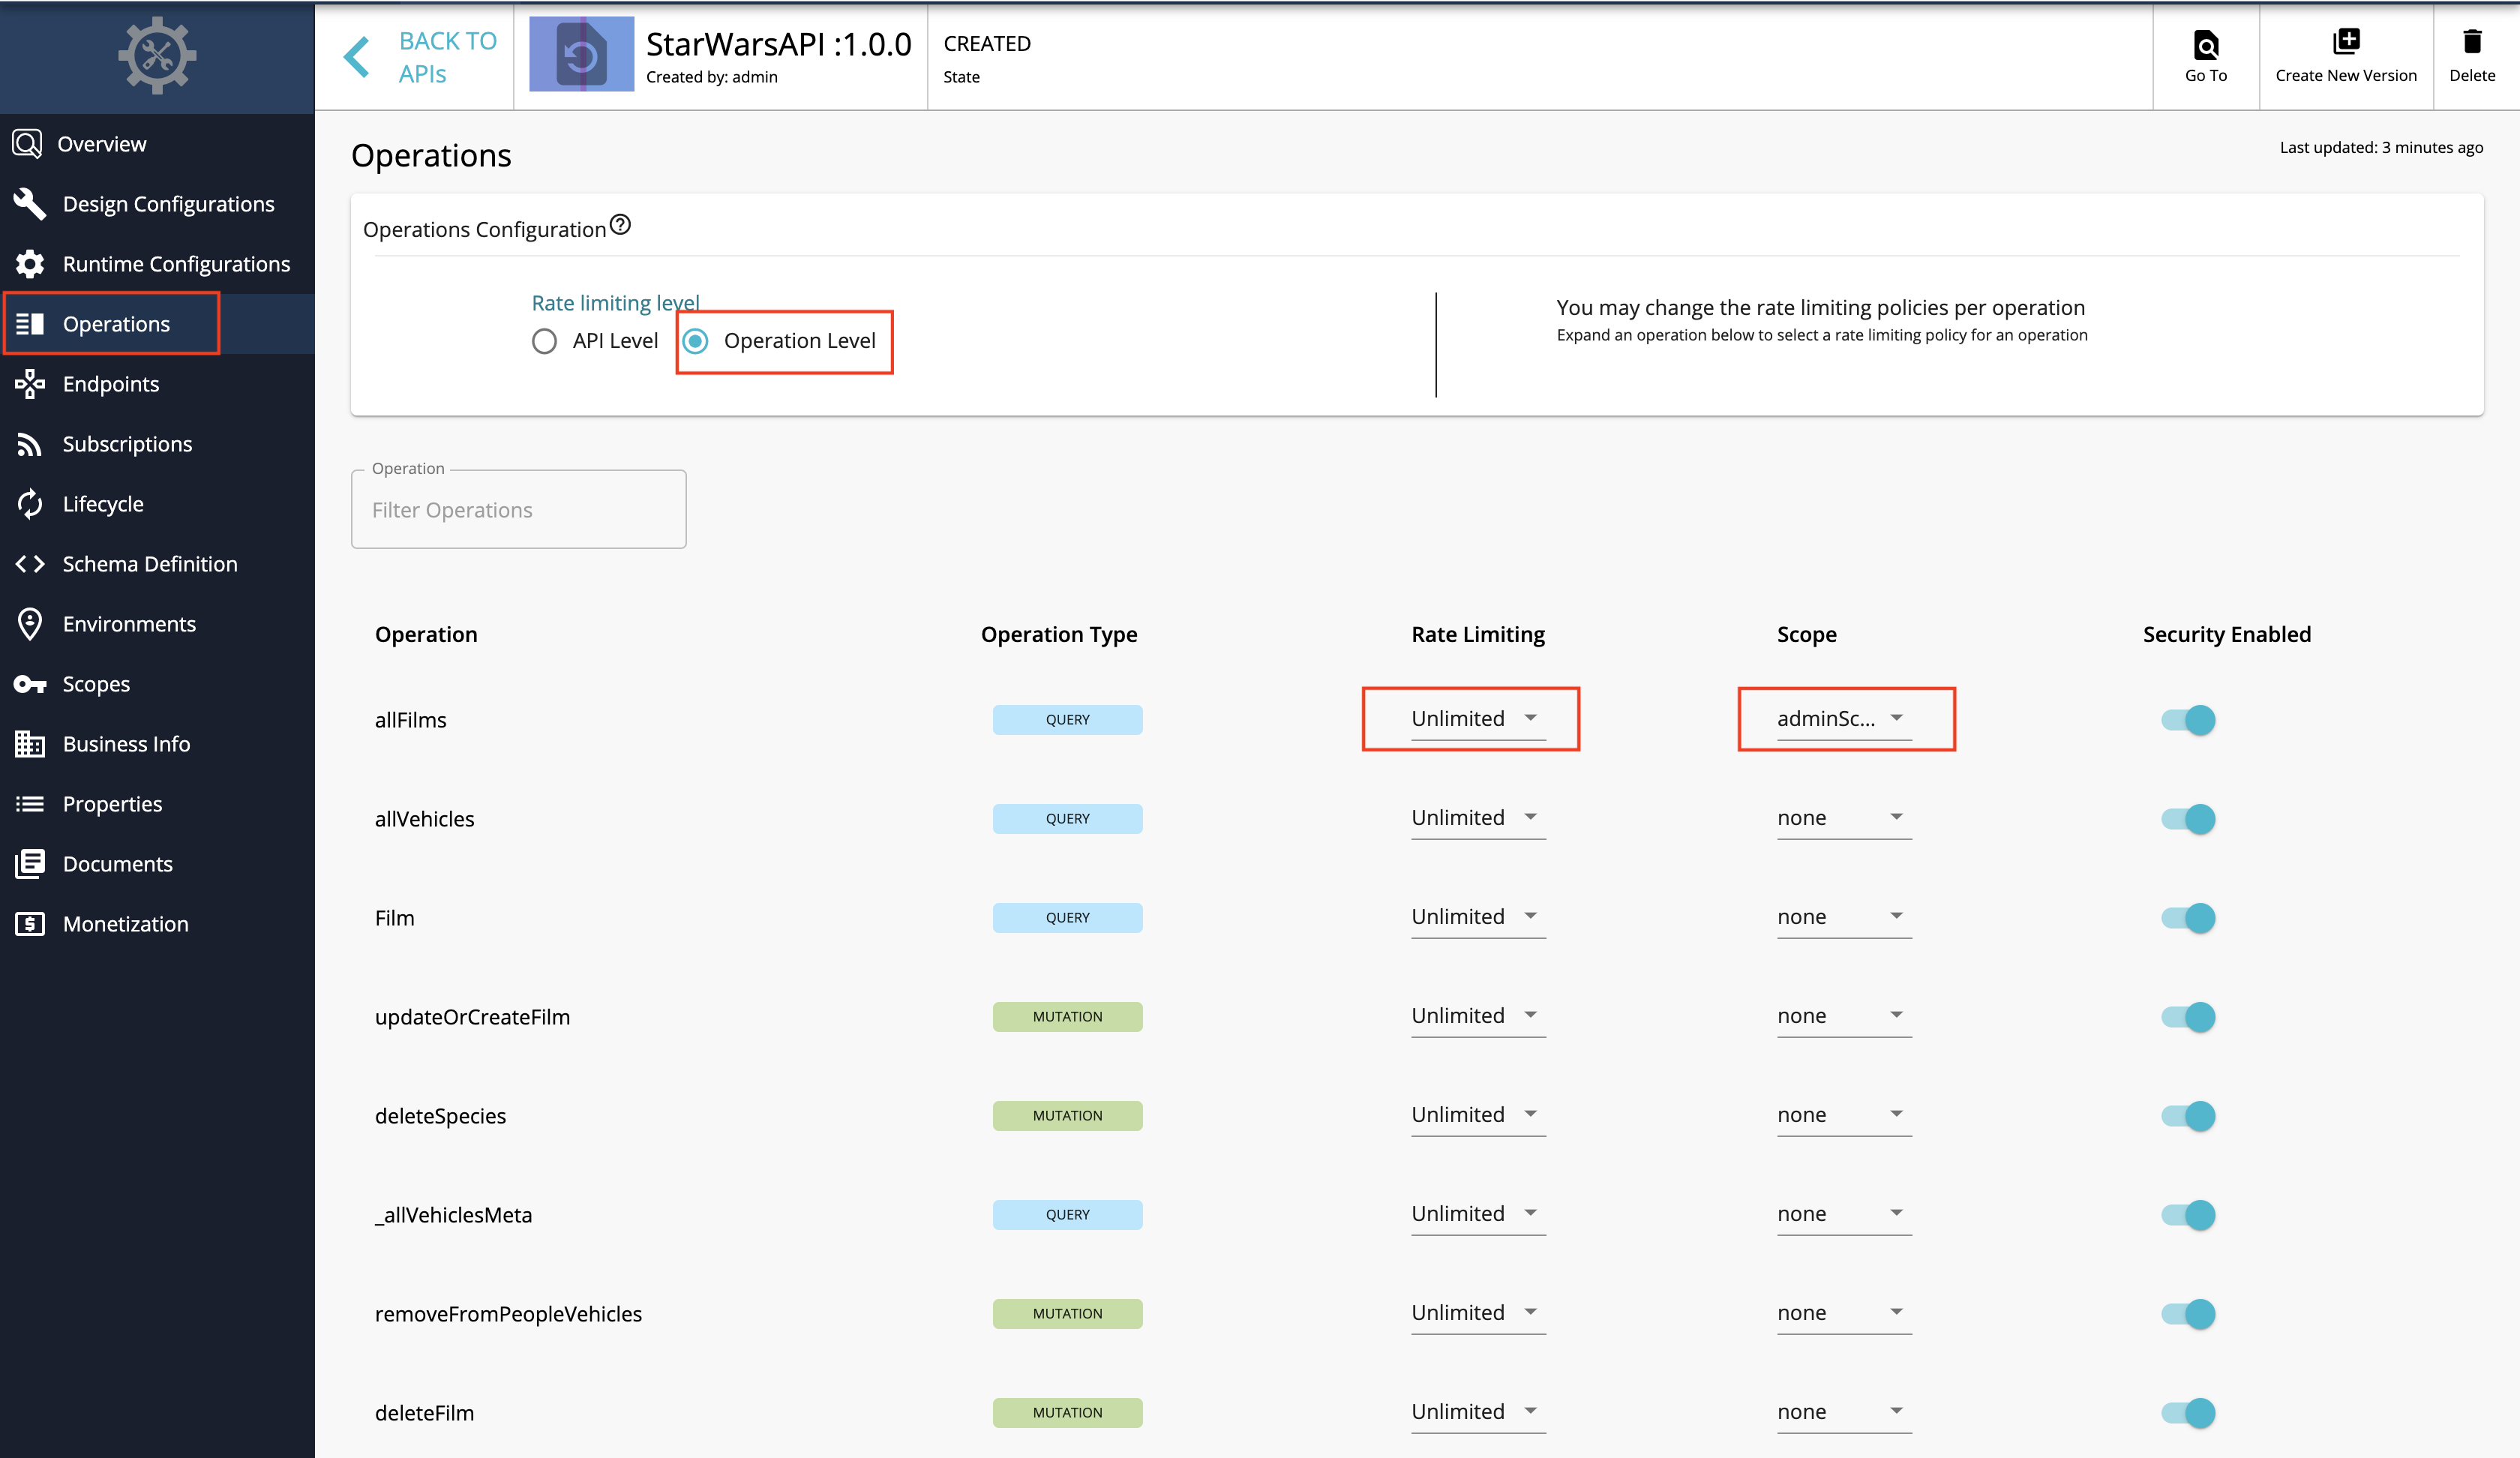
-
Select a throttling policy, scope, and enable or disable security for each of the operations.
Apply the
adminScopeandFilmSubscriberScopescopes to theallFilmsandallPlanetsoperations, respectively. -
Click Save.
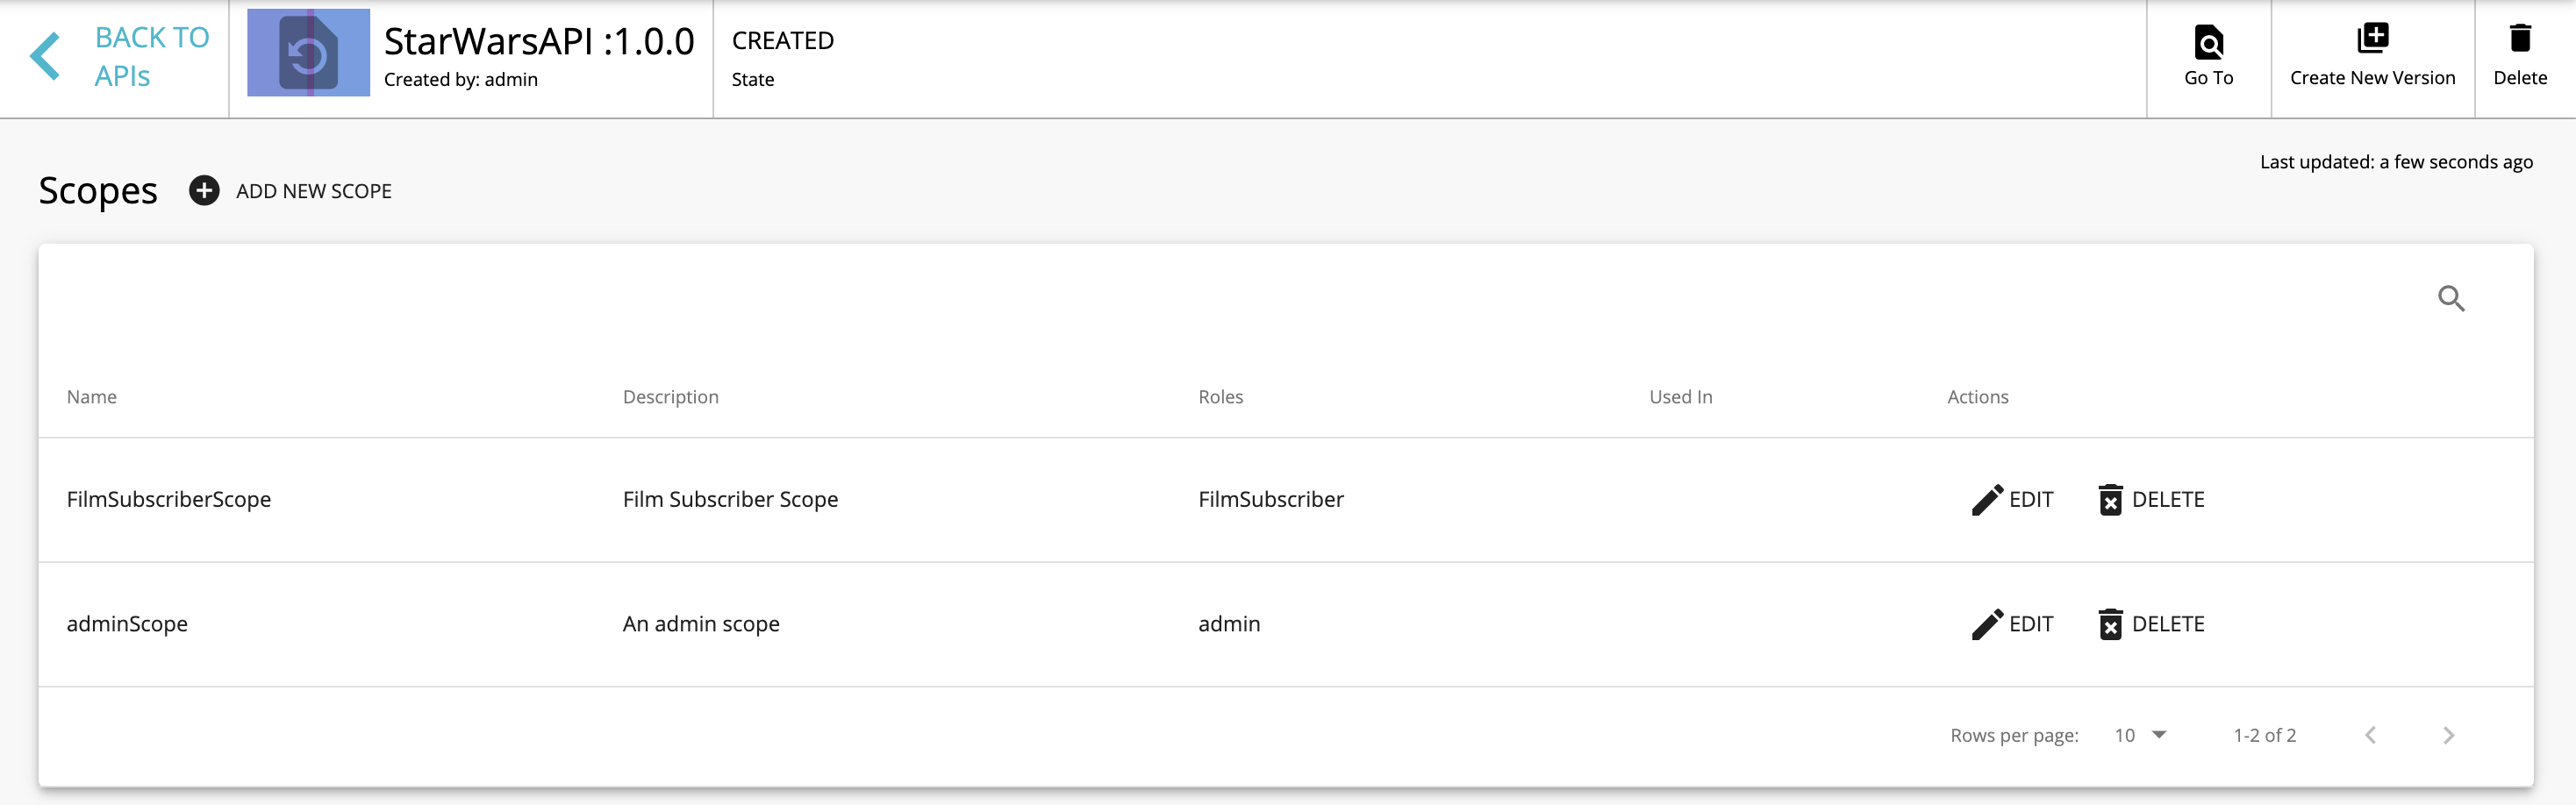
If you check the list of scopes, it should appear as follows:
-
-
-
Now, you have created and configured the GraphQL API successfully.
Step 2 - Publish the GraphQL API
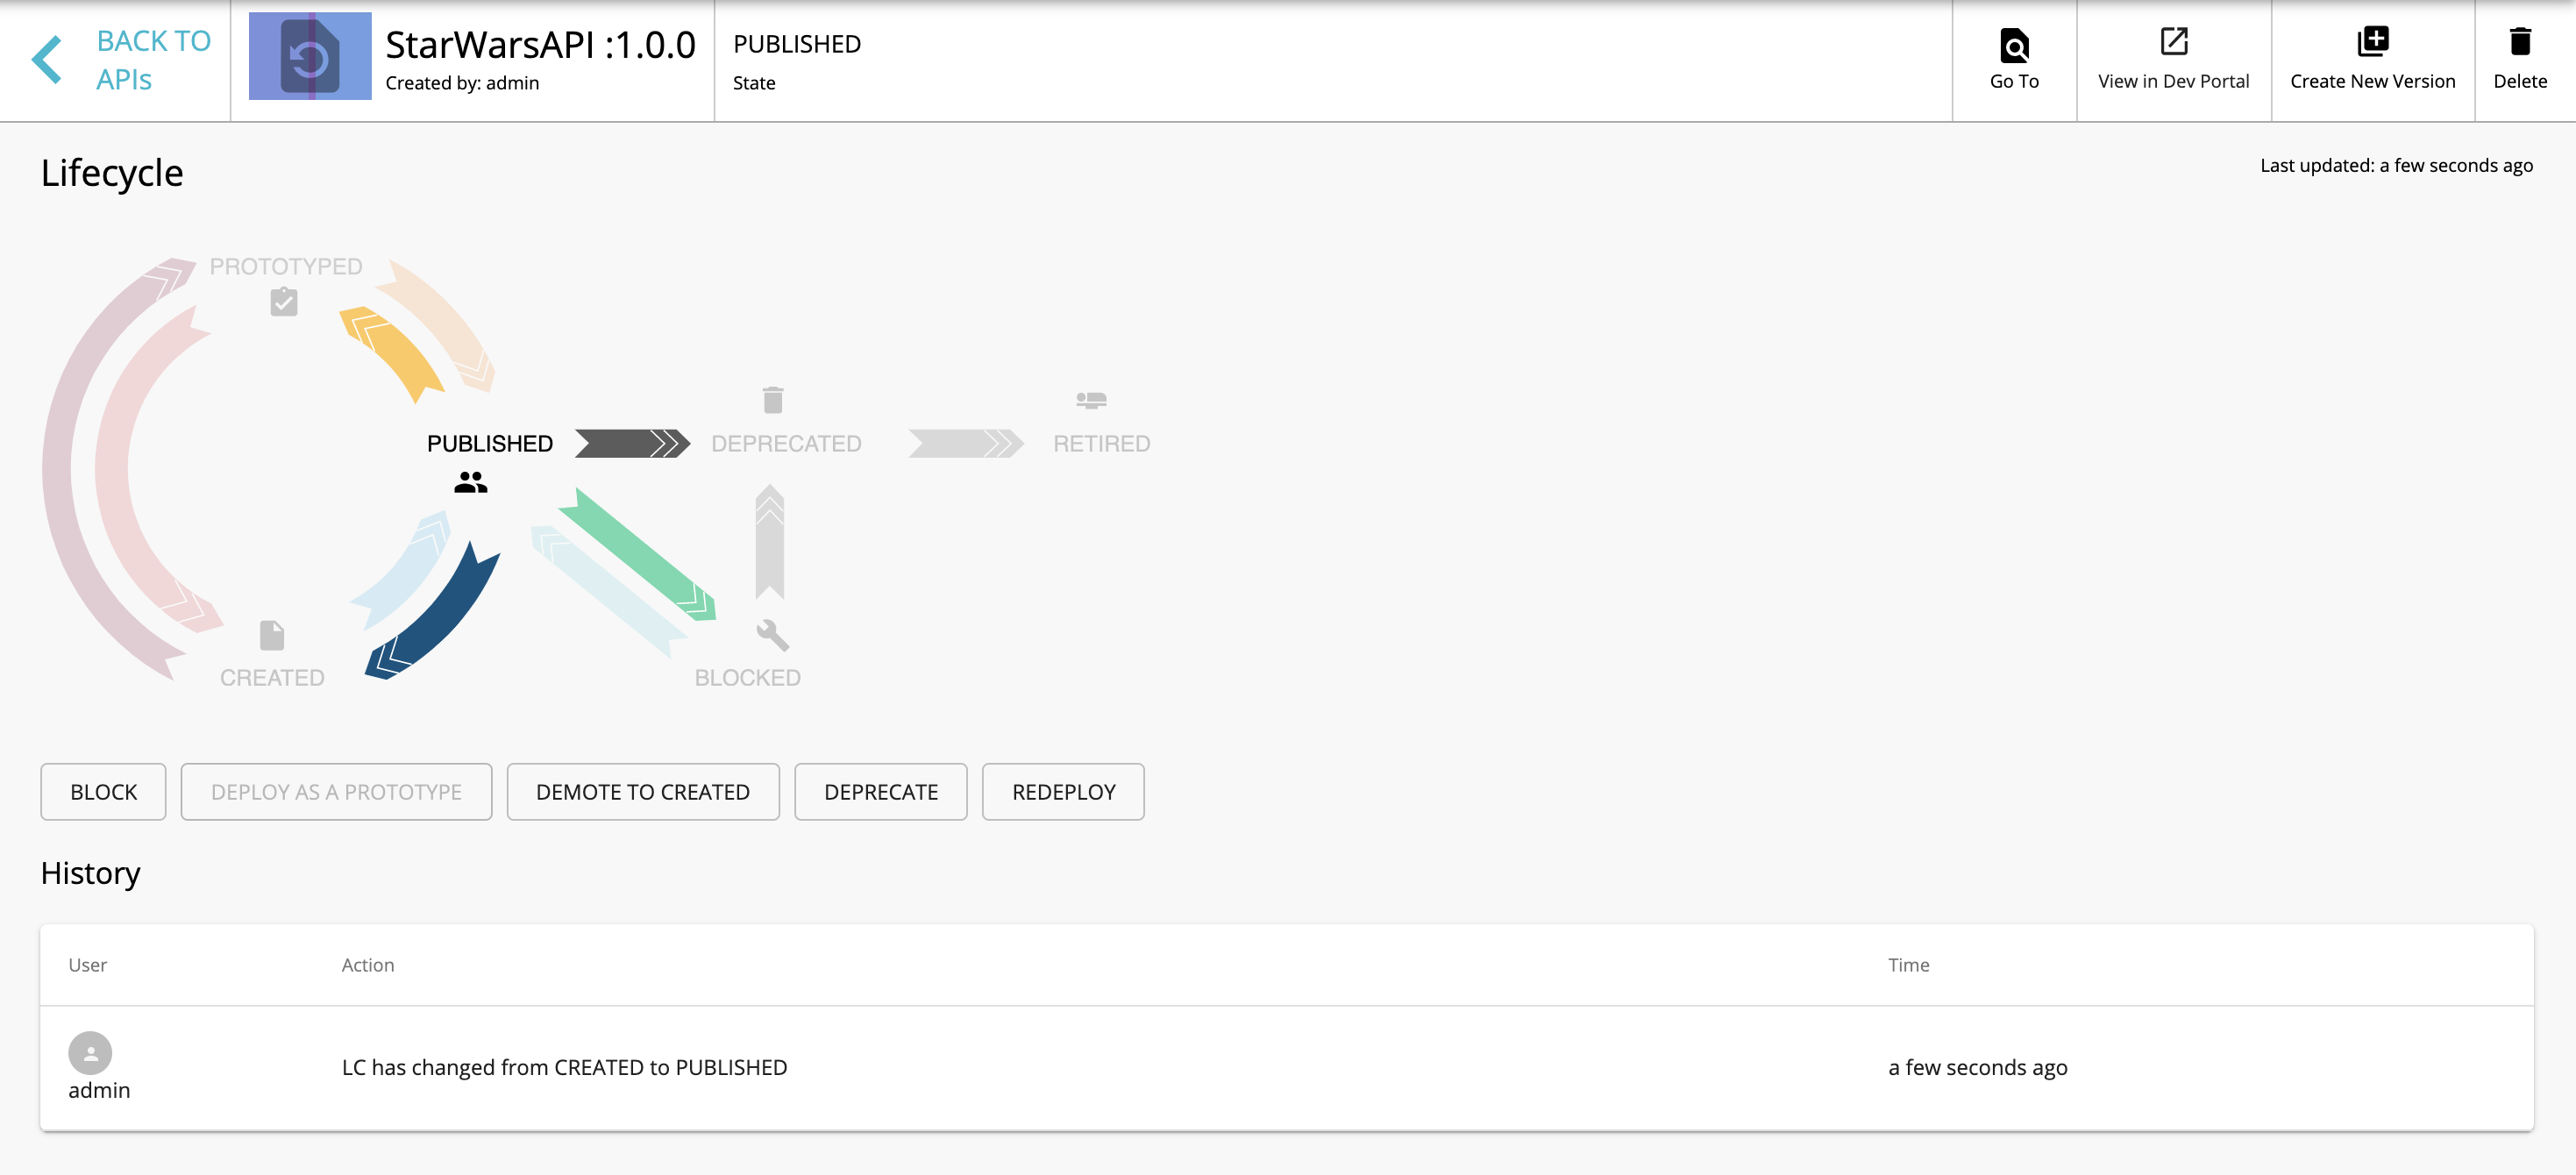
Click LIFECYCLE to navigate to the API lifecycle and click PUBLISH to publish the API to the API Developer Portal.
Step 3 - Invoke the GraphQL API
-
Sign in to the DEVELOPER PORTAL.
https://<hostname>:9443/devportalExample:
https://localhost:9443/devportal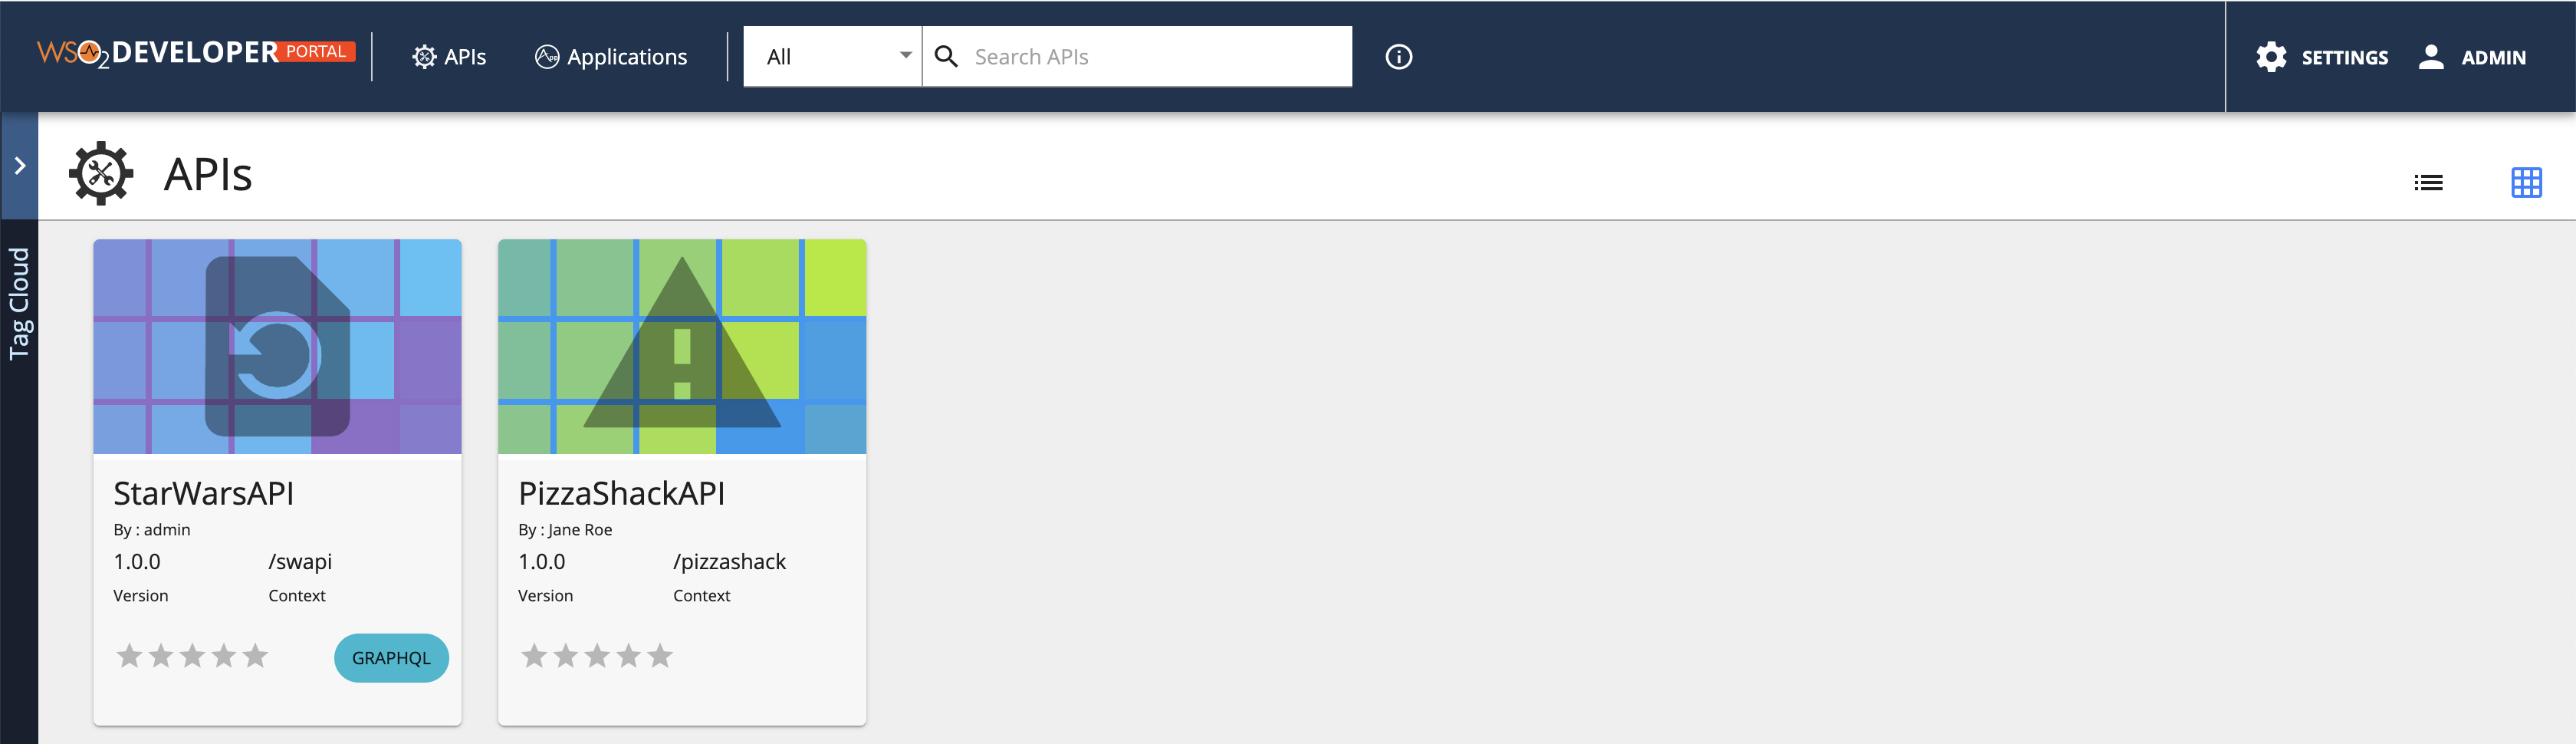
-
Click on the GraphQL API.
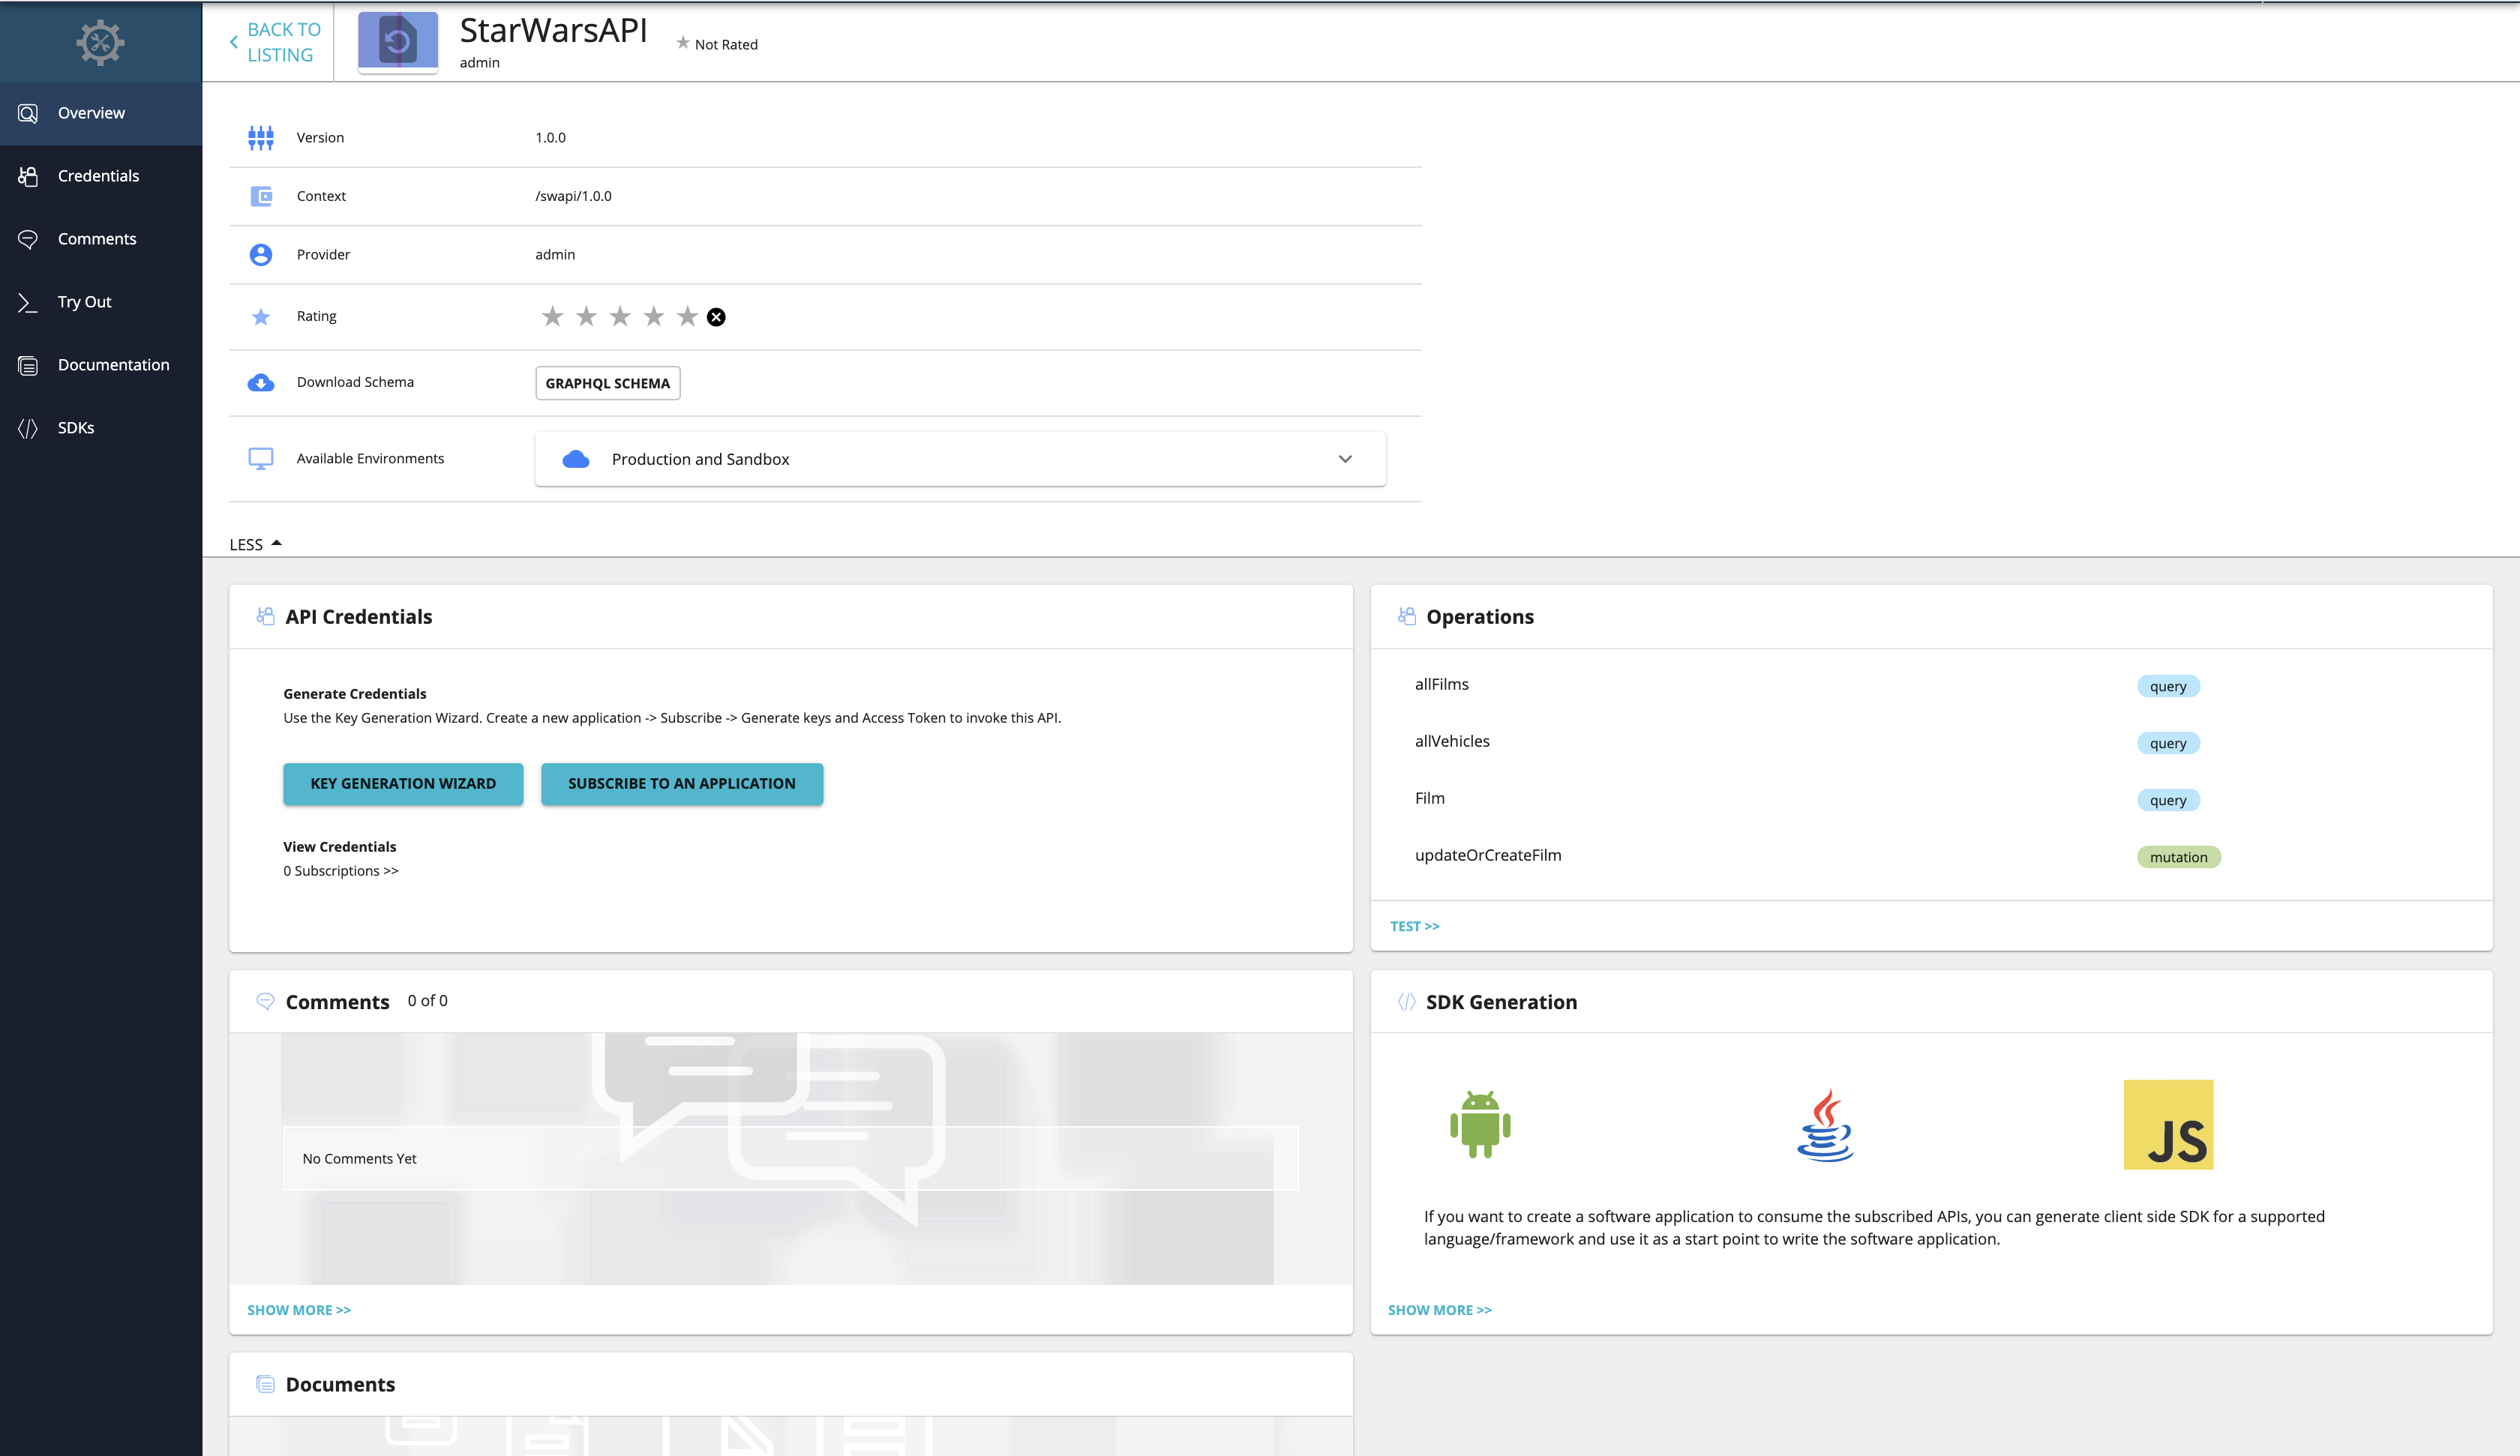
The API overview appears.
-
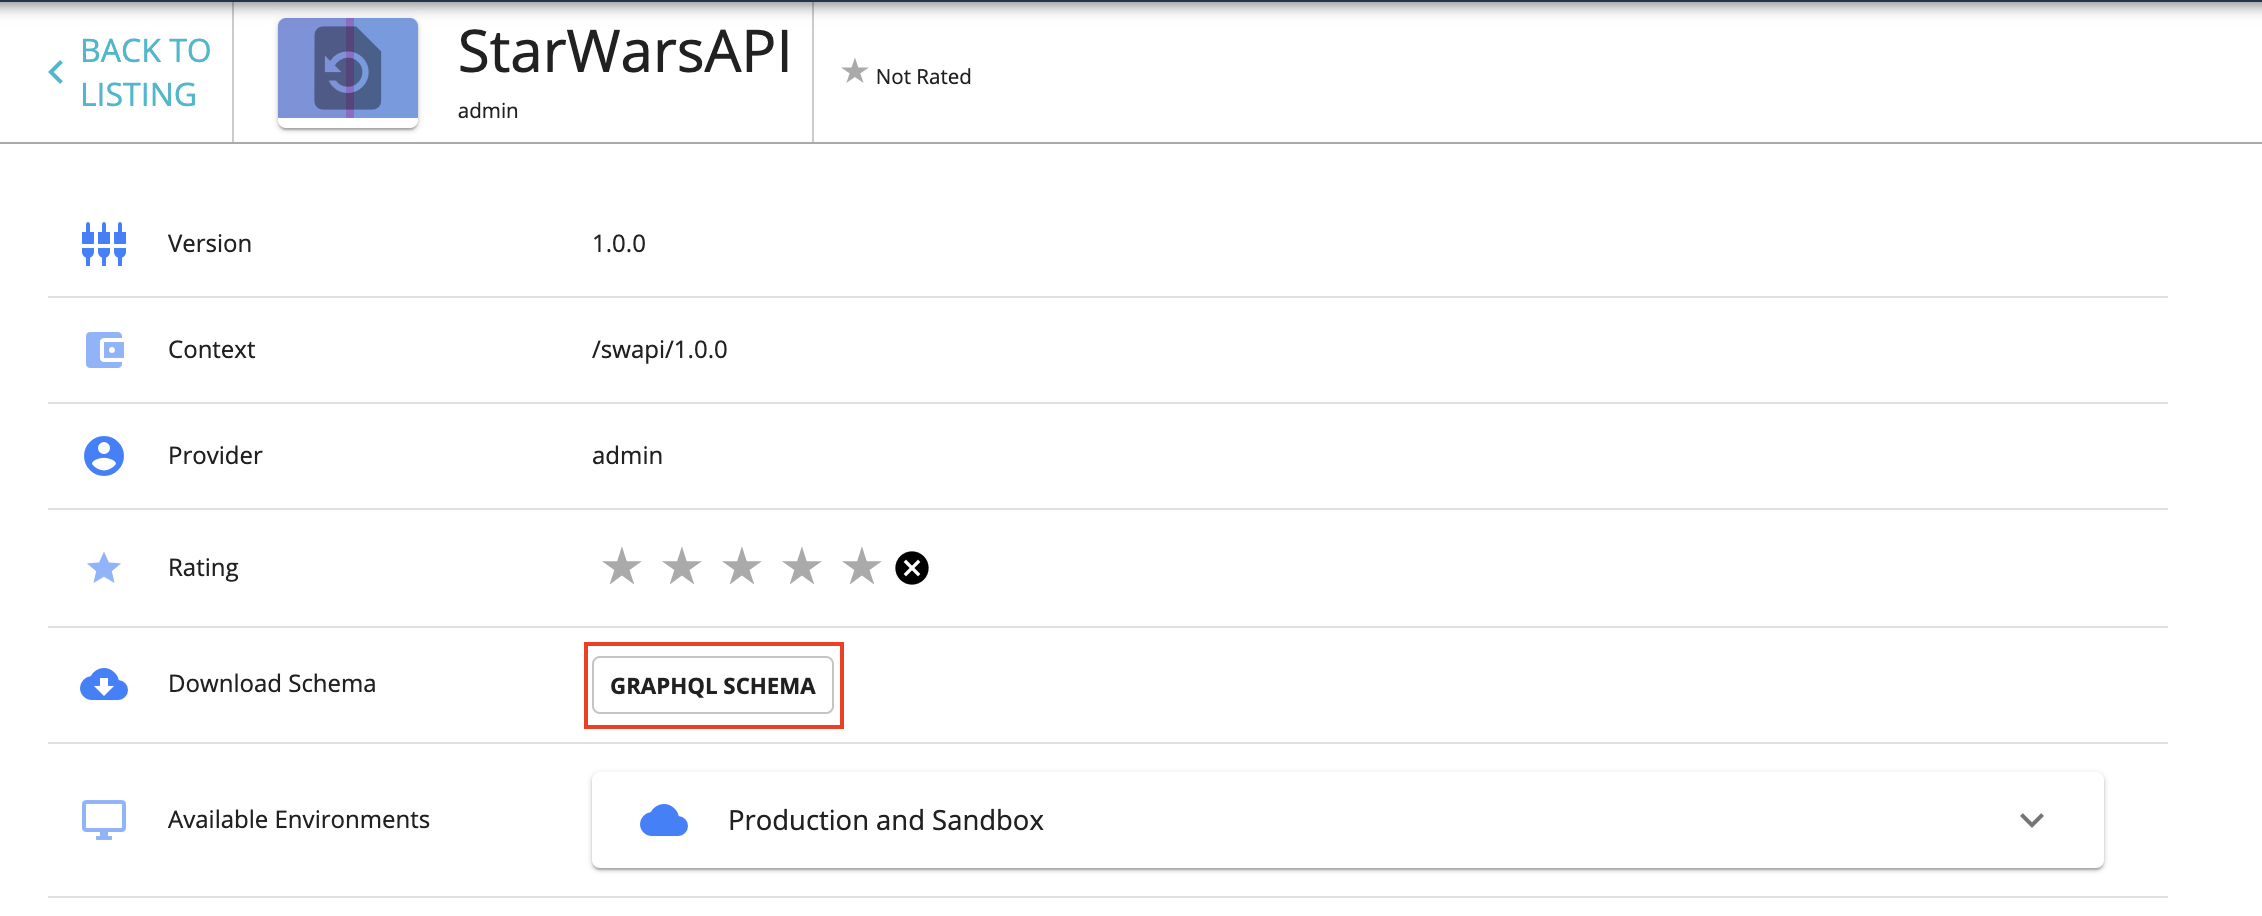
Optionally, download the API schema if required.
Note
You can download the API schema even without signing in to the Developer Portal
Click More on the API overview page and then click GRAPHQL SCHEMA to download the API schema.
-
Subscribe to the API.
-
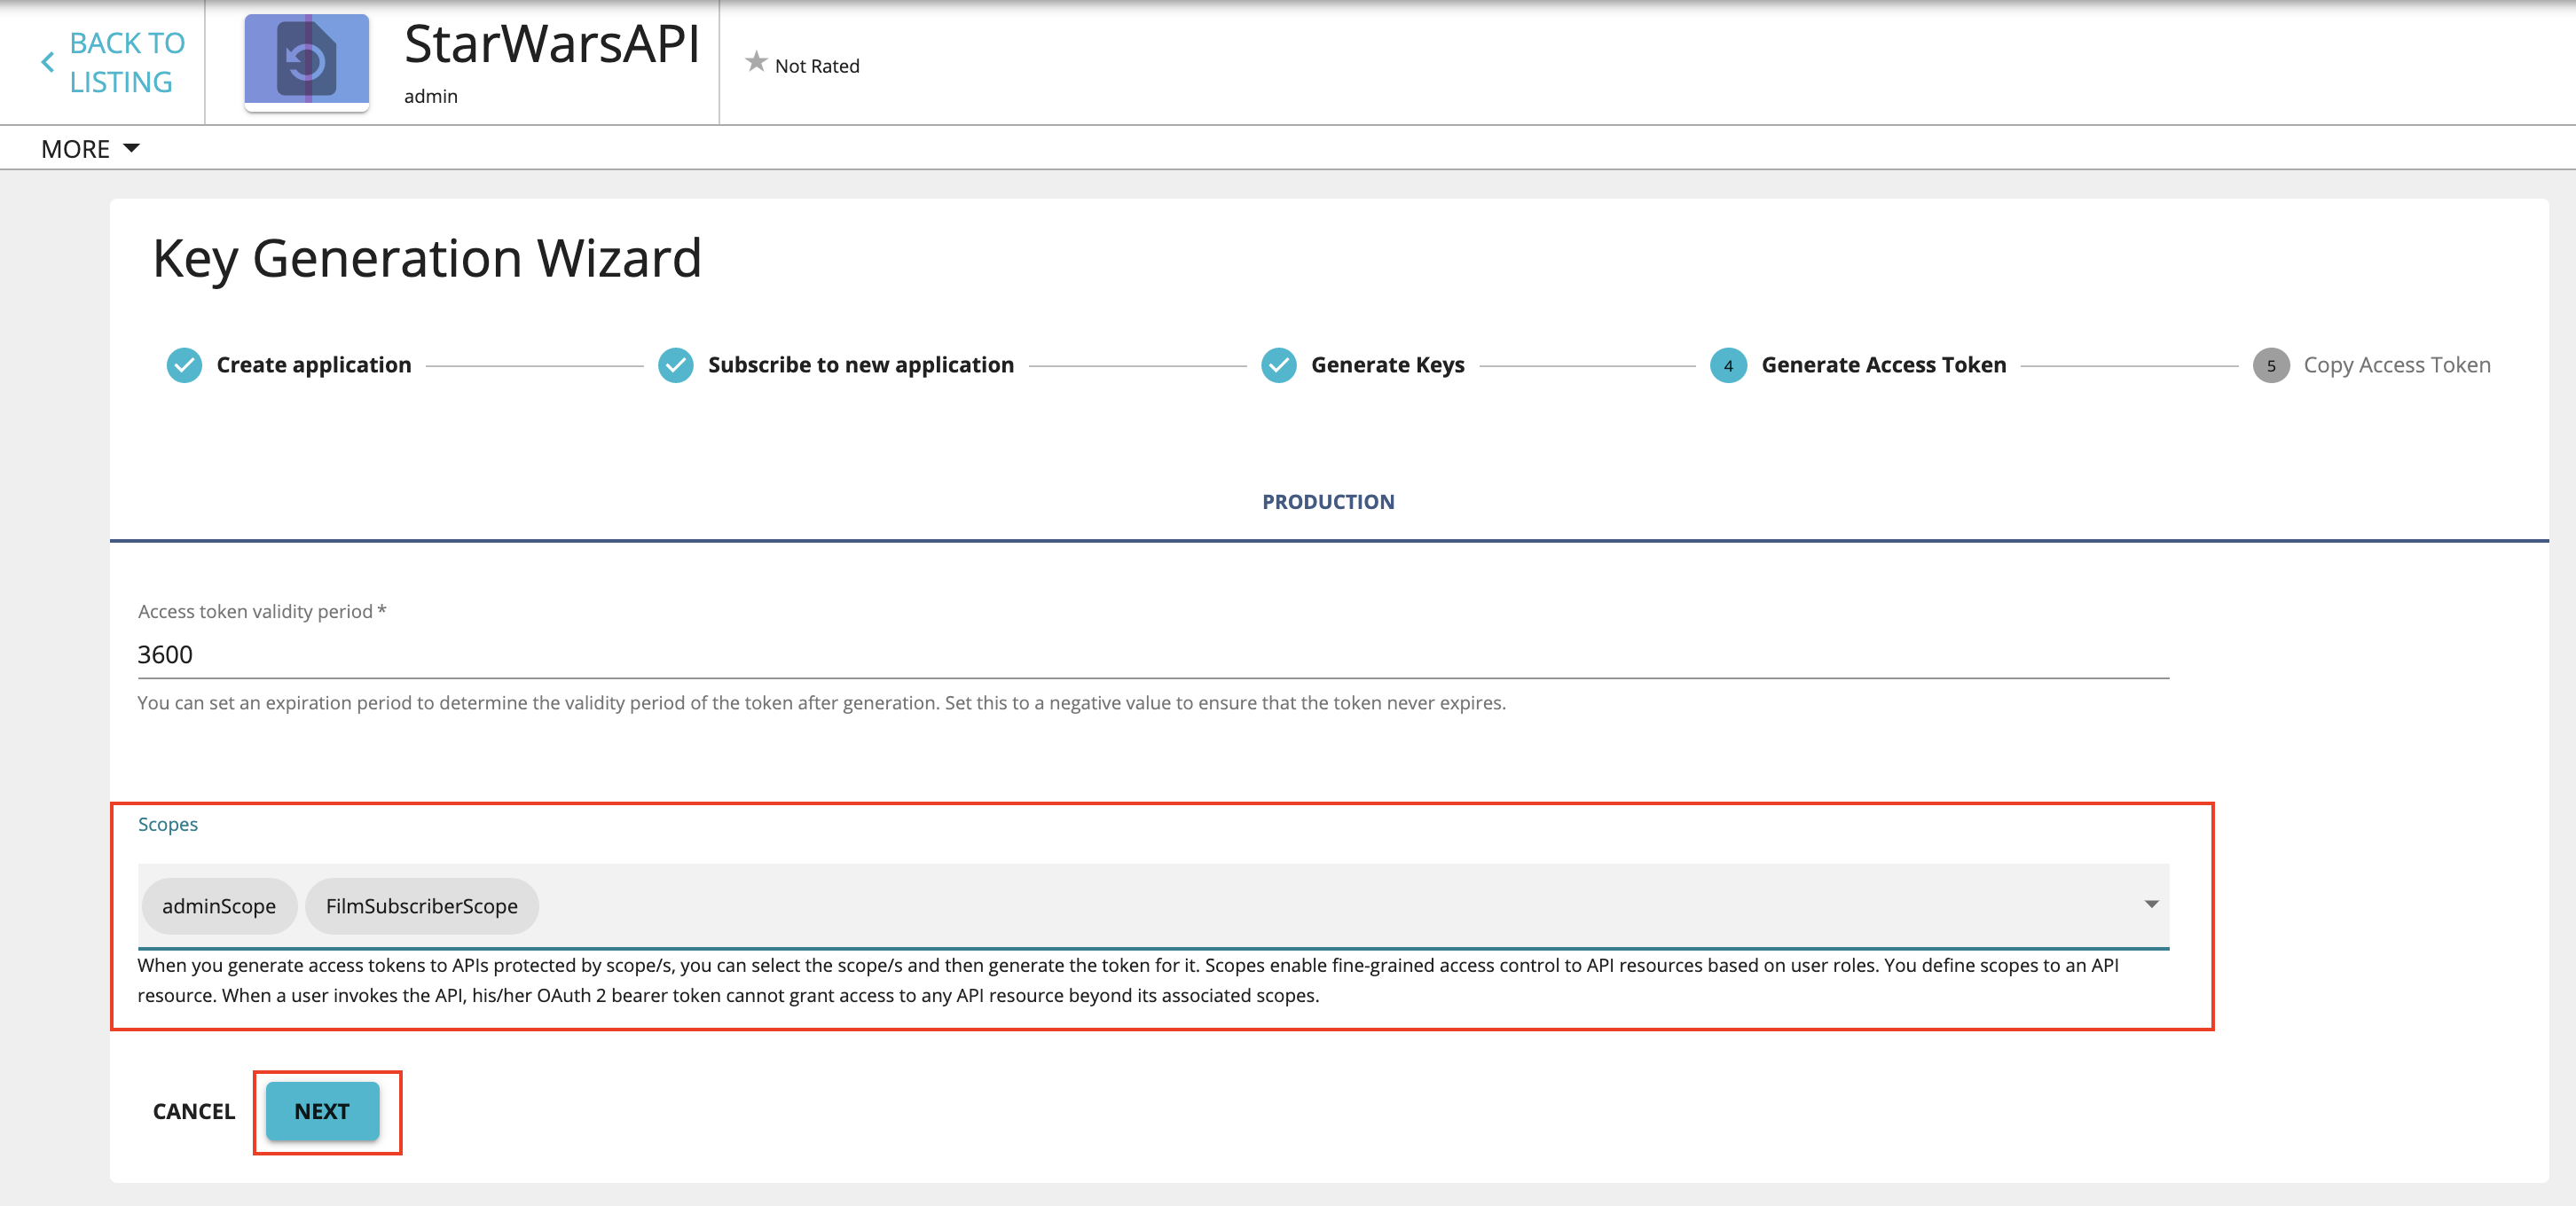
Click KEY GENERATION WIZARD.
This wizard takes you through the steps of creating a new application, subscribing, generating keys, and generating an access token to invoke the API. Add the two scopes (
allFilms,allPlanets) that you assigned to the operations.Note
You can use any application (e.g., JWT or OAuth) to subscribe to the API.
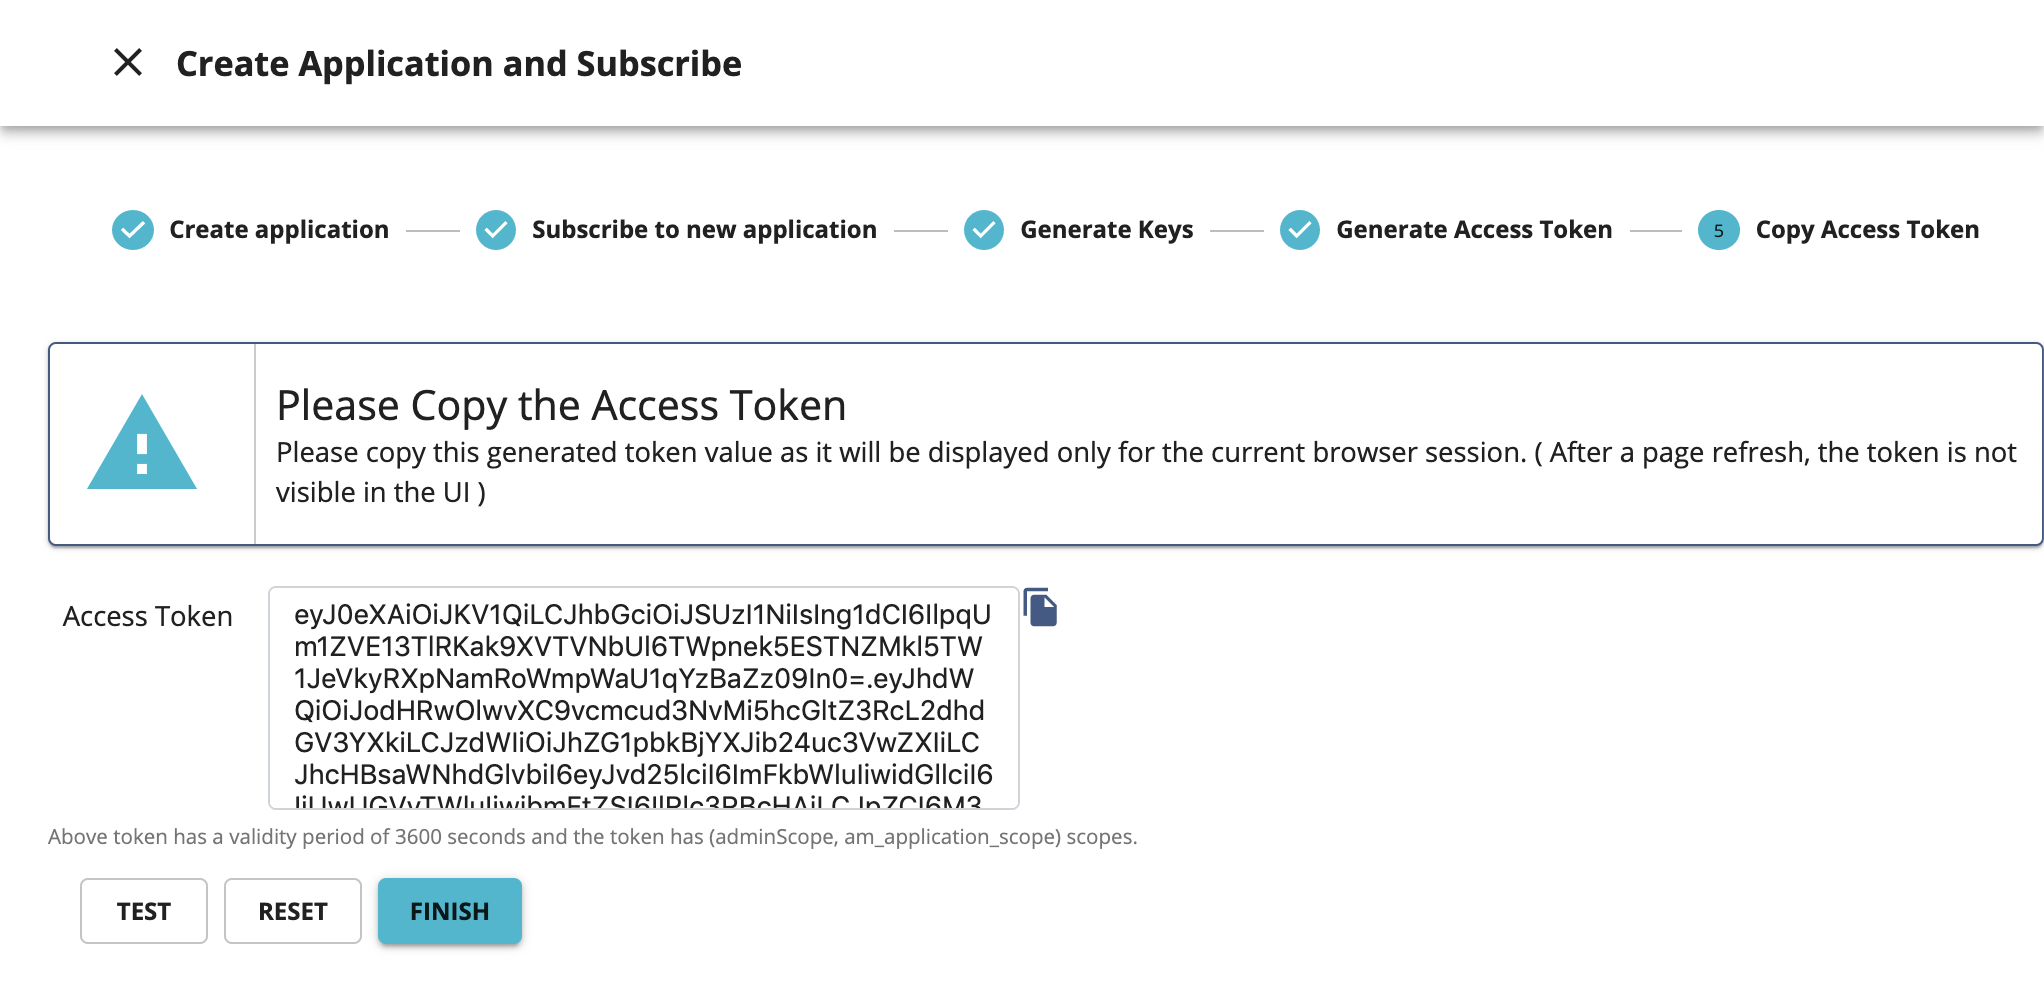
-
Copy the authorization token that appears.
-
-
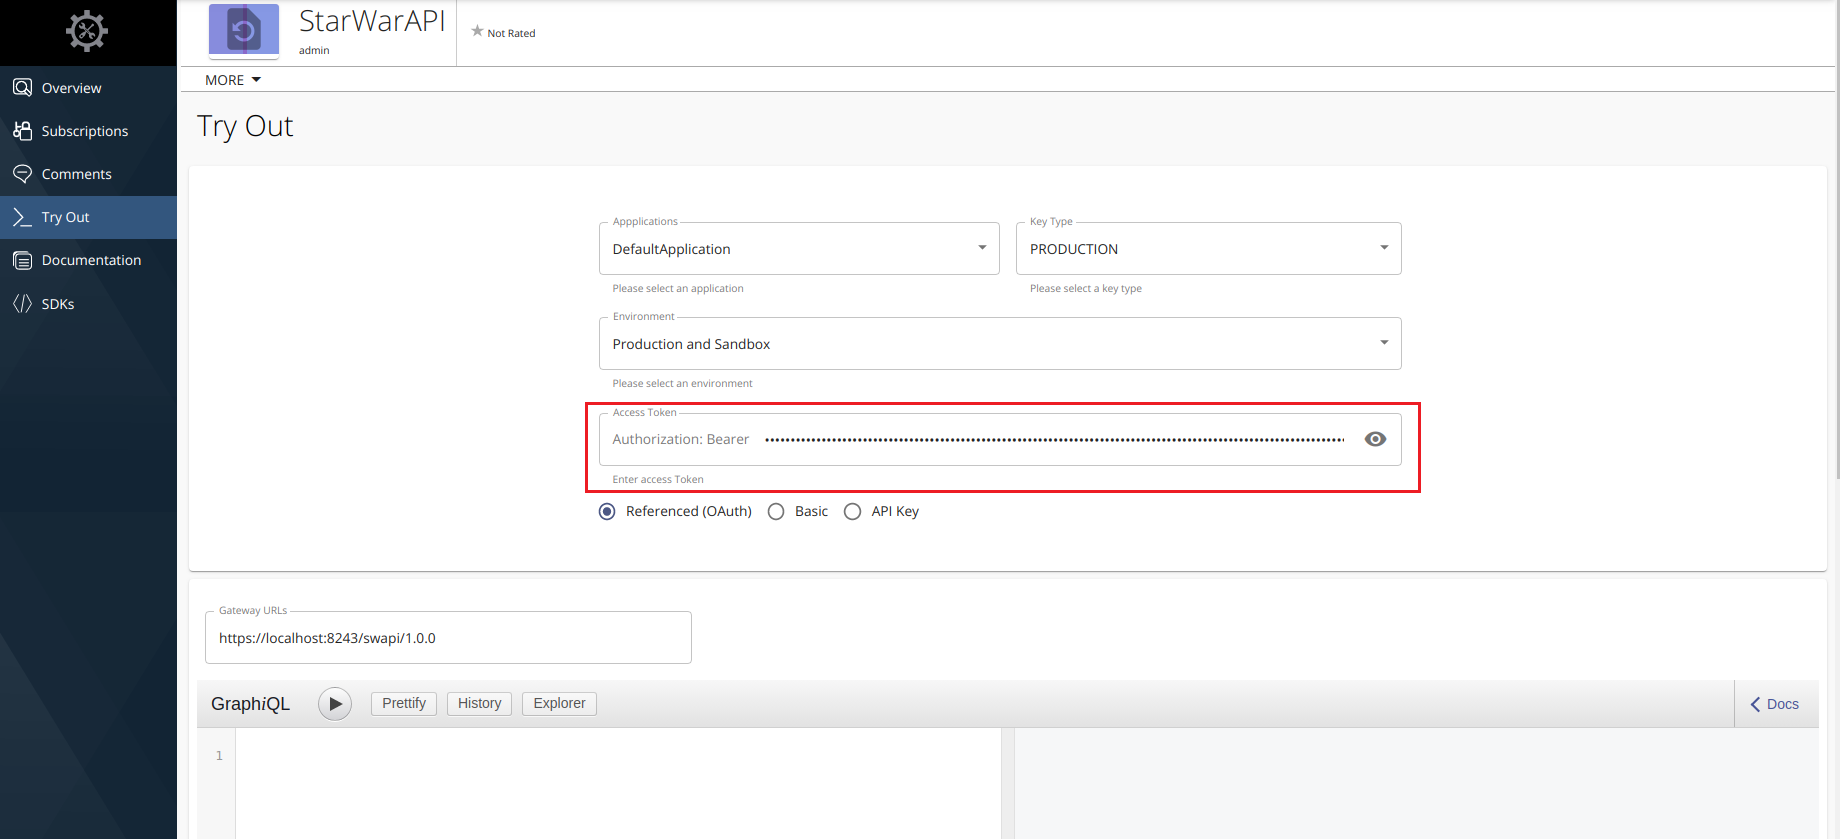
Try out the operations.
-
Click TEST to navigate to the developer console.
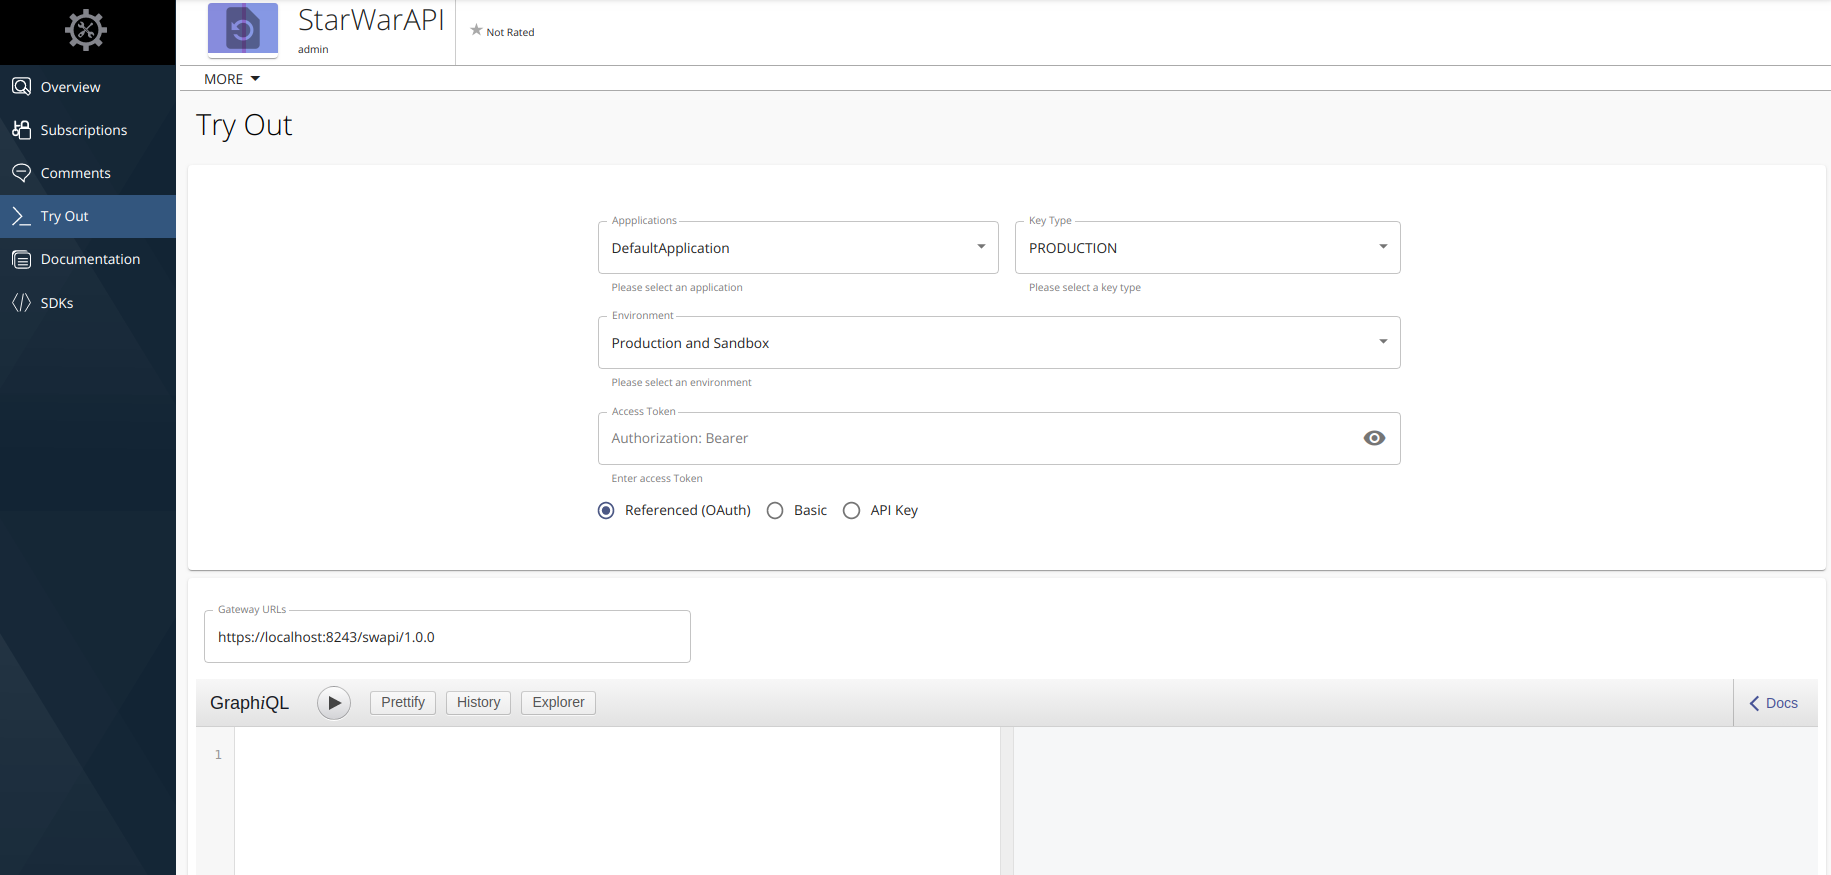
-
Paste the access token that you previously copied into the Access Token field.
-
Enter the following sample payload as the StarWarsAPI request. Then click on execute button as follows.
query{
   human(id:1000){
      id
      name
   }
   droid(id:2000){
      name
      friends{
      name
      appearsIn
      }
   }
}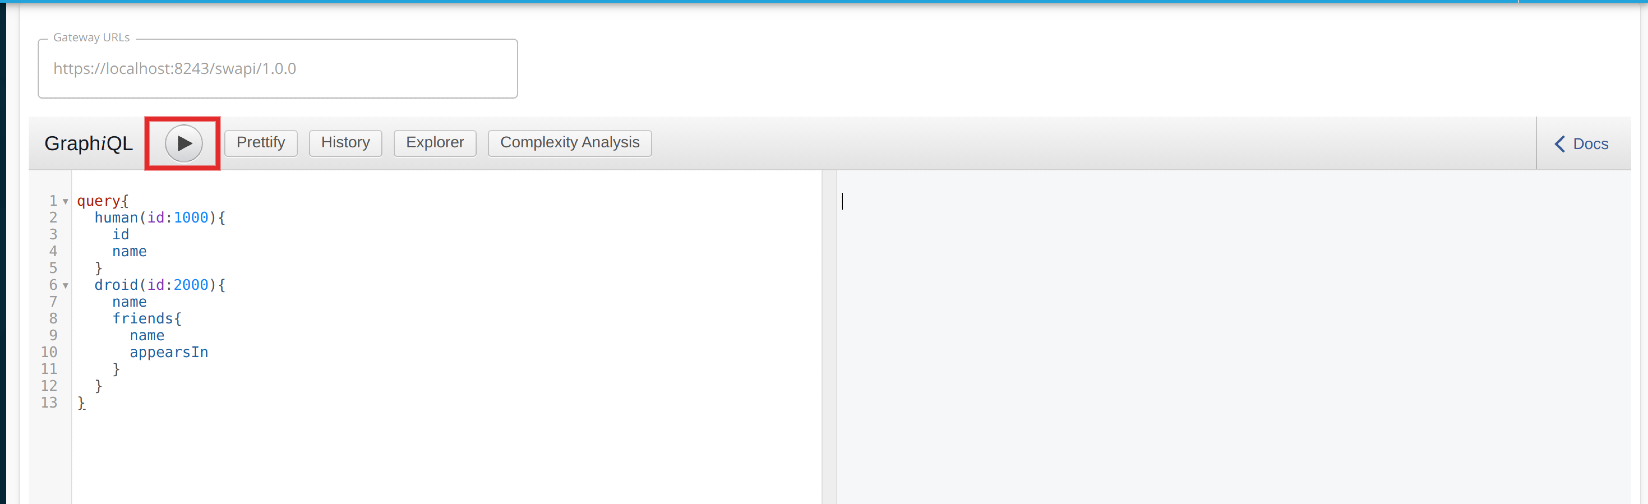
Note
If you are going to invoke QUERY Operation, payload should be started with 'query' keyword.
If you are going to invoke MUTATION Operation, payload should be started with 'mutation' keyword.
-
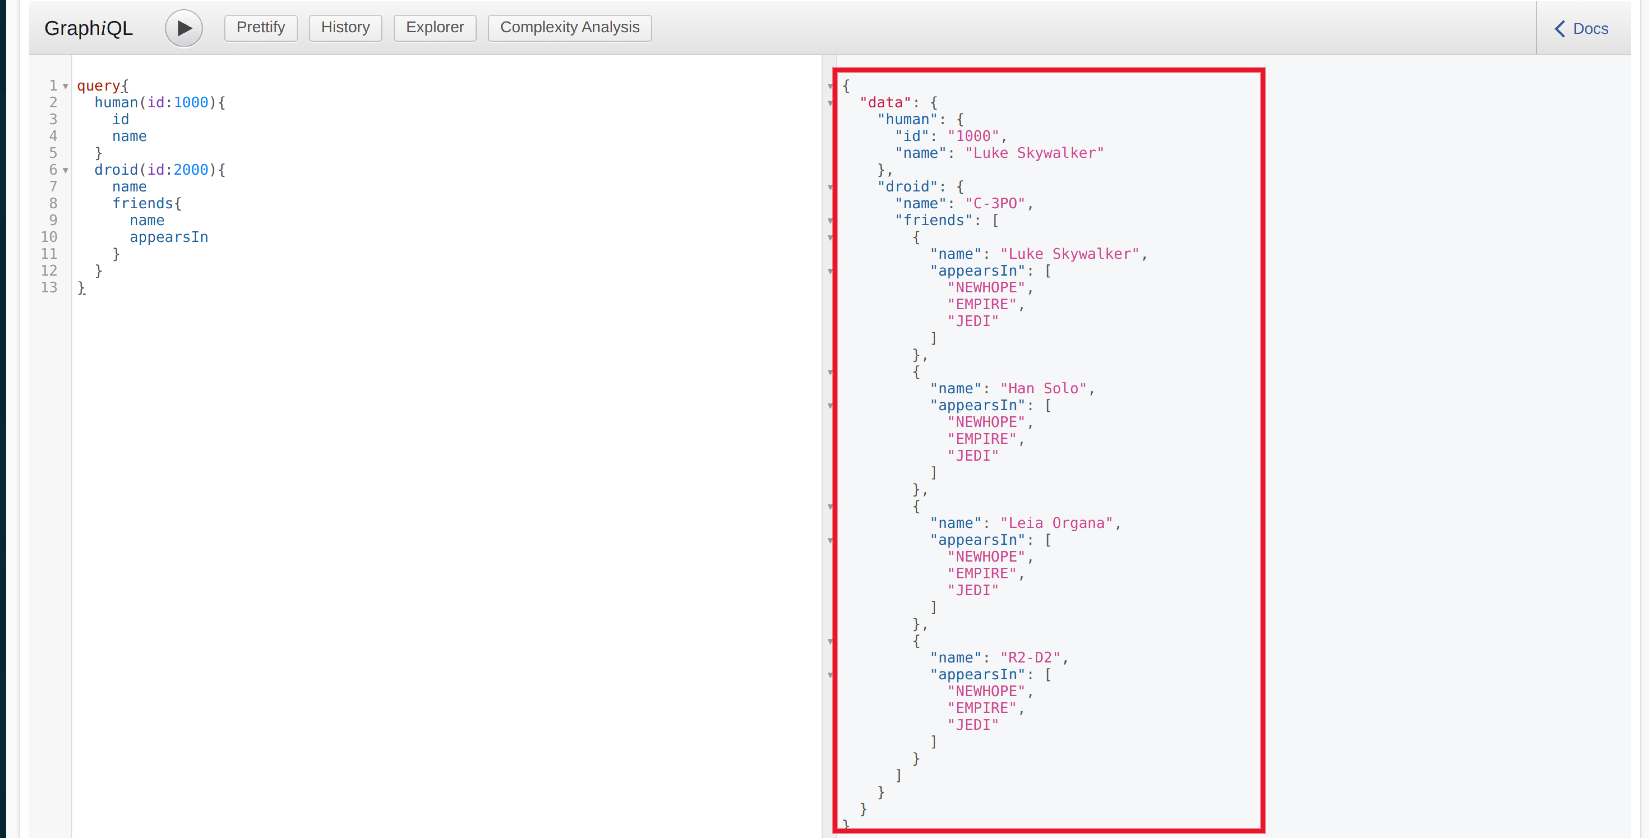
Click Execute.
-
You have successfully created and published your first GraphQL API, subscribed to it, obtained an access token for testing and tested your API with the access token.
Top