Creating and Uploading using WSO2 Integration Studio
You can design all custom mediation policies using a tool such as the WSO2 Integration Studio and then store the policy in the registry which can be later deployed to the Gateway.
Let's see how to create a custom mediation policy using the WSO2 Integration Studio and then deploy and use it in your APIs. This custom policy adds a full trace log which is getting printed when you invoke a particular API deployed in the Gateway.
- Navigate to the Integration Studio page - https://wso2.com/integration/integration-studio/
- Click Download button according to your preferred platform (i.e., Mac, Windows, Linux).
For example if you are using ubuntu 64 bit computer you need to download, WSO2-Integration-Studio-7.0.0-linux-gtk-x86_64.tar.gz. -
Extract the downloaded archive of the Integration Studio to the desired location and run the IntegrationStudio application to start the tool.
Tip
To learn more about using WSO2 Integration Studio, visit here.
-
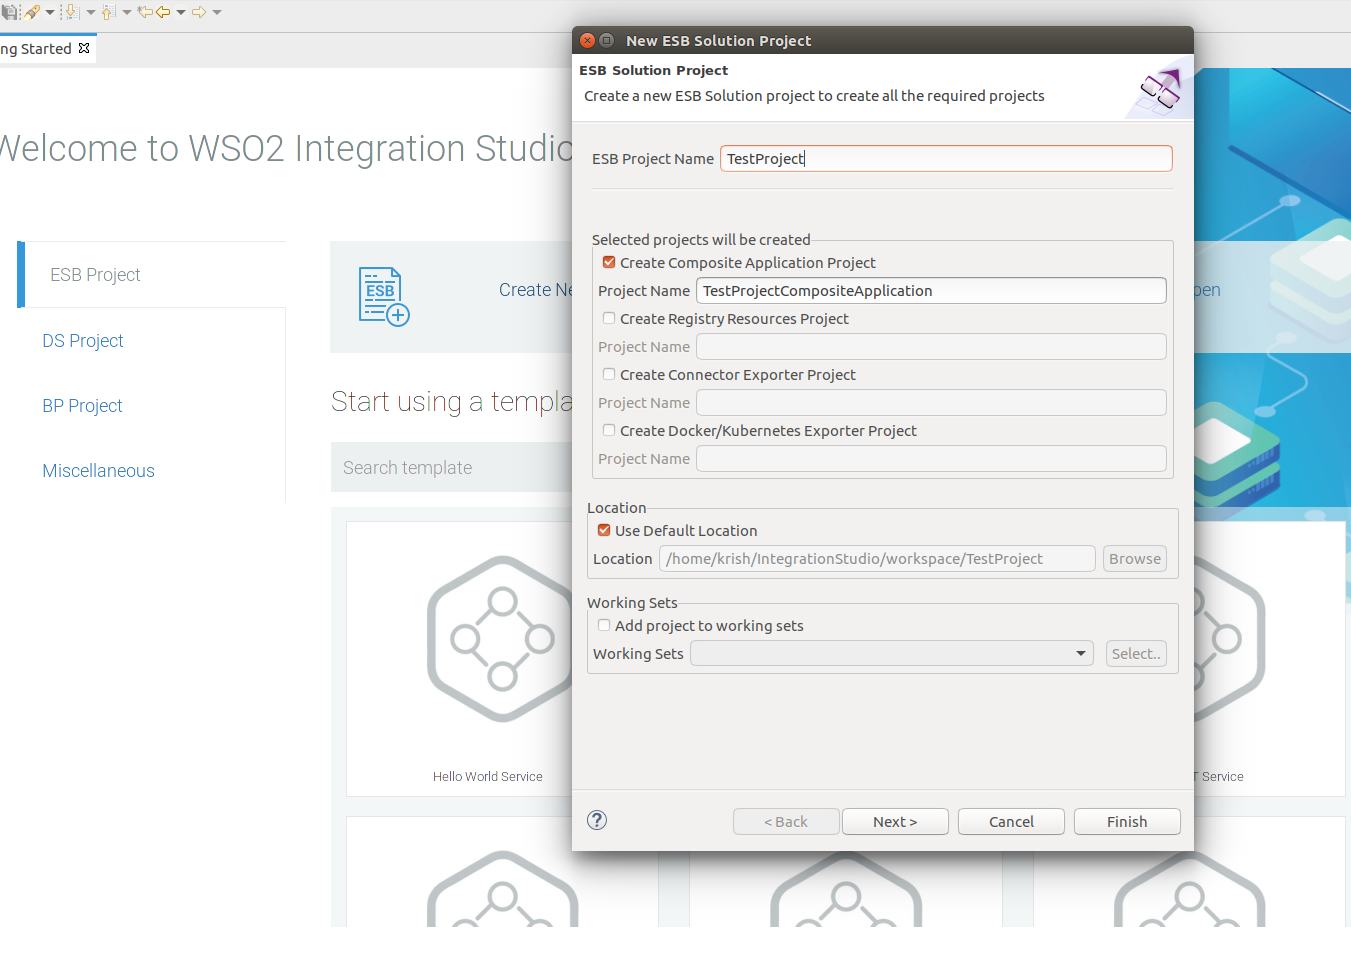
Click ESB Project -> Create New to create a new ESB Solution Project.
-
Provide Project Name as
TestProjectand click Finish. Then you will be redirected to the following page.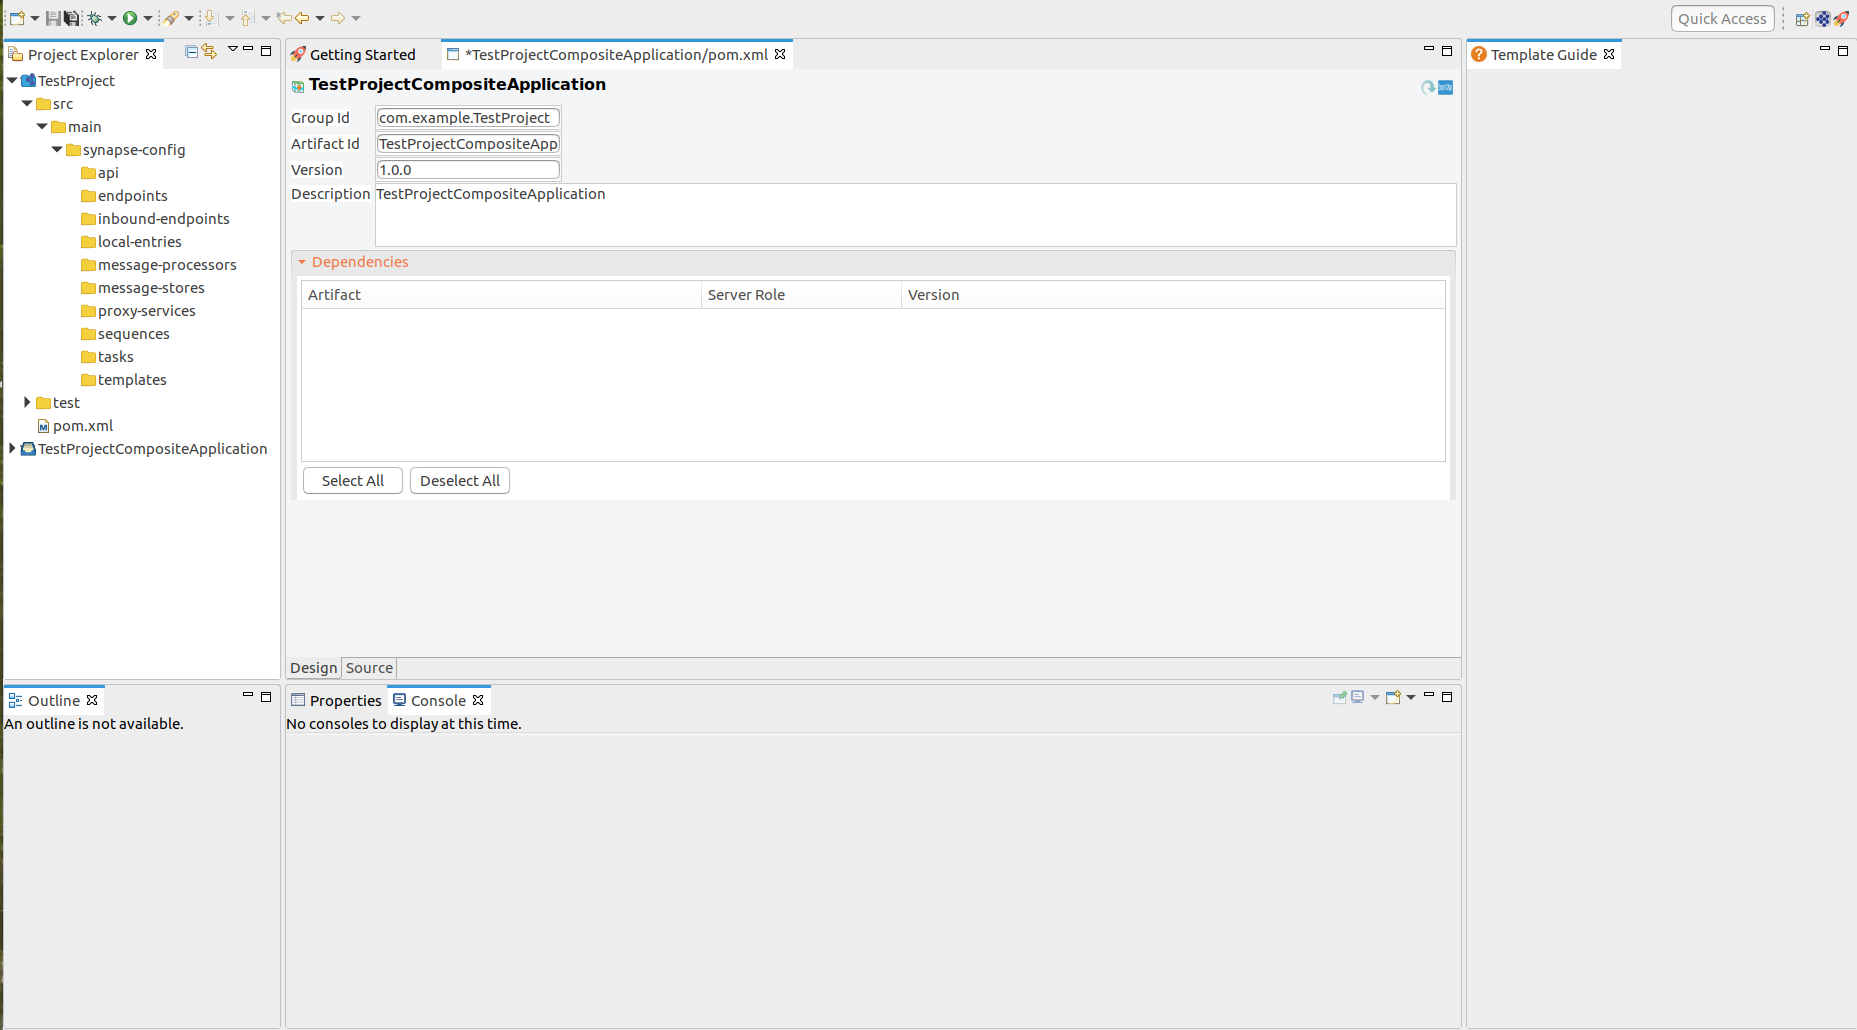
-
Navigate to the directory path TestProject -> src -> main -> synapse-config -> sequences in Project Explorer window.

-
Right-Click on sequences directory and go to New -> Sequence to create a new sequence.
If you want to import existing sequence proceed with Import Sequence option.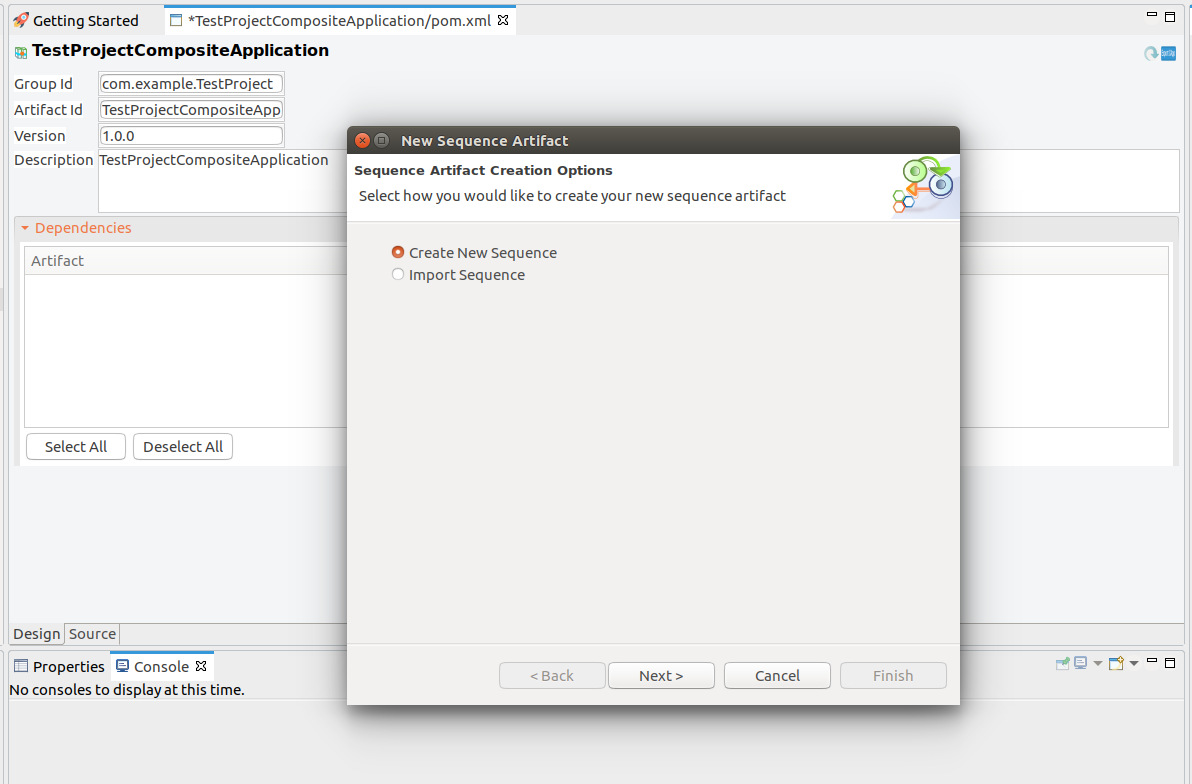
-
Create new sequence and provide sequence name
newSequenceand click Finish.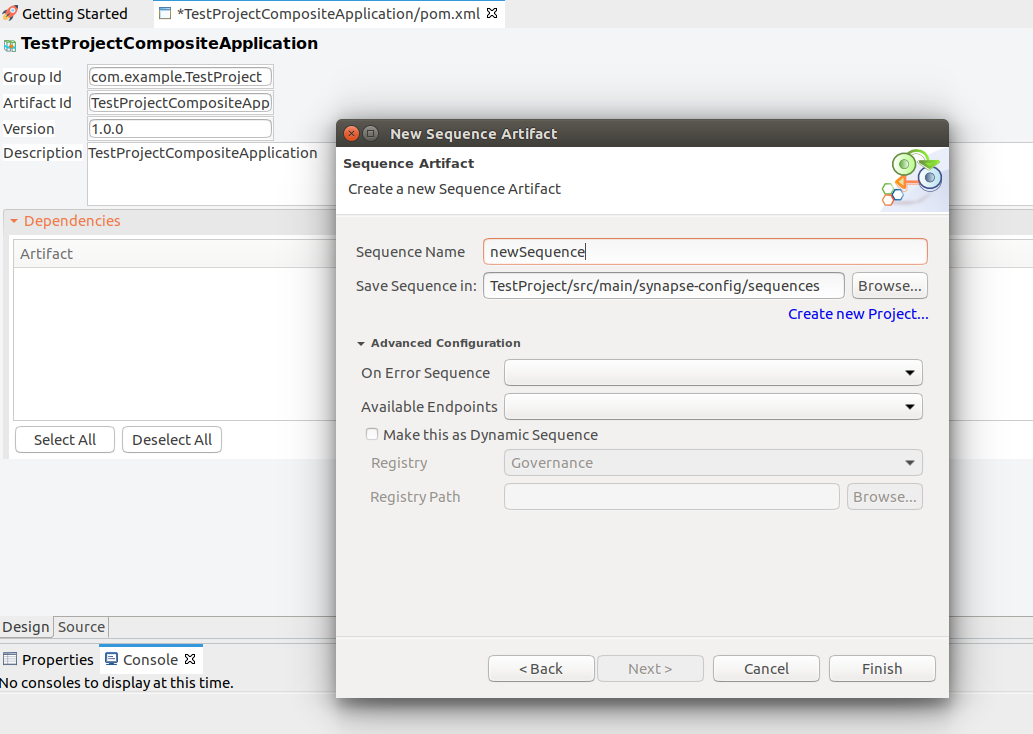
-
Your sequence now appears on the Integration Studio console.
Drag and drop a Log Mediator from under the Mediators section, to your sequence and give the following values to the Log Mediator and Save the filenewSequence.xml.Log Level: Full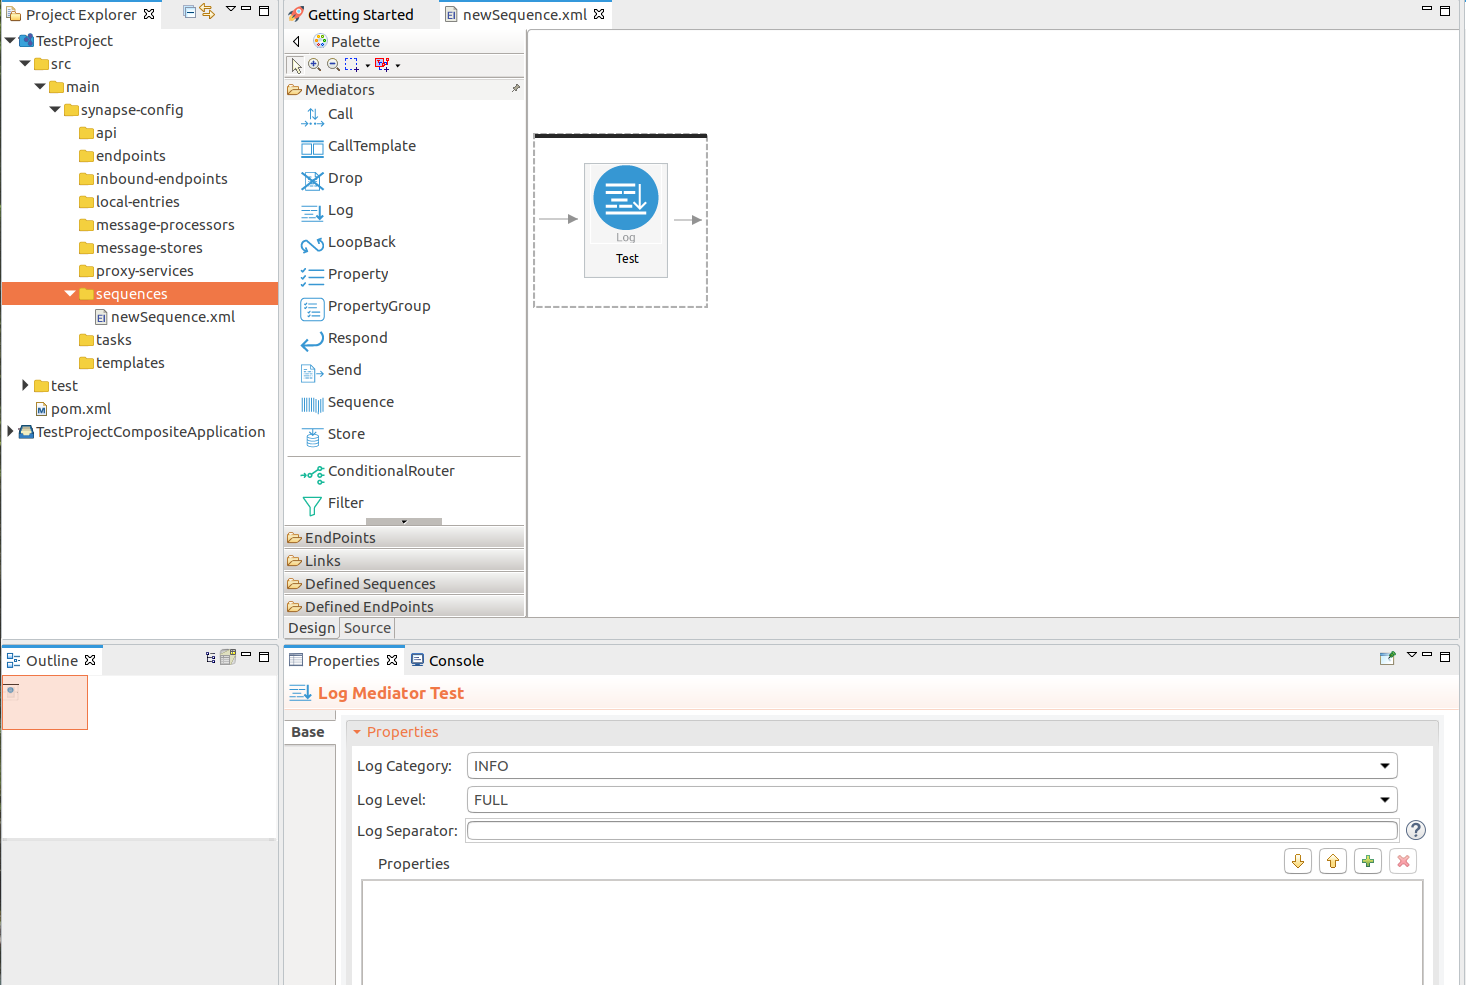
-
Right click the sequence file
newSequence.xml, and goto WSO2 registry -> Check in to WSO2 Registry. You will be prompted with the following dialog box.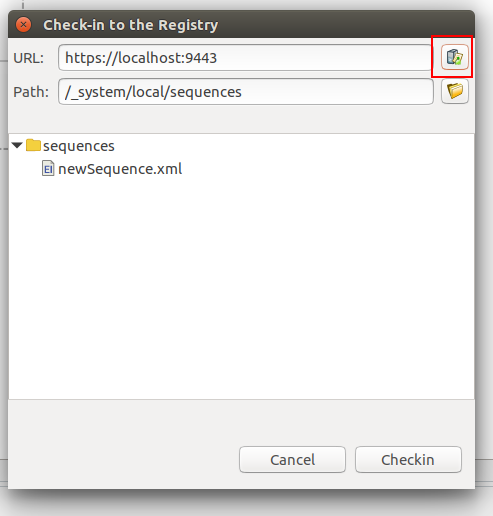
-
On the dialog box that appears, enter the URL of the
WSO2 Publisher Portaland click the Right top icon to open the Registry Tree Browser. -
From Registry Tree Browser, locate the path where the sequence is needed to be added
(IN/OUT/FAULT).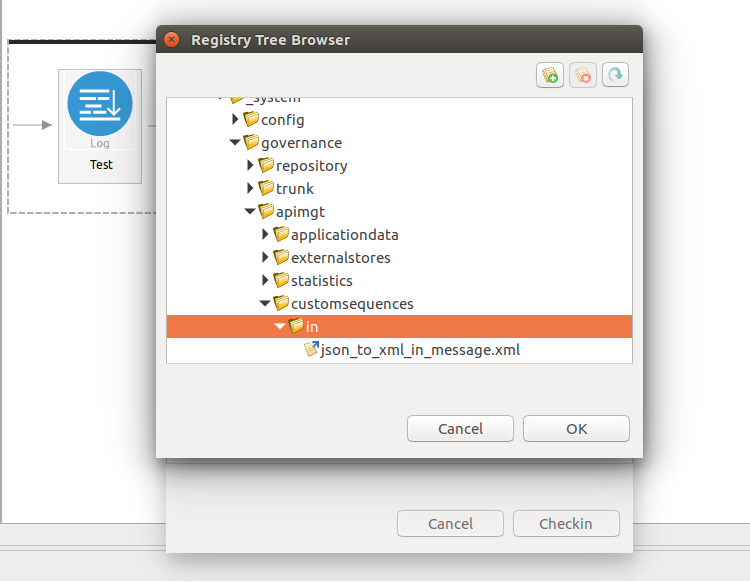
-
Then click OK and Checkin.
-
After that you can check Registry Browser in WSO2 Management Console to verify whether the sequence is successfully added.

-
Log in to the API Publisher Portal.
-
Click CREATE API and then design a new REST API to create an API by following the steps in Create a REST API.
-
Go to the created API and from the Left Menu, go to Runtime Configurations.
-
Click
 button in the Message Mediation section under Request sub-menu.
 -
In the Select a Mediation Policy popup, select Common Policies and select the newly added
newSequencefrom the sequence list. Then, click Select.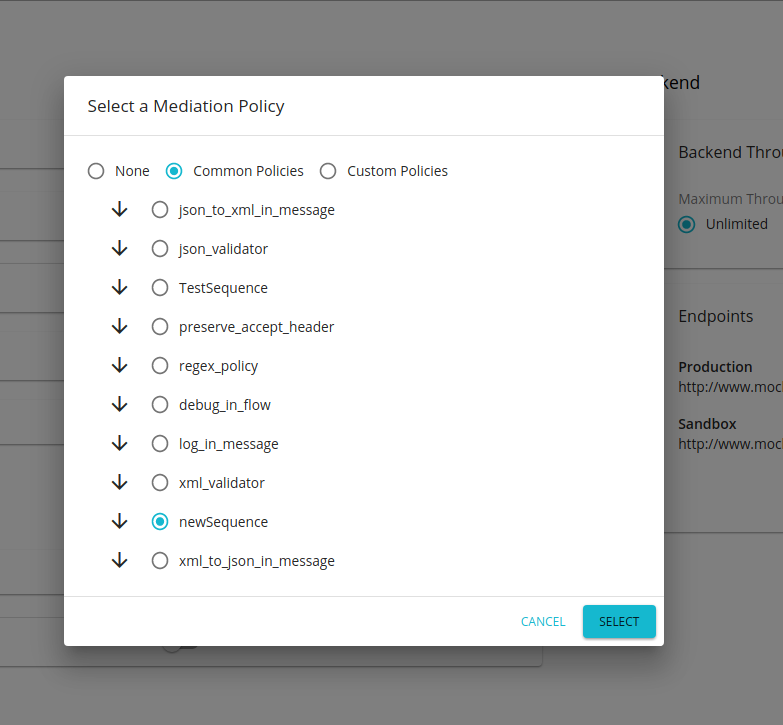
-
If the API is not in
PUBLISHEDstate, go to Lifecycle tab, clickREDPLOYto re-publish the API. -
When you invoke the API using a valid subscription, you can see the following trace log in the server logs.
[2019-12-19 15:27:30,770] INFO - LogMediator To: /test/1.0, MessageID: urn:uuid:042a64ab-590a-4128-bd99-ef6974893610, Direction: request, Envelope: <?xml version='1.0' encoding='utf-8'?><soapenv:Envelope xmlns:soapenv="http://www.w3.org/2003/05/soap-envelope"><soapenv:Body/></soapenv:Envelope