Configuring Identity Server as IDP for SSO
Info
The Single Sign-On with OpenID Connect feature is enabled by default in WSO2 API Manager.
The Single Sign-On with SAML 2.0 feature in the API Manager is implemented according to the SAML 2.0 browser-based SSO support that is facilitated by WSO2 Identity Server (WSO2 IS). This feature is available in any WSO2 IS version from 4.1.0 onwards. WSO2 IS 5.10.0 is used in this guide. WSO2 Identity Server acts as an identity service provider of systems enabled with single sign-on, while the Web applications act as SSO service providers. Using this feature, you can configure SSO with SAML 2.0 across the API Publisher and Developer Portal. After configuring, you can access the Developer Portal or API Publisher in a single authentication attempt.
Tip
In this documentation, MySQL is used as the database to configure WSO2 API Manager with WSO2 Identity Server. For instructions on replacing the default H2 database with MySQL, see Setting up MySQL.
Step 1 - Share the user store
-
Configure your user store(s) (if you have not done so already).
Follow the instructions in Configuring User Stores.
-
Point both WSO2 IS and WSO2 API Manager to your user stores(s).
This is required to make sure that a user who tries to sign in to the Developer Portal or the Publisher is authorized. When users try to sign in to either of the applications, they are redirected to the configured identity provider (WSO2 IS in this case) where they need to provide their login credentials to be authenticated.
In addition to this, the user should also be authorized by the system to enable Role-based Permissions.
Therefore, for the purpose of authorization, WSO2 IS and WSO2 API Manager needs to have a shared user store and user management database (by default, this is the H2 database in the
<API-M_HOME>/repository/conf/user-mgt.xmlfile) where the user's role and permissions are stored.Follow the instructions below to point both WSO2 IS and WSO2 API Manager to your user stores(s):
For example, let's share a JDBC user store (MySQL) with both the WSO2 Identity Server and WSO2 API Manager as explained below.
-
Download WSO2 API Manager 3.1.0 from here and unzip it.
<API-M_HOME>refers to the root folder where WSO2 API-M was unzipped.Tip
To use WSO2 IS as the Key Manager, download the WSO2 Identity Server 5.10.0 as a Key Manager pack, with pre-packaged Key Manager features as follows:
- Access the previous WSO2 API Manager related releases.
- Select version 3.1.0.
- Click on the Identity Server as a Key Manager download option.
-
Download WSO2 Identity Server (WSO2 IS) 5.10.0 from here and unzip it.
<IS_HOME>refers to the root folder where WSO2 IS was unzipped. -
Create a MySQL database (e.g., 410_um_db) and run the
<API-M_HOME>/dbscripts/mysql.sqlscript on it to create the required tables. -
Navigate to the
<API-M_HOME>/repository/conf/deployment.tomlfile and add database configurations.For example, you can share a single user store as follows. (If you are sharing multiple datasources, you need to define a datasource for each of the user stores that you are working with, so that they can be shared.)
Example
[database.shared_db]
type = "mysql"
url = "jdbc:mysql://localhost:3306/410_um_db"
username = "wso2carbon"
password = "wso2carbon"
Note
Change the database URL to the URL of the shared database (MySQL database) you have created above. Modify the username and password parameters in the above configuration with your database credentials.
-
Add the latter datasource configuration that appears above in the
<IS_HOME>/repository/conf/deployment.tomlfile. -
Disable the default LDAP and enable the JDBC user store instead.
WSO2 Identity Server has an embedded LDAP user store by default.
-
As the LDAP user store is enabled by default, add the following in the
<IS_HOME>/repository/conf/deployment.tomlfile to change this to the database user store.[user_store] type = "database" -
Disable the default LDAP and enable the JDBC user store.
For instructions, see Internal JDBC User Store Configuration.
Note
In WSO2 API Manager, the JDBC User Store is enabled by default. (i.e., The following configuration exists in the
<API-M_HOME>/repository/conf/deployment.tomlby default.) By changing the default user store of the WSO2 Identity server to JDBC User Store, you are pointing both WSO2 API Manager and WSO2 Identity Server to the same user store to share their user stores. -
-
Copy the database driver JAR file to the
<IS_HOME>/repository/components/liband<API-M_HOME>/repository/components/libdirectories.
-
Step 2 - Configure WSO2 API Manager as the Service Provider for WSO2 Identity Server
-
Start WSO2 Identity Server.
./wso2server.sh -DportOffset=1Tip
You also can change the port offset value in the
<IS_HOME>/repository/conf/carbon.xmlfile by adding the following to the<IS_HOME>/repository/conf/deployment.tomlfile.[server] offset = "1"What is port offset?
The port offset feature allows you to run multiple WSO2 products, multiple instances of a WSO2 product, or multiple WSO2 product clusters on the same server or virtual machine (VM). The port offset defines the number by which all ports defined in the runtime, such as the HTTP/S ports, will be offset. For example, if the HTTPS port is defined as 9443 and the port offset is 1, the effective HTTPS port will be 9444.
-
Sign in to the WSO2 IS Management Console.
https://<hostname>:9443/carbonhttps://localhost:9443/carbonTip
If you are using sign-in pages that are hosted externally to sign in to the Identity Server, define the absolute URLs of those login pages in the
authenticators.xmlandapplication-authenticators.xmlfiles in the<IS_HOME>/repository/conf/identitydirectory. -
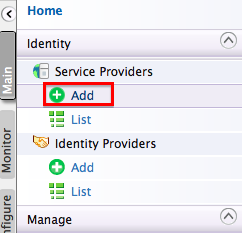
Click Main, Identity, and then click Add under the Service Providers menu.
-
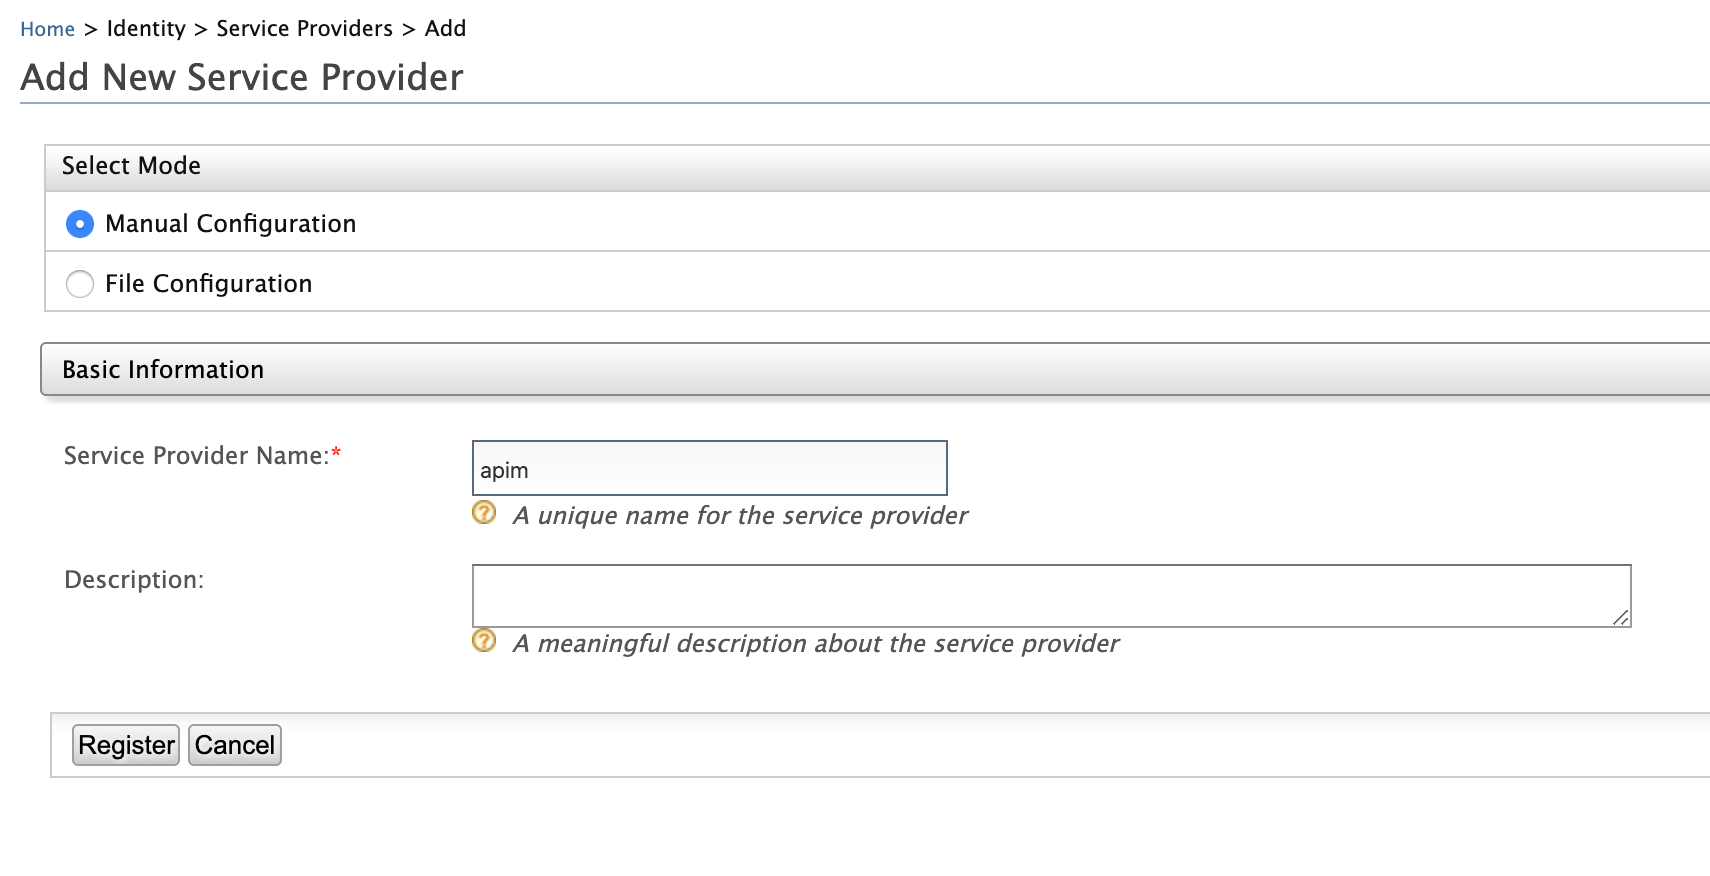
Enter a Service Provider name and click Register.
The detailed configuration page appears.
Multi-tenanted environment
Carry out the instructions given below for all the tenants to be able to sign in to the API-M Web applications in a multi-tenanted environment.
- Click the SaaS Application option that appears after registering the service provider.
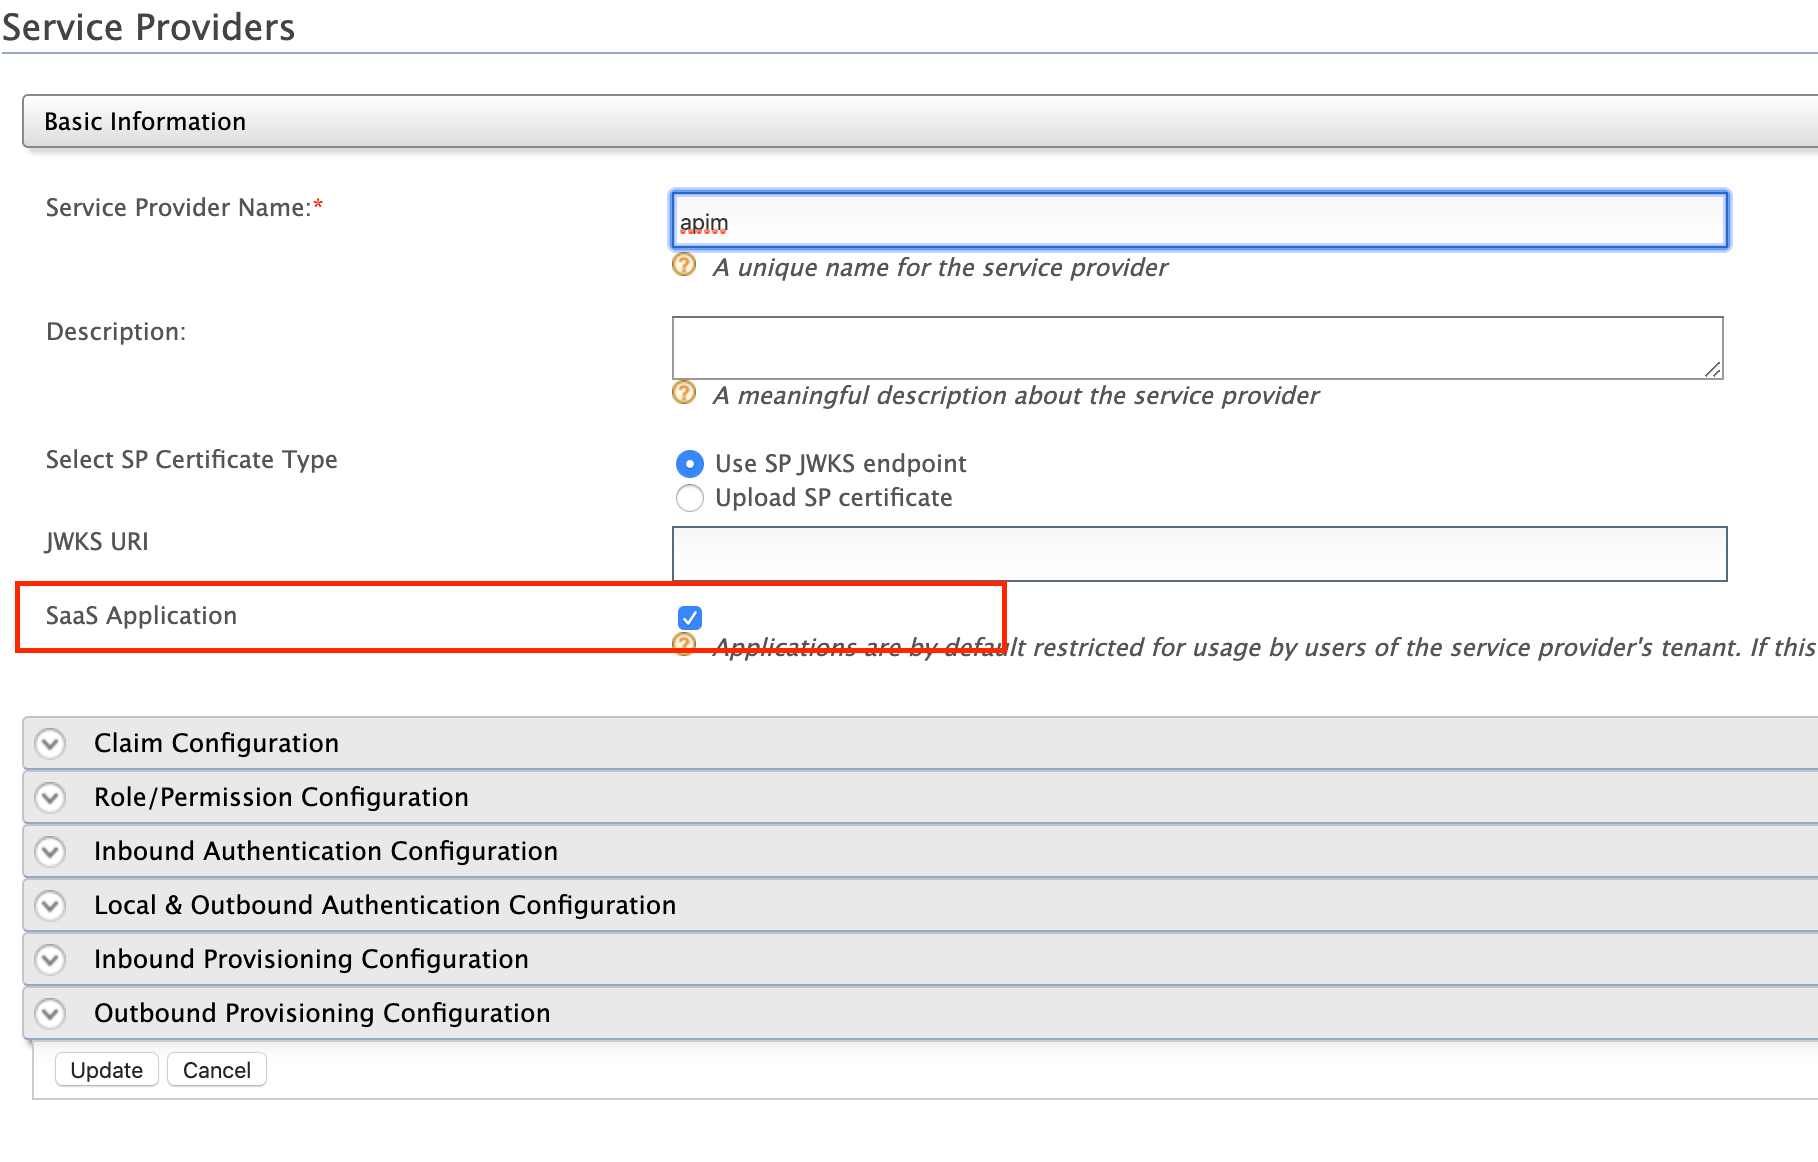
If you do not select the SaaS Application option, only users in the current tenant domain (the tenant domain that you are defining the service provider in) will be allowed to sign in to the Web application and you will need to register new service providers for all the Web applications (Developer Portal and API Publisher in this case) from each tenant space separately.
For example, let's say that you have three tenants as TA, TB and TC, and you register the service provider in TA only. If you tick the SaaS Application option, all users in TA, TB, TC tenant domains will be able to sign in. Else, only users in TA will be able to sign in. As the servers in a multi-tenanted environment interact with all tenants, all nodes should share the same user store. Therefore, make sure you have a shared registry (JDBC mount, WSO2 Governance Registry, etc.) instance across all nodes.
- Click the SaaS Application option that appears after registering the service provider.
-
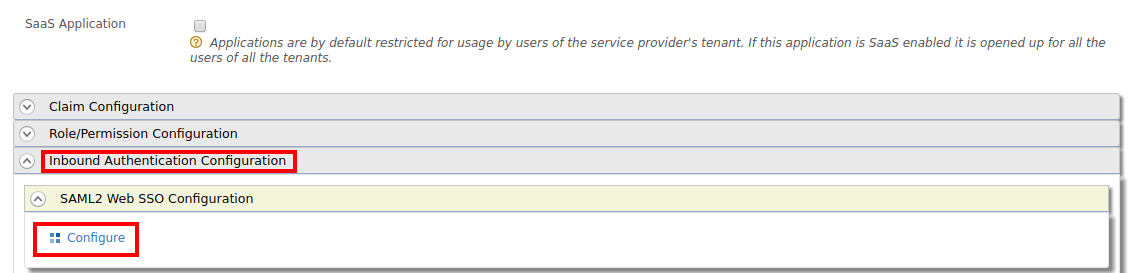
Expand the Inbound Authentication Configuration section, then expand the SAML2 Web SSO Configuration section, and click Configure.
Enable a tenant-specific SSO for the Publisher and Developer Portal
To enable a tenant-specific SSO with IS 5.10.0 for
Publisherand theDeveloper Portal, enable the Use tenant domain in local subject identifier option under the Local & Outbound Authentication Configuration section.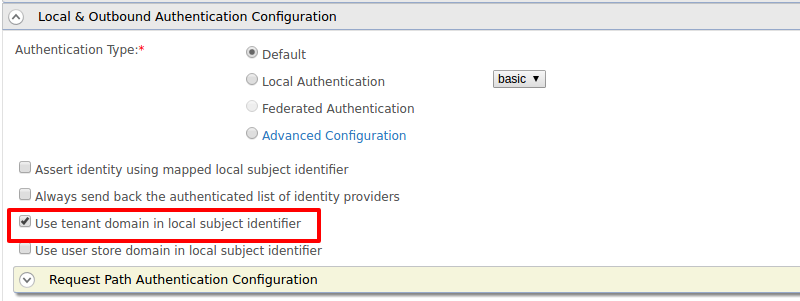
-
Register the API Publisher as the SSO service provider.
-
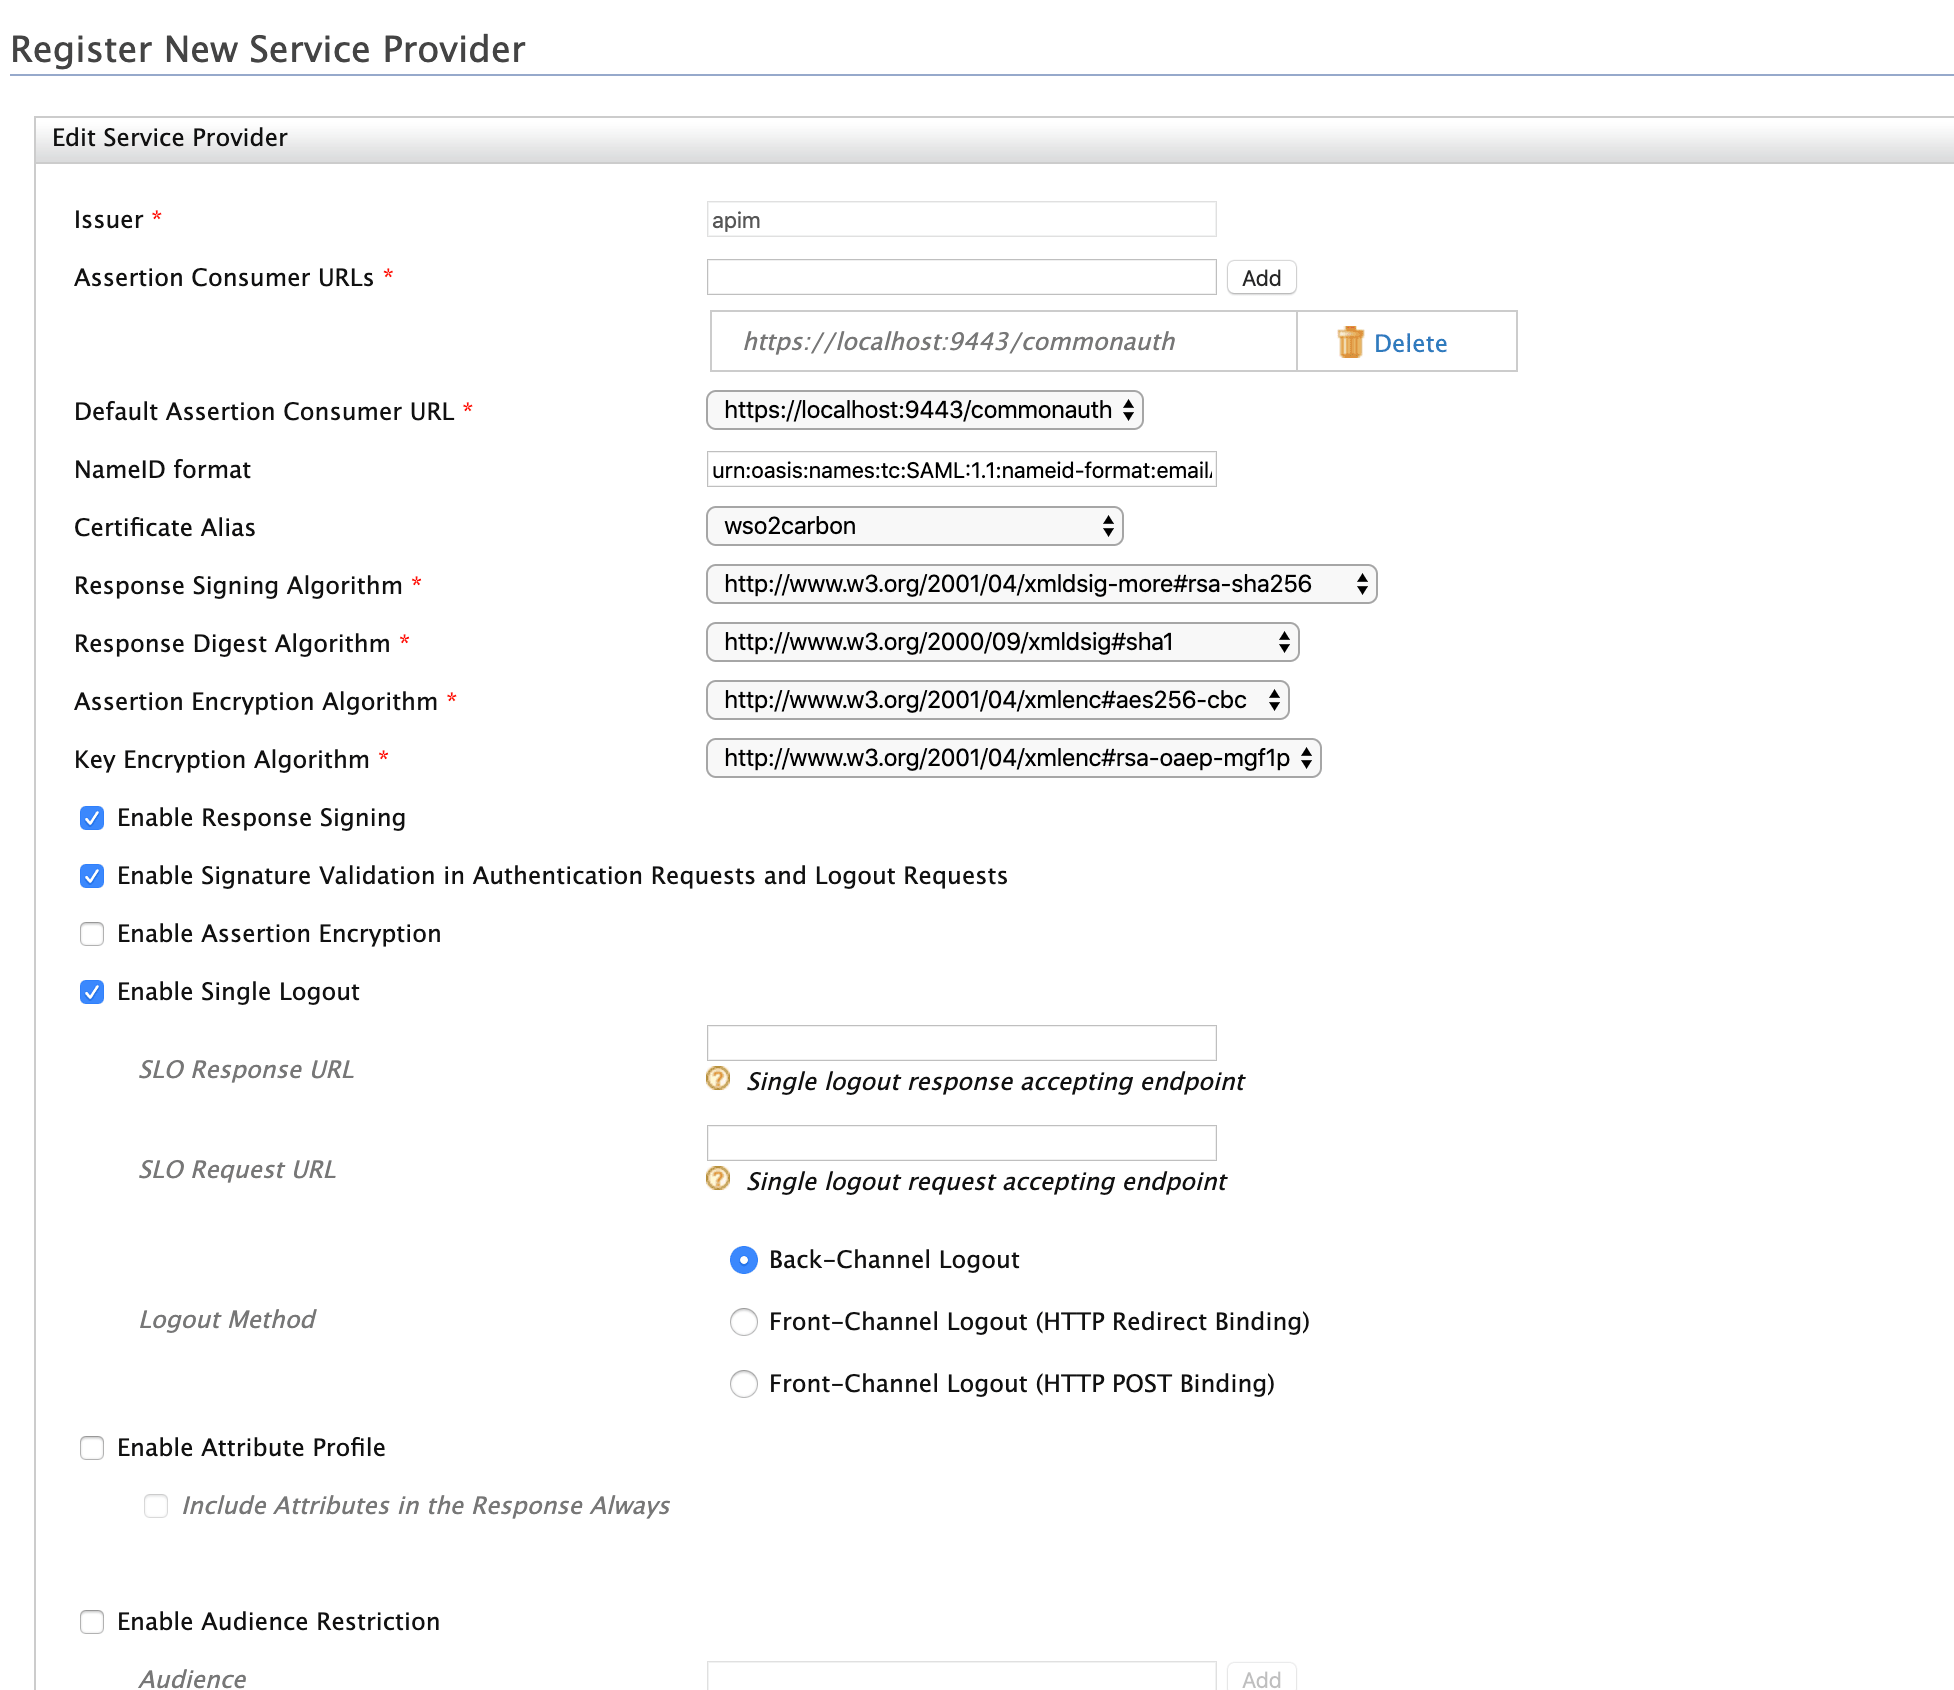
Enter the configurations to register the API Publisher as the SSO service provider. These sample values may change based on your configuration.
- Issuer: apim
-
Assertion Consumer URL:
https://localhost:9443/commonauth.Change the IP and port accordingly. This is the URL for the Assertion Consumer Services (ACS) page in your running publisher app.
-
Response Signing Algorithm: rsa-sha256
-
Select the following options:
- Enable Response Signing
- Enable Signature Validation in Authentication Requests and Logout Request
- Enable Single Logout
-
Click Register.
Example
-
-
Upload the public certificate of the API Manager by selecting Select SP Certificate Type.
Step 3 - Configure WSO2 Identity Server as a SAML 2.0 SSO Identity Provider
-
Start API Manager
./wso2server.sh -
Sign in to the WSO2 API Management Console.
https://<hostname>:9443/carbonhttps://localhost:9443/carbon -
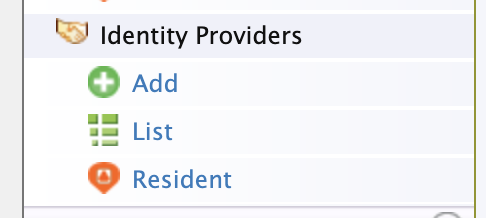
Click Main, Identity, and then click Add under the Identity Providers menu.
-
Upload the public certificate of Identity Server under Identity Provider Public Certificate.
-
Define the Federated authenticator.
-
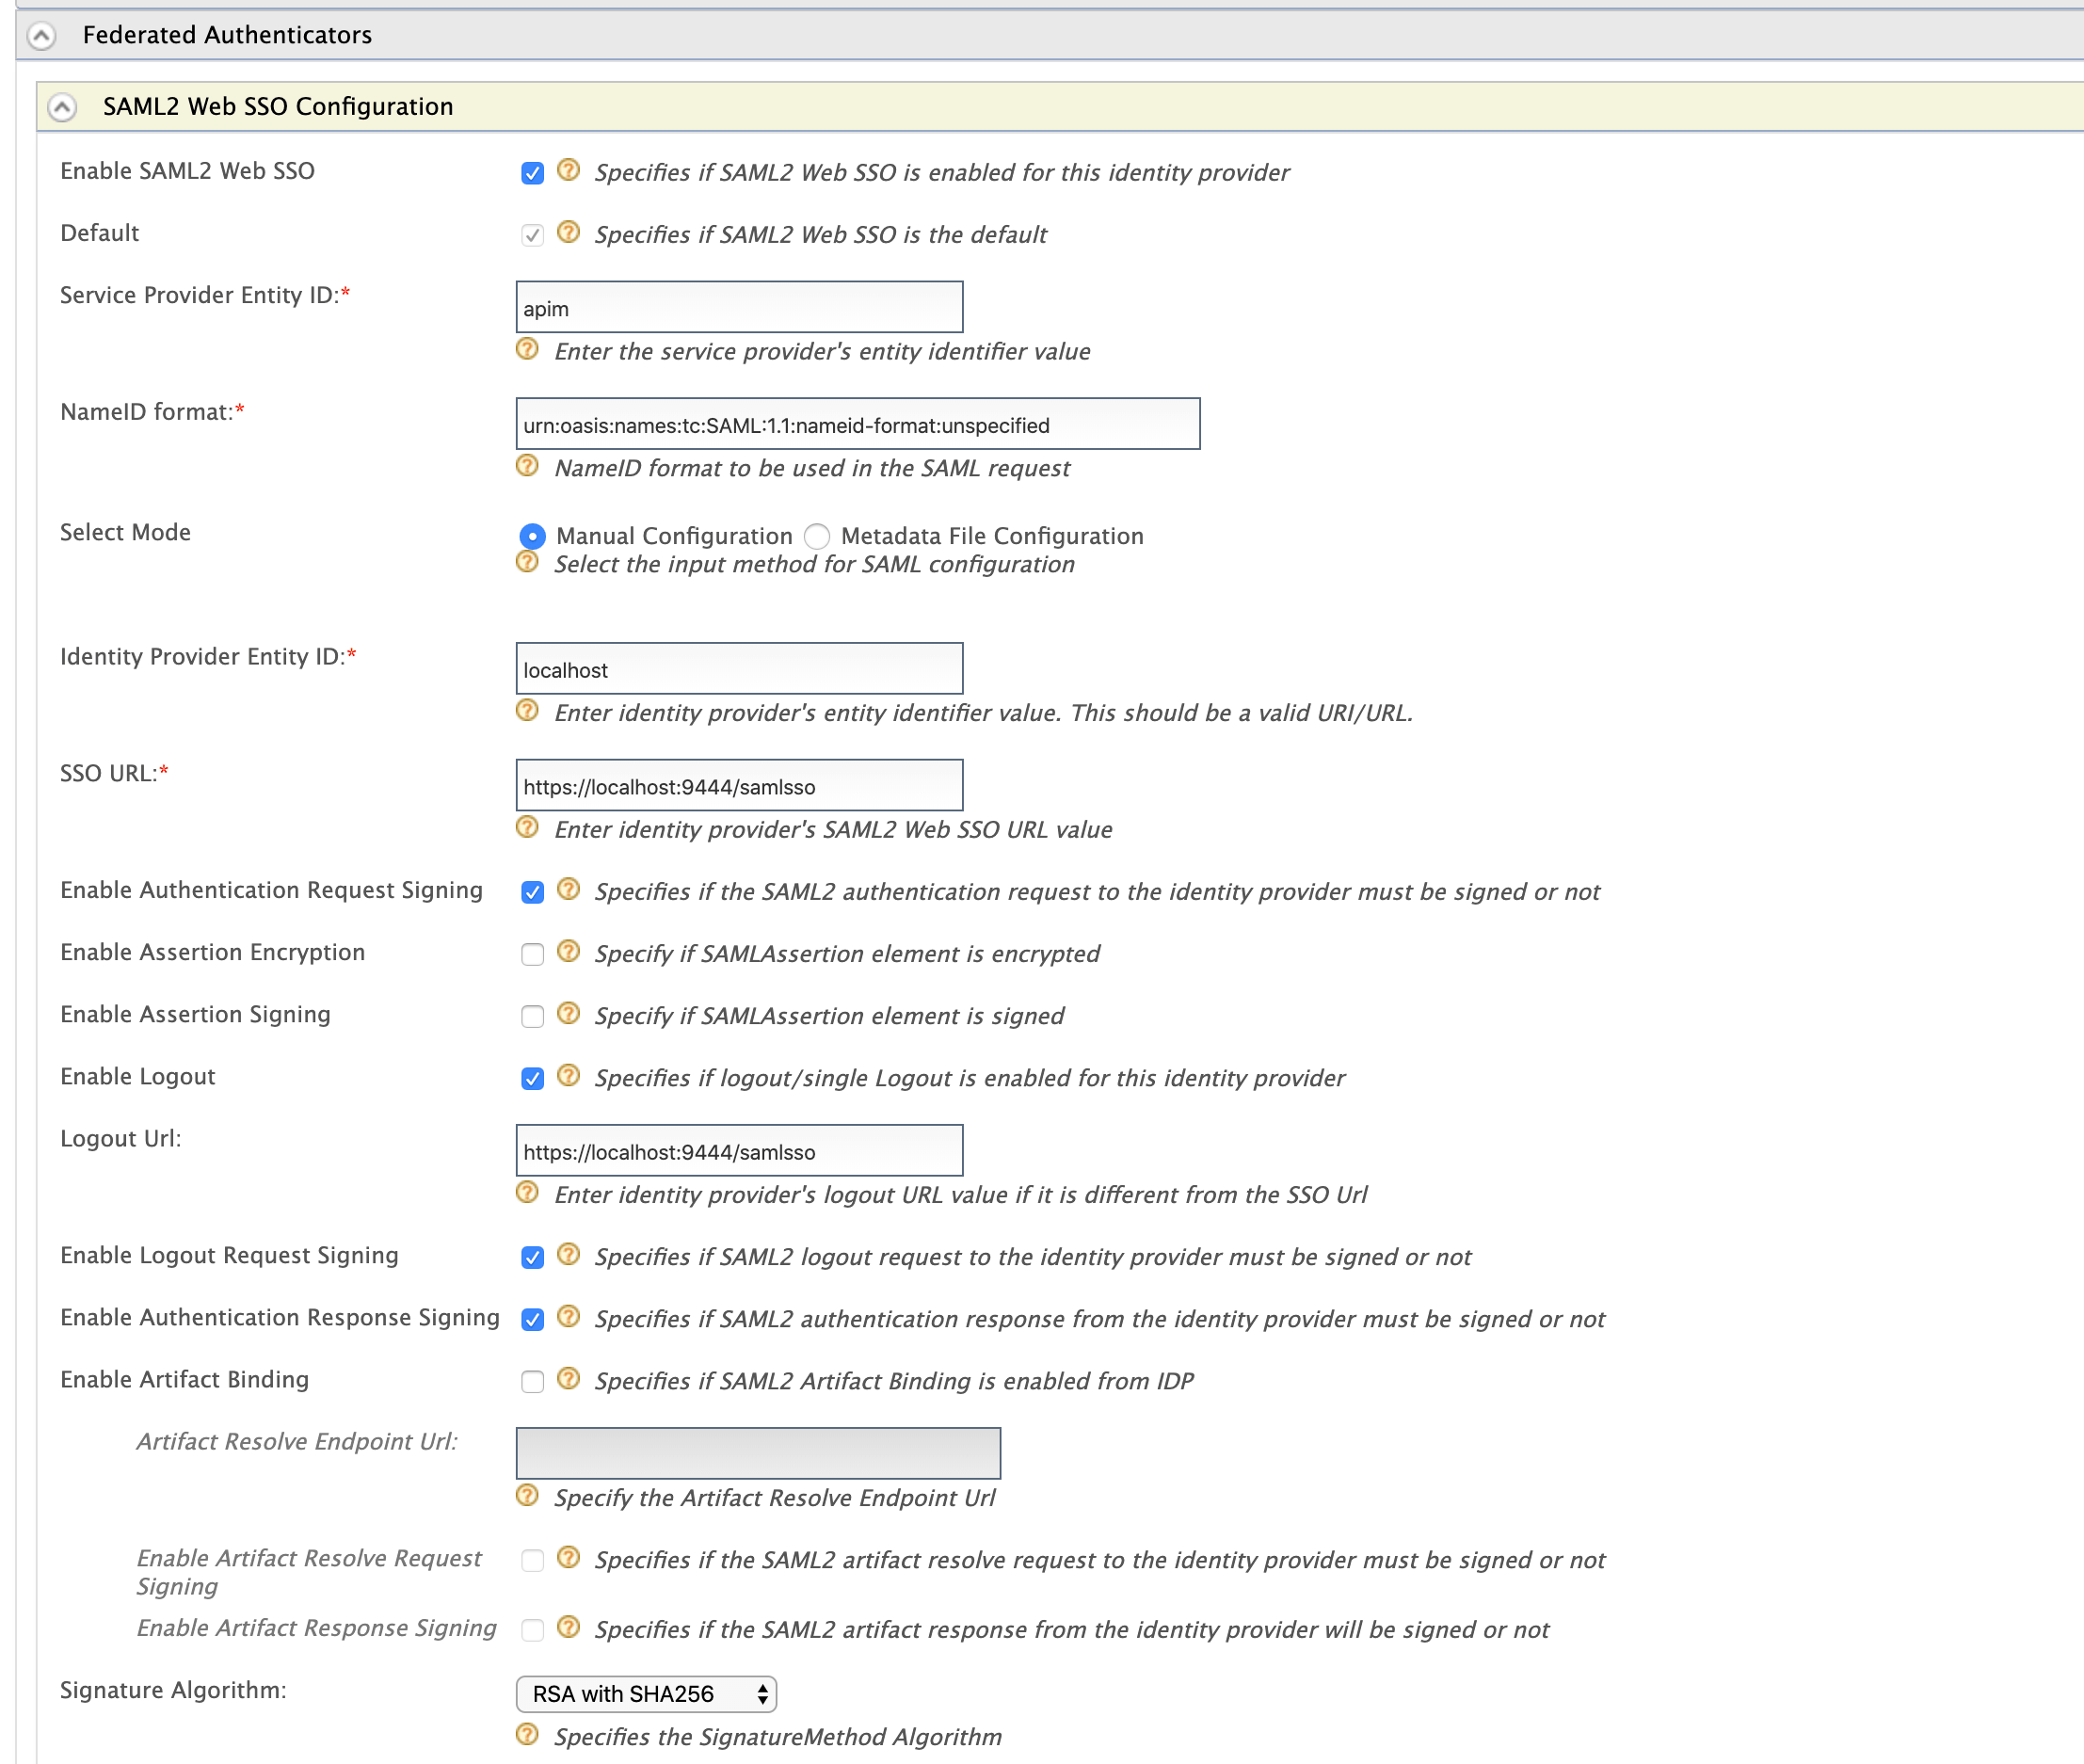
Expand the Federated authenticators section, then expand the SAML2 Web SSO Configurations section and define the Federated authenticator as follows:
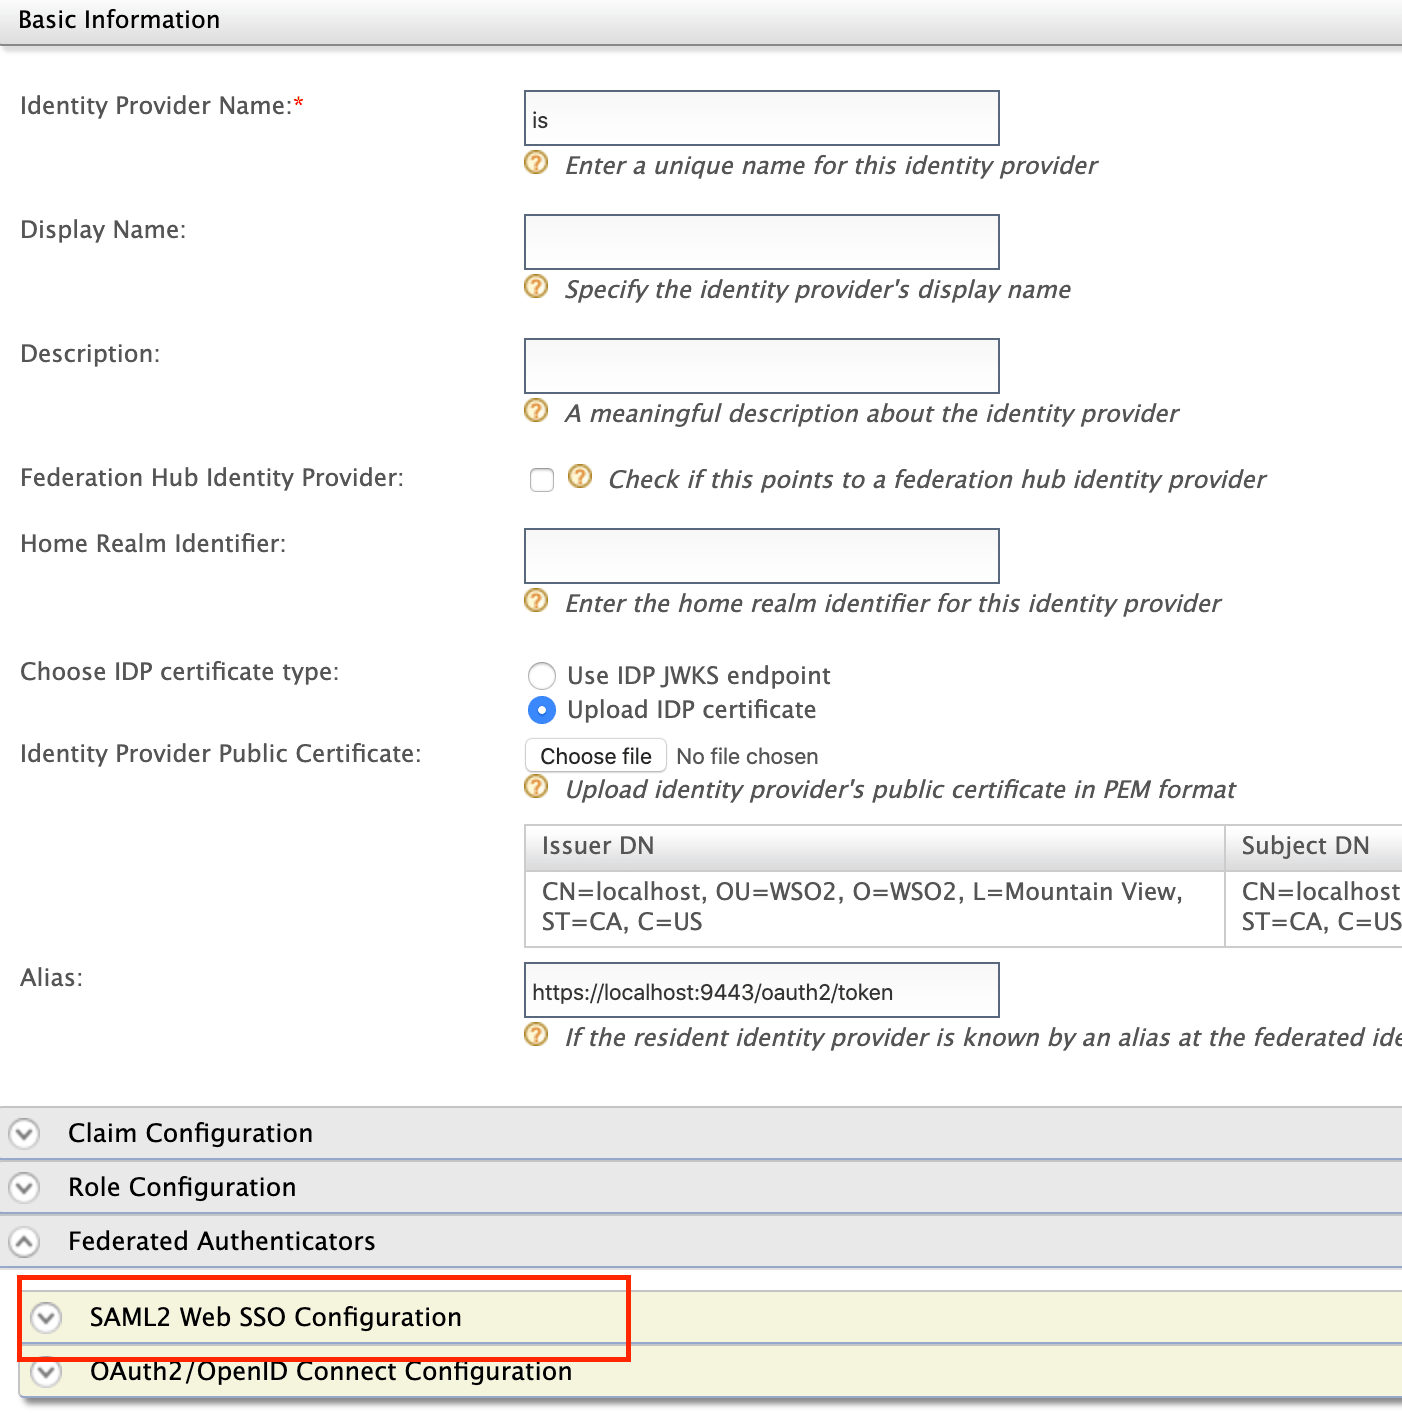
- Identity Provider Name: is
-
Service Provider Entity ID: apim
This value can change depending on the Issuer value defined in WSO2 IS SSO configuration above.
-
Identity Provider Entity ID: localhost
-
SSO URL:
https://localhost:9444/samlssoChange the IP and port accordingly. This is the redirecting SSO URL in your running WSO2 IS server instance.
-
Signature Algorithm: RSA with SHA256
- Select the following options:
- Enable SAML2 Web SSO
- Enable Authentication Request Signing
- Enable Authentication Response Signing
- Enable Logout Request Signing
- Enable Logout
-
Click Register.
-
Example
Note
Make sure your service provider configurations in the Identity Server and the identity provider configurations in API Manager are similarly reflected to each other.
Example:
- If the Response Signing Algorithm in Identity Server is
rsa-sha256, then the Signature Algorithm in API Manager should beRSA with SHA256. - If you enabled Enable Single Logout in Identity Server, then enable Enable Logout in API Manager.
Step 4 - Configure WSO2 API Manager apps as SAML 2.0 SSO service providers
-
Sign in to the WSO2 API-M Management Console.
https://<hostname>:9443/carbonhttps://localhost:9443/carbon -
List the service providers and click the edit option that corresponds to the API Publisher.
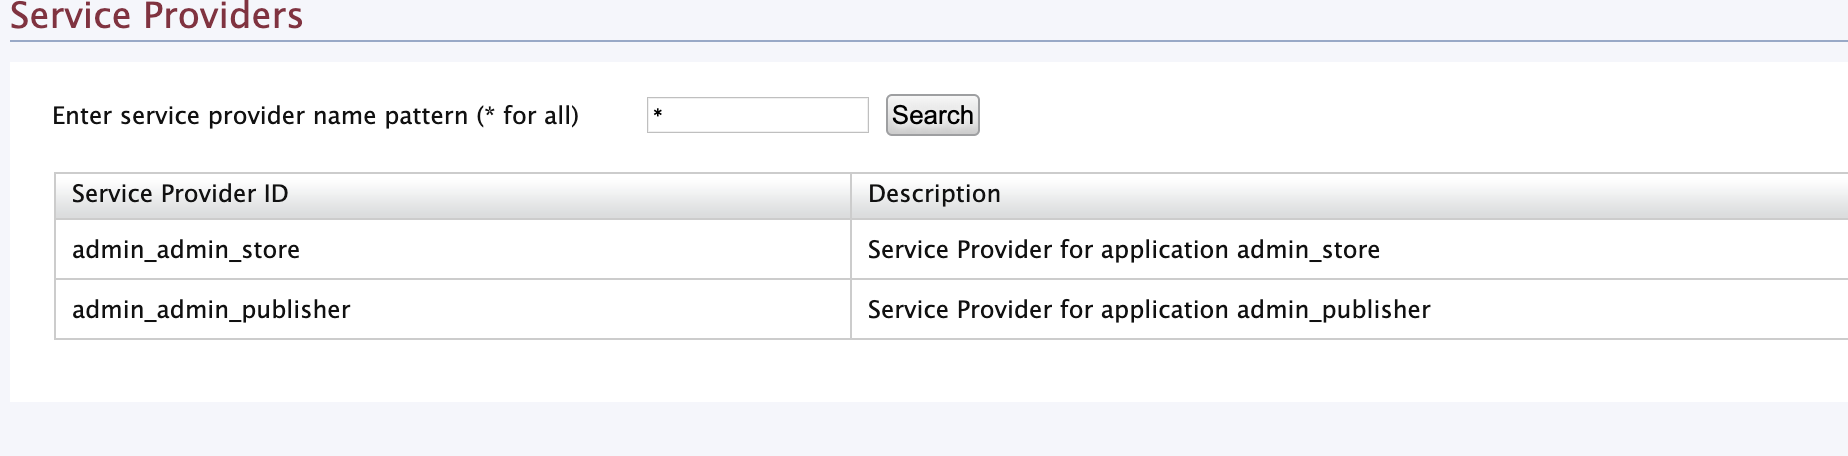
Note
The Publisher and Developer Portal service providers will be listed under service providers after you have logged in to the Publisher and the Developer Portal at least once.
-
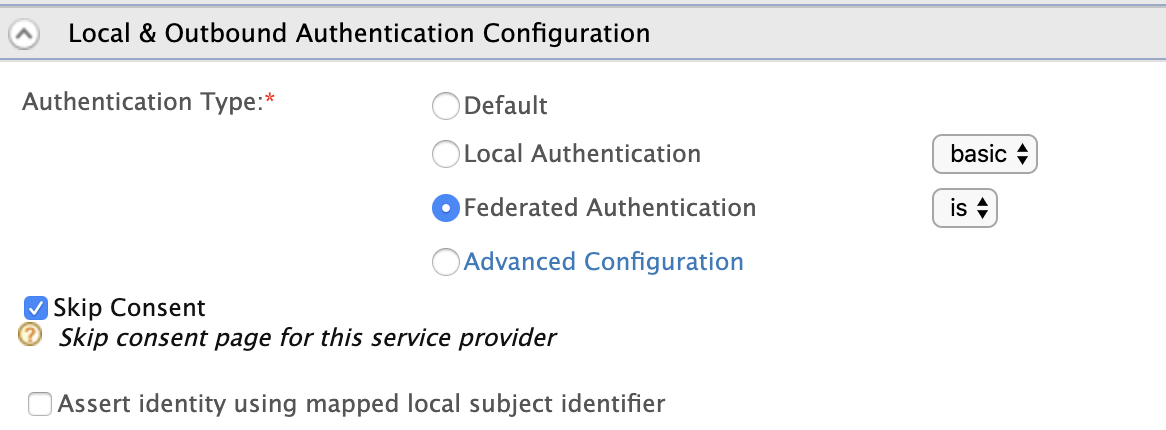
Navigate to Local and Outbound Authentication Configuration and select Identity Provider as the Federated Authentication.
-
Click Update.
-
Repeat the above steps (Step 2 to Step 4) with regard to the Developer Portal as well.
-
Access the Publisher.
https://<hostname>:9443/publisherhttps://localhost:9443/publisherObserve that the request is redirected to the WSO2 IS SAML2.0 based SSO login page.

-
Enter the user credentials.
If the user authentication is successful against WSO2 IS, it will redirect to the API Publisher Web application with the user already authenticated.
-
Access the Developer Portal application, click its Login link (top, right-hand corner) and verify that the same user is already authenticated in the Developer Portal.
Note
Even with SSO enabled, if users do not have sufficient privileges to access API Publisher/Developer Portal or any other application, they will not be authorized to access them.
Info
To learn more about Single Sign-On with WSO2 Identity Server, see SAML 2.0 Web SSO in the WSO2 Identity Server documentation.
Step 5 - Configure the WSO2 API Manager Admin Portal as the SAML 2.0 SSO service provider
-
Open the
<API-M_HOME>/repository/deployment/server/jaggeryapps/admin/site/conf/site.jsonfile. -
Modify the following configurations found under
ssoConfiguration.Parameter Description enabledSet this value to trueto enable SSO in the application.issuerADMIN_PORTAL
This value can change depending on the Issuer value defined in WSO2 IS SSO configuration above.identityProviderURLhttps://localhost:9444/samlsso
Change the IP and port accordingly. This is the redirecting SSO URL in your running WSO2 IS server instance.keyStoreNameThe keystore of the running IDP. As you use a remote instance of WSO2 IS here, you can import the public certificate of the IS keystore to the APIM and then point to the APIM keystore. The default keystore of the APIM is <API-M_HOME>/repository/resources/security/wso2carbon.jks. Be sure to define the full path of the keystore here.keyStorePasswordPassword for the above keystore. The default keyStorePasswordiswso2carbonidentityAliaswso2carbon