Quick Start Guide
Before you begin...
Note
- Install Oracle Java SE Development Kit (JDK) version 11.\* or 1.8.\* and set the
JAVA_HOMEenvironment variable. For more information on setting theJAVA_HOMEenvironment variable for different operating systems, see Setup and Install. - Download WSO2 API Manager 3.0.0.
- Start WSO2 API Manager by navigating to the
/bin wso2server.bat --run(for Windows) orsh wso2server.sh(for Linux.)
This guide walks you through the following 3 scenarios.
- Creating and publishing an API via the API Publisher Portal.
- Subscribing to the API via the Developer Portal and generating keys.
- Invoking the API with the generated keys.
Finally, this guide takes a look at how you can create an API using the API controller, which is a command line tool to create and publish APIs.
Let's get started...
Working with the WSO2 API Manager UIs
Step 1 - Create and publish an API
Follow the instructions below to create a publish an API via the API Publisher Portal.
-
Navigate to the API Publisher Portal https://localhost:9443/publisher and sign in with
admin/adminas the credentials.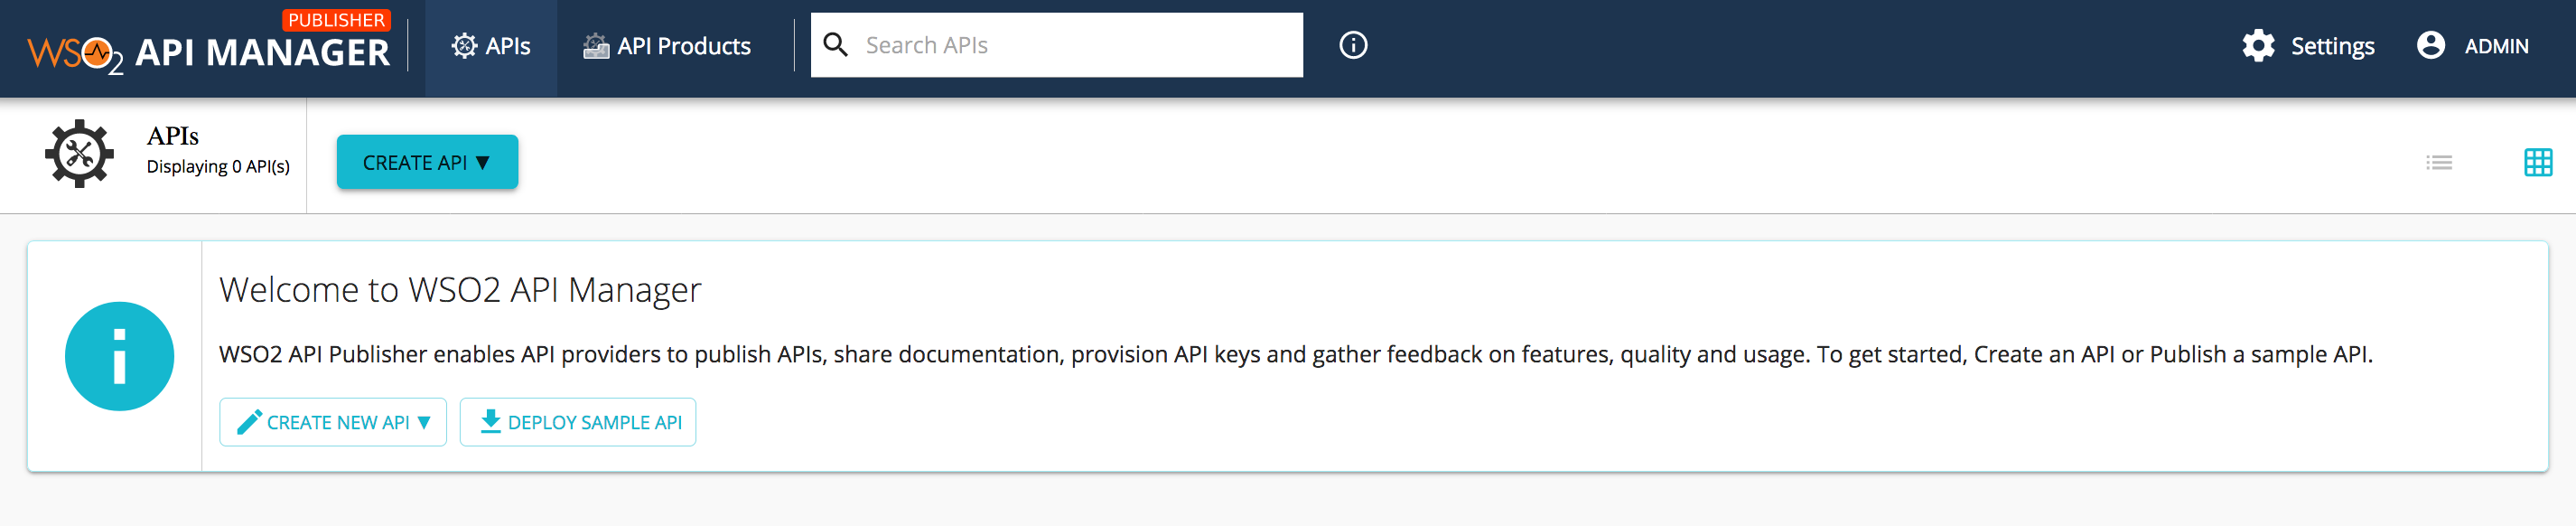
-
Create an API.
Let's use a mock REST service to create the API from scratch.
-
Navigate to https://www.mocky.io/ on your web browser.
A mock service with a JSON response
{"hello": "world"}is provided by default on the landing page of the site. Let's use the service URL (http://www.mocky.io/v2/5185415ba171ea3a00704eed) that appears in the mock service.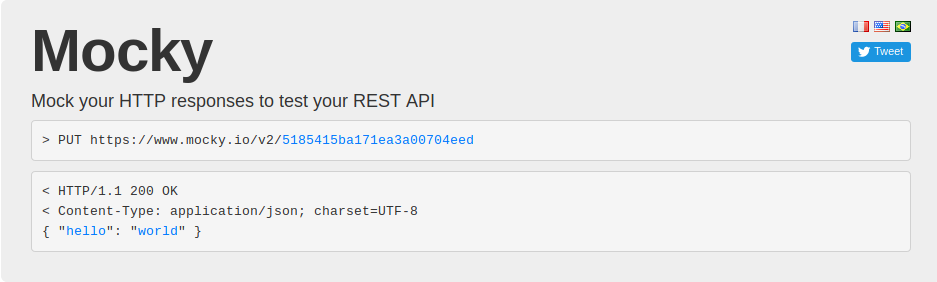
-
Optionally, to test this service, copy the service URL http://www.mocky.io/v2/5185415ba171ea3a00704eed and navigate to it on a new browser. You should see the following JSON message.
{"hello": "world"}
-
-
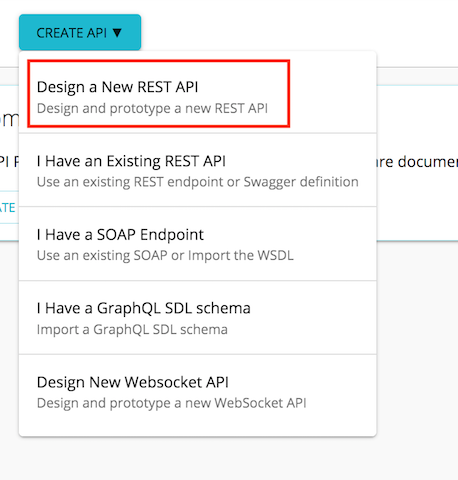
Click Create New API and then click Design a new REST API.
-
Enter the API details.
Name HelloWorld Context /helloVersion 1.0.0 Endpoint http://www.mocky.io/v2/5185415ba171ea3a00704eedNote
Use the HTTP protocol because to use HTTPS you need to import the
mocky.iocertificate into WSO2 API ManagerBusiness Plan(s) Gold, Bronze 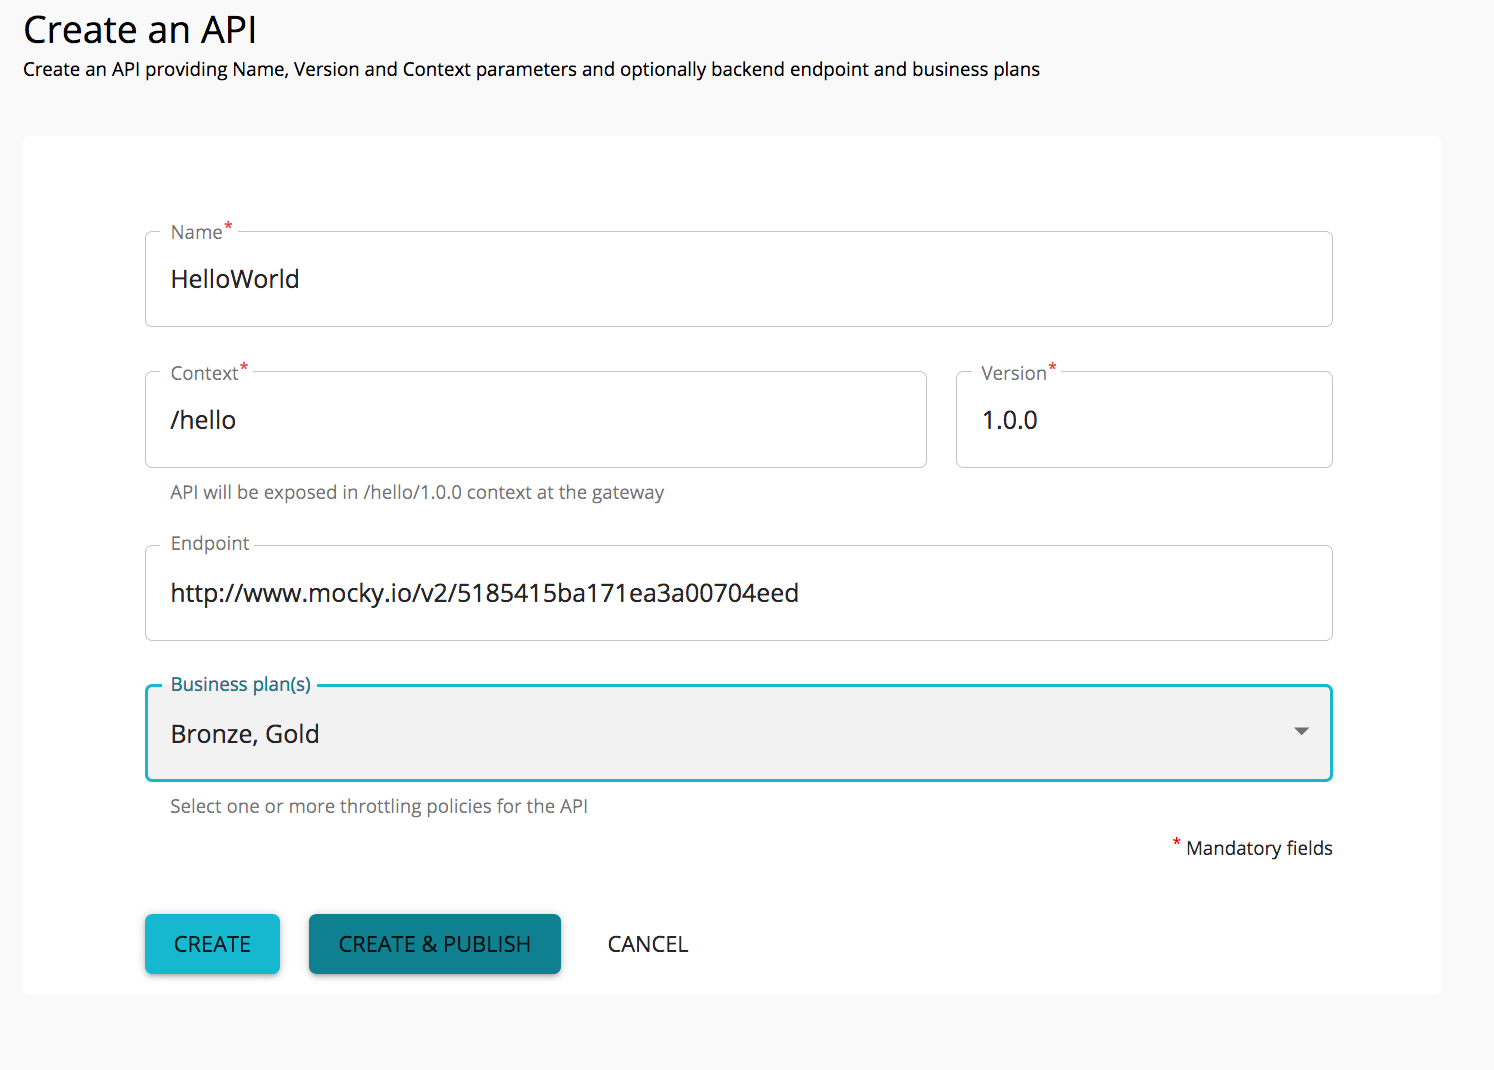
-
Click Create & Publish.
This will publish your first API on the Developer Portal as well as deploy it on the API Gateway. You now have an OAuth2.0 secured REST API that is ready to be consumed.
Step 2 - Subscribe to the API
Follow the instructions below to subscribe to the API and generate the keys via the Developer Portal.
-
Navigate to the Developer Portal.
https://localhost:9443/devportal
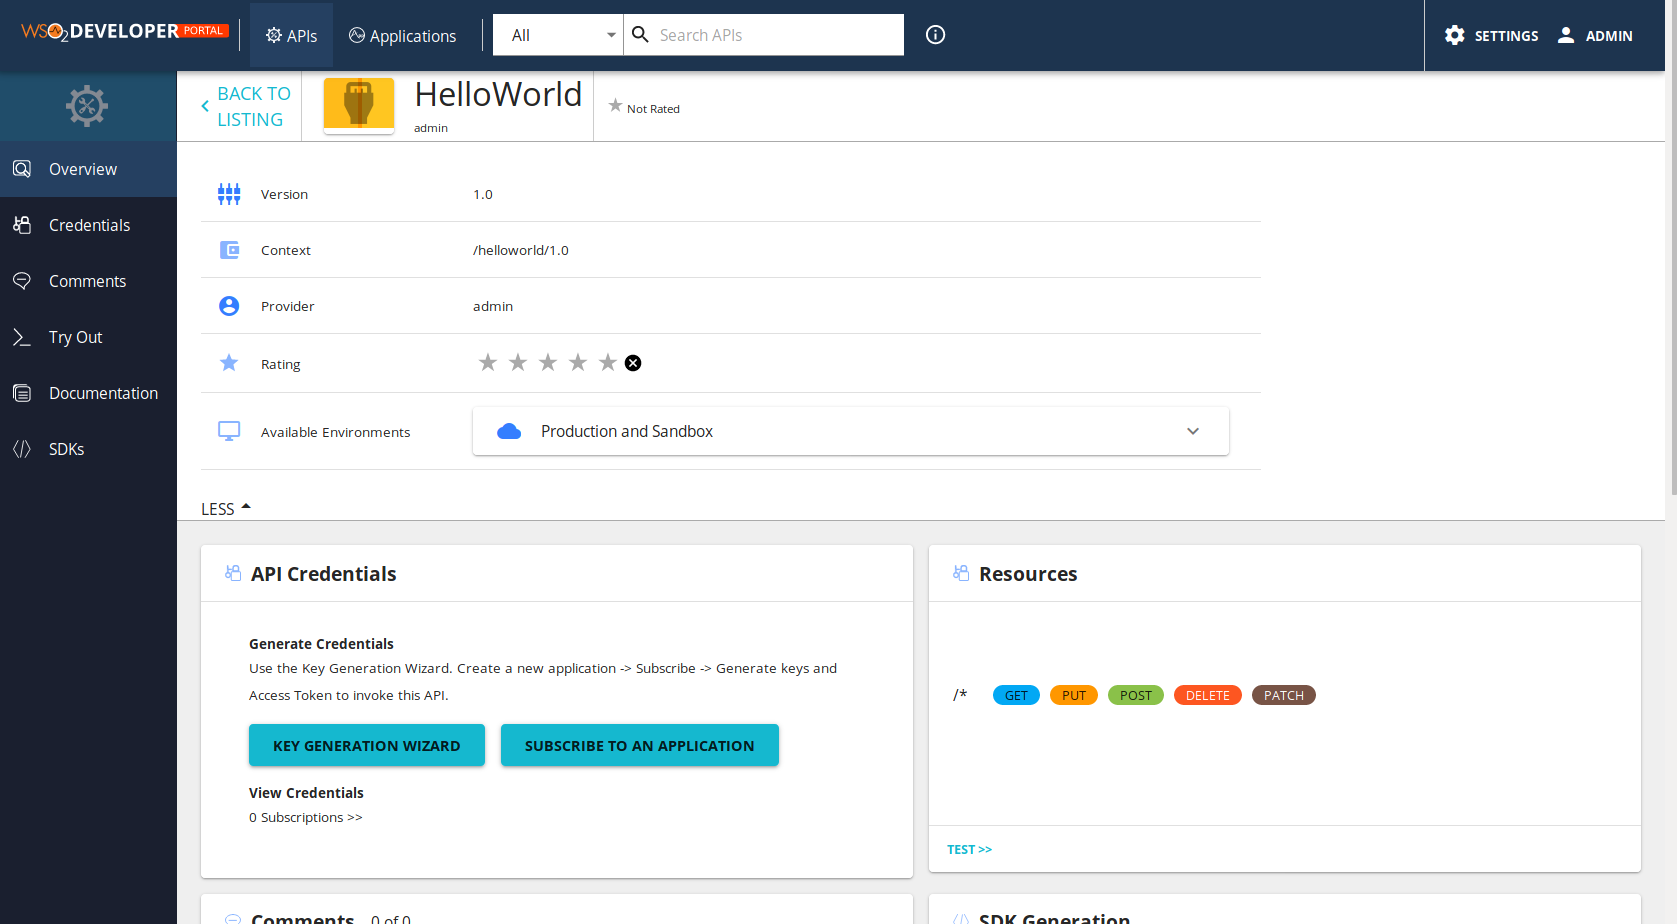
The published
HelloWorldAPI is listed in the Developer Portal as shown below.
-
Click Sign-In and enter
admin/adminas your credentials to sign in to the Developer Portal. -
Click on the API thumbnail to view the overview of the API.
-
Register an OAuth2.0 application.
-
Click Key Generation Wizard.
This wizard walks you through 5 steps that will register an OAuth2.0 application which you will use to consume the
HelloWorldAPI.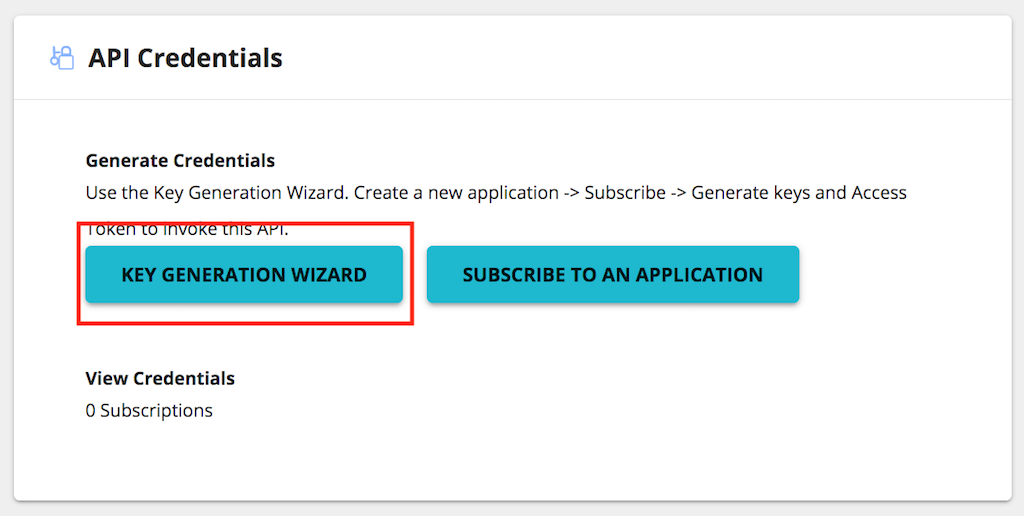
-
Create the OAuth2.0 application.
Enter the application name, and click Next without changing any of the other default values.
Application Name Greetings Per Token Quota 50PerMin Token Type JWT 
-
Subscribe the application to the API.
This subscribes the
Greetingsapplication to theHelloWorldAPI on the selected Business Plan. Click Next without changing any of the default values.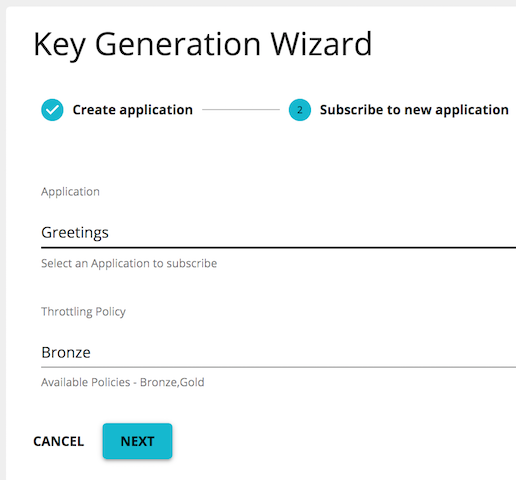
-
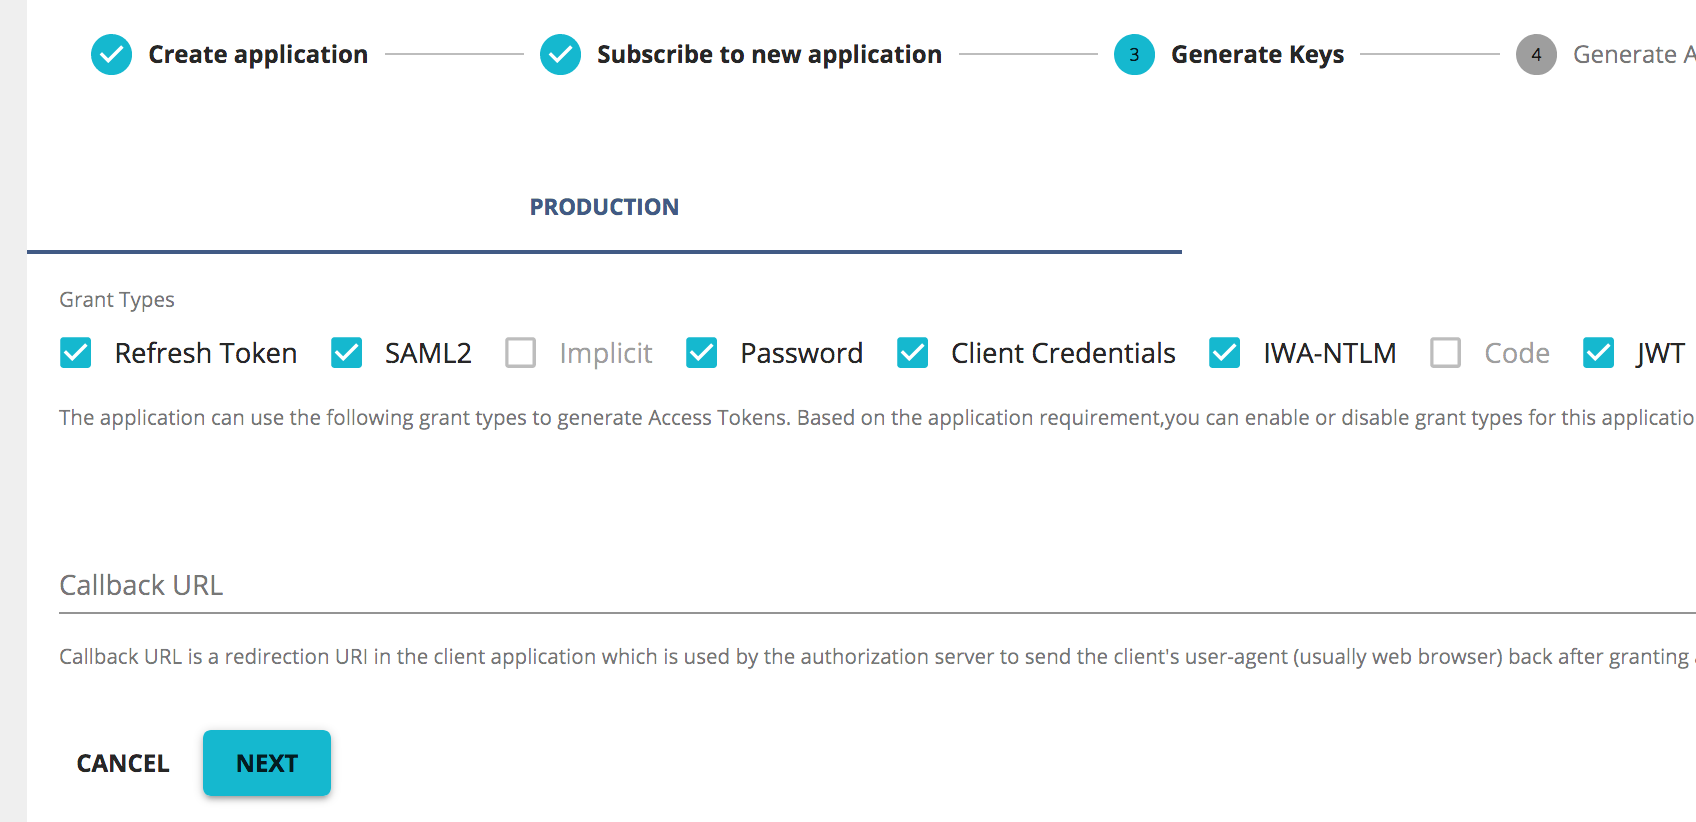
Generate the credentials for the Greetings OAuth2.0 application.
The Grant Types define the various protocols, which will be allowed by the system, from which your application will be allowed to request tokens. Click Next without changing any of the default values.
-
Generate a test access token for the 'Greetings' application to access the 'HelloWorld' API.
This step allows you to specify the validity period for the token and its permissions (scopes). Click Next without changing any of the default values.
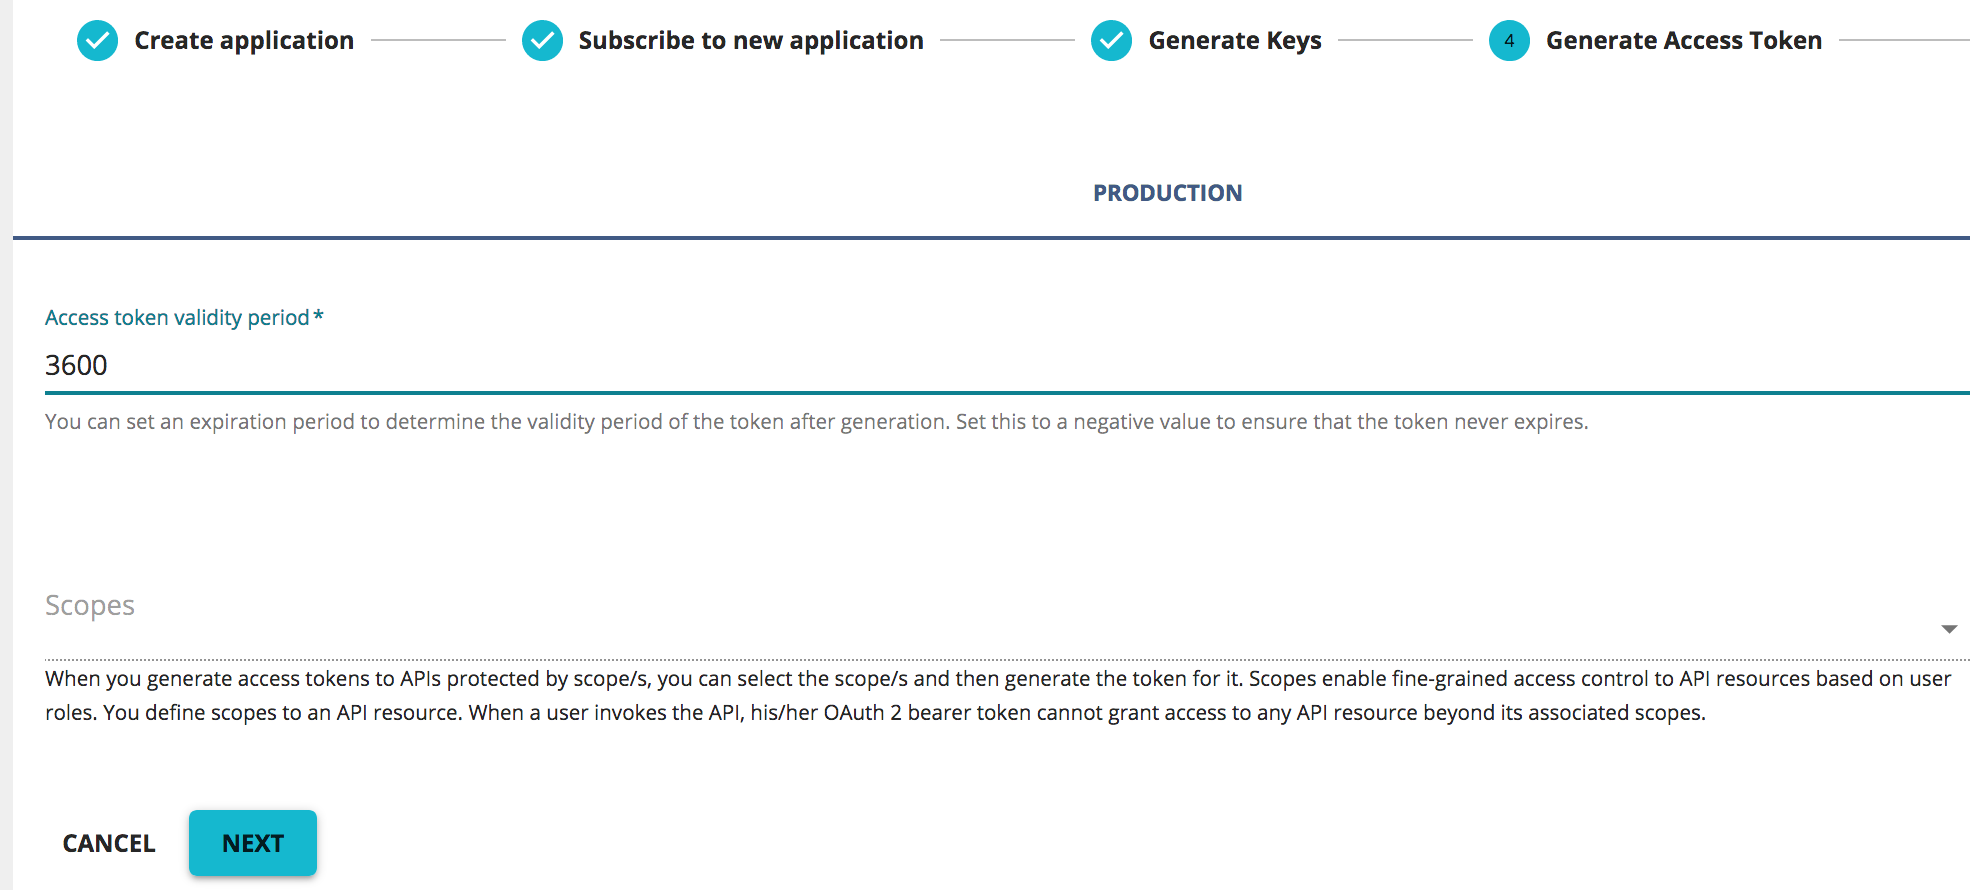
-
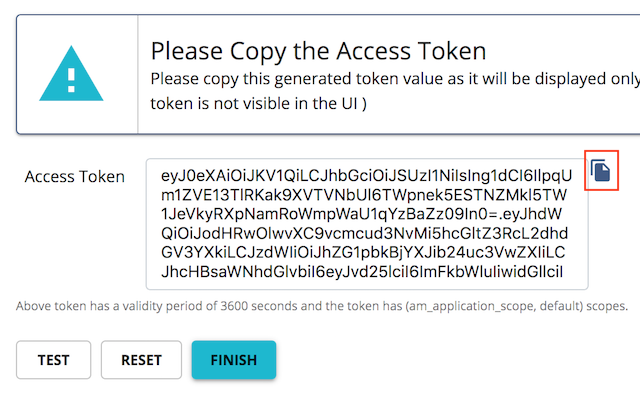
Click copy, as shown below, to copy the generated test access token to the clipboard.
-
Click Finish.
-
Voila!!! You can now test the 'HelloWorld' API with the OAuth2.0 token that you just generated.
Step 3 - Invoke the API
Follow the instructions below to invoke the previously created API with the generated keys.
-
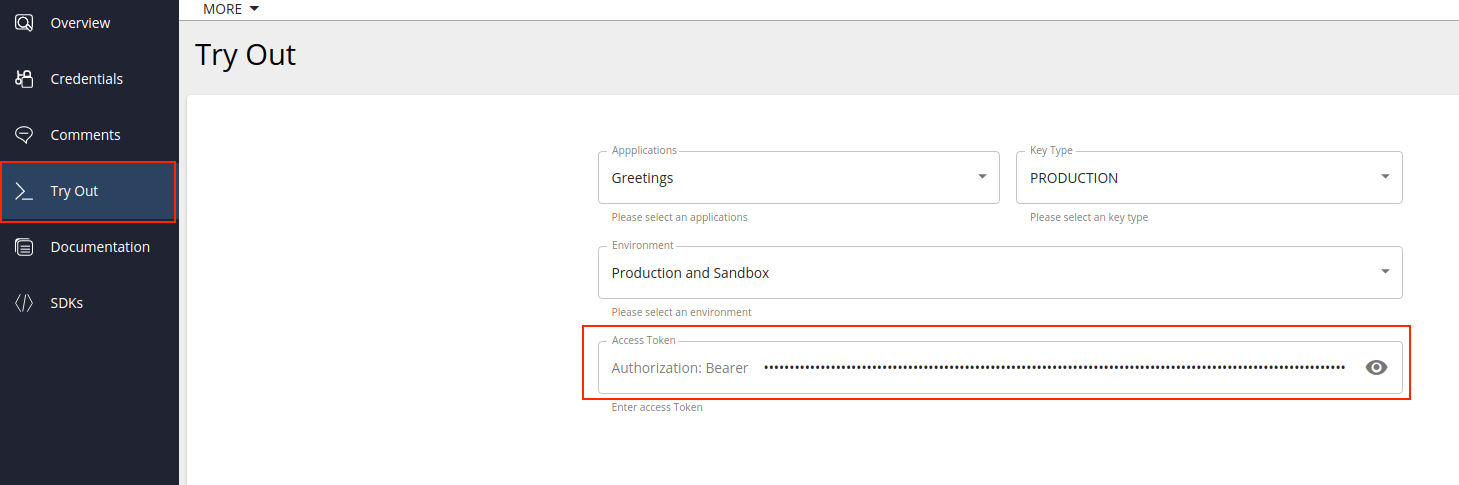
Click Try Out.
The resources of the API are listed.
-
Paste the access token that you previously copied in the Access Token field.
-
If this is the first time you are using the API test console from your browser, open a new tab and navigate to the https://localhost:8243/ URL.
This will prompt your browser to accept the certificate used by the API Gateway. This is required because by default the API Gateway uses a self-signed certificate that is not trusted by web browsers.
Note
This certificate that is used by the API Gateway is replaced when deploying the system in production.
-
Click on the
GETresource of the API to expand the resource. -
Click Try It Out, which is the button on the right. Then click Execute.
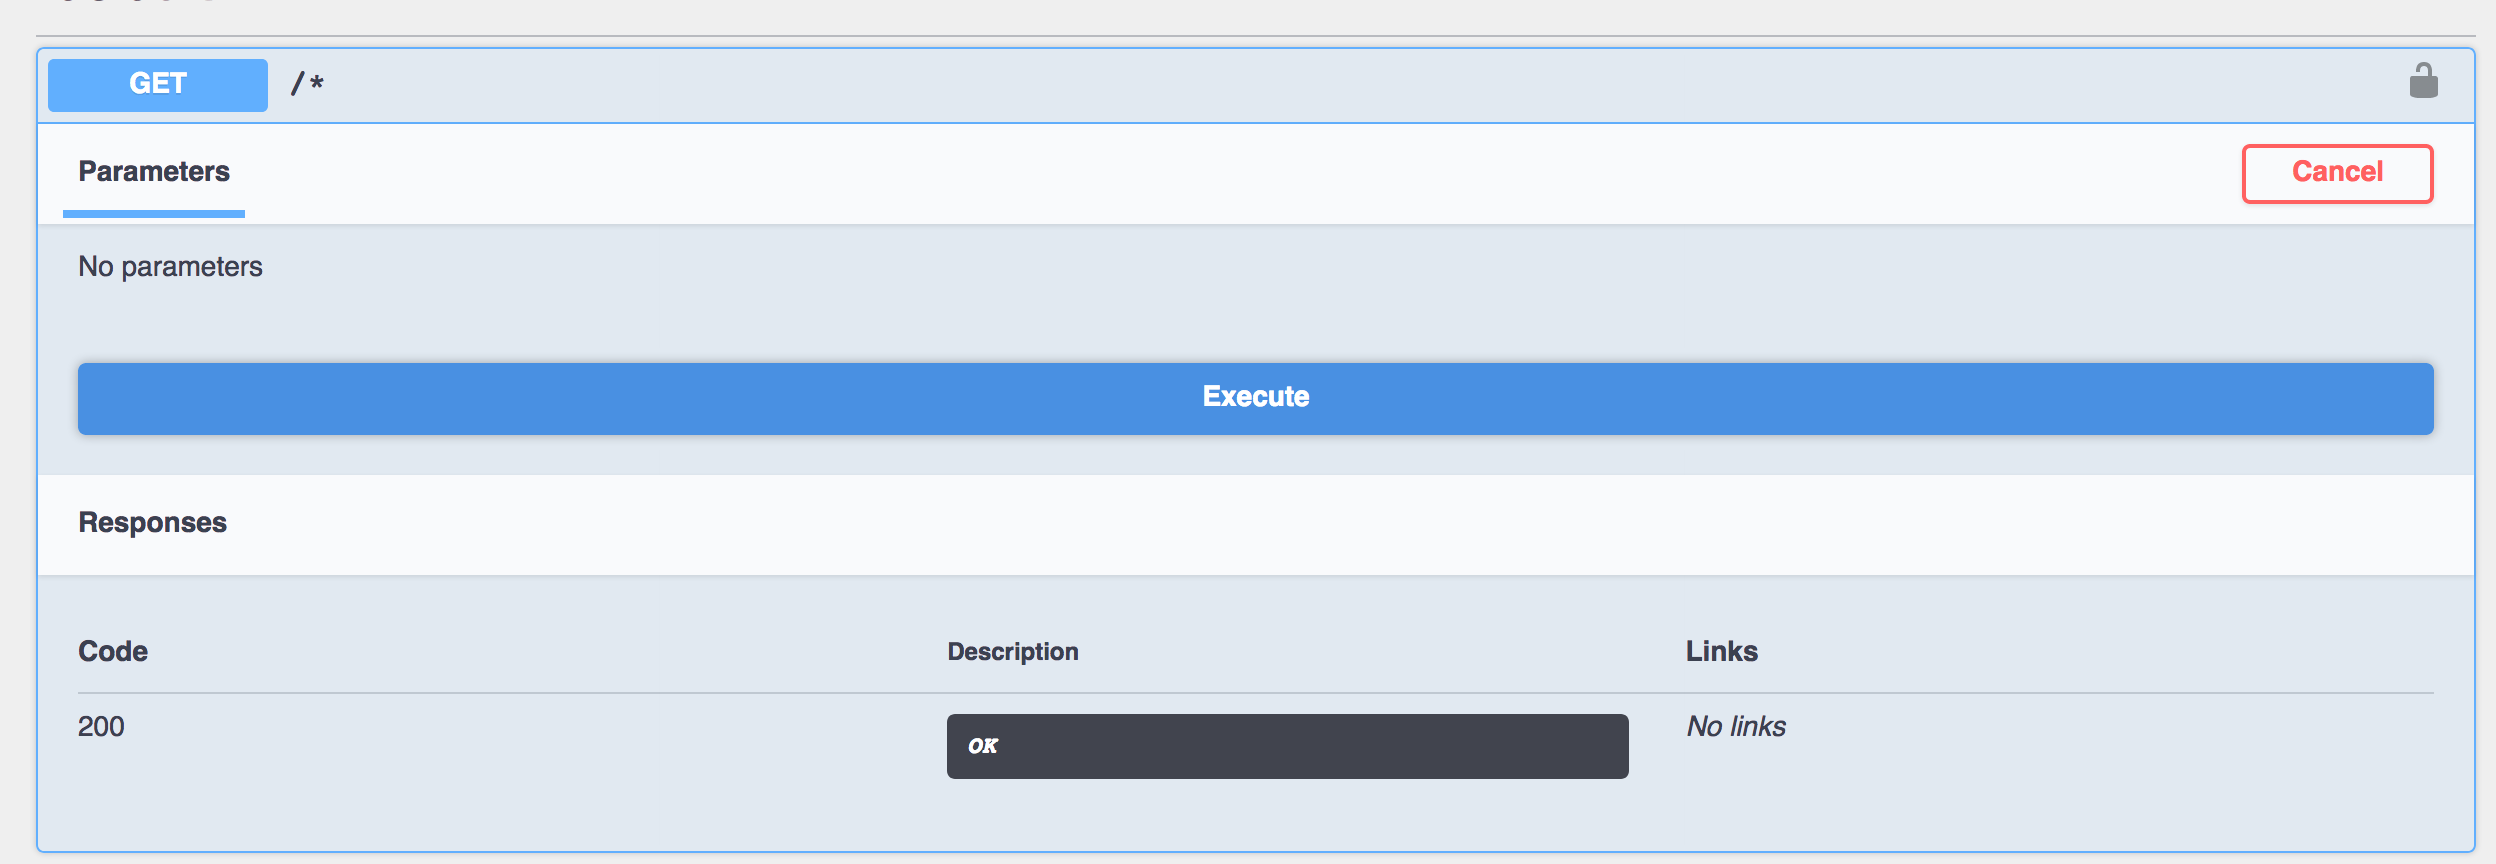
You should see the
{"hello" : "world"}response from the API.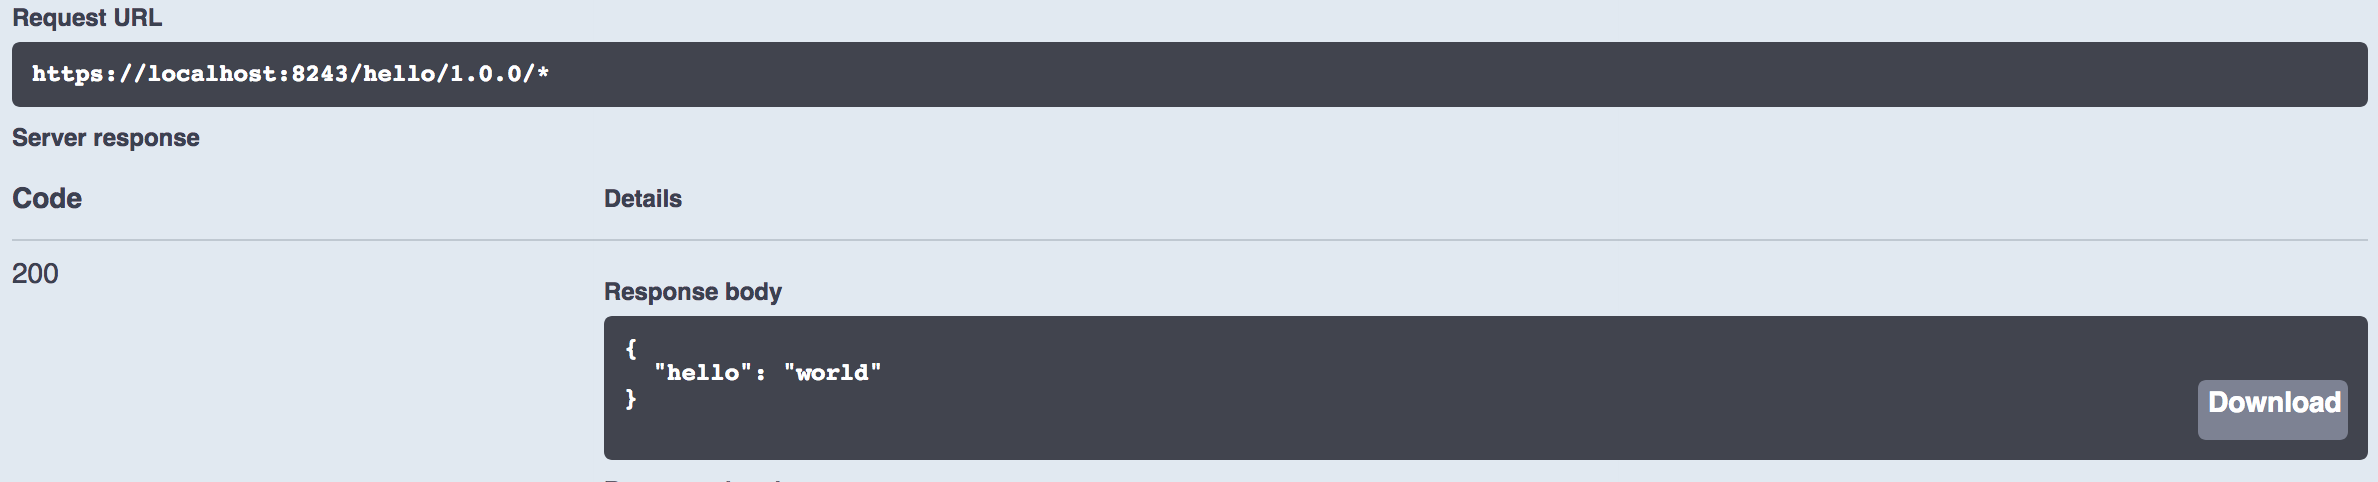
Congratulations! You have successfully created your first API, subscribed to it through an OAuth2.0 application, obtained an access token for testing, and invoked your API with the access token.
Working with the command line tool - API Controller (apictl)
Let's look at how you can use the CI/CD command line tool for APIs (API Controller) to develop and deploy an API on WSO2 API Manager.
Step 1 - Download and setup the API Controller
-
Download API Controller 3.0.0 (or the latest of 3.0.x family) based your operating system from https://wso2.com/api-management/previous-releases/.
Info
Download the API Controller 3.0.x latest distribution using below instructions:
- Access the previous WSO2 API Manager related releases.
- Select version 3.0.0.
- Download the operating system specific distribution from Tooling -> CLI section.
-
Extract the ZIP to a preferred location.
This location will be referred to as the
apictldirectory. -
Use the command line tool to navigate to the
apictldirectory.Execute the following command to view the available operations.
./apictl --help -
Point the API Controller to the instance of API Manager in which you want to deploy APIs.
Execute the following command to add an environment.
Note
It is assumed that WSO2 API Manager is run locally (localhost) using the default ports.
./apictl add-env -e dev --registration https://localhost:9443/client-registration/v0.15/register --apim https://localhost:9443 --token https://localhost:8243/tokenOn successfully executing this command, you should see the following message.
Successfully added environment 'dev'
Step 2 - Create an API
-
Initialize an API project by providing a name for the project.
Let's use the command below to create an API named
PetstoreAPI. This creates a folder namedPetstoreAPIin your current directory../apictl init PetstoreAPI --oas https://petstore.swagger.io/v2/swagger.jsonNote
Use the following command to view the various options related to initializing a project.
./apictl init --help -
Open the
api.yamlfile.Open and explore the
PetstoreAPIfolder with an IDE (e.g., VSCode). Navigate to theMeta-informationdirectory and open theapi.yamlfile.Tip
Alternatively, You can use a text editor to open this file as well.
Change the values of the attributes
statusandproductionUrlas shown below and save the file.status: PUBLISHED
productionUrl: http://petstore.swagger.io/v2Note
- Changing the default lifecycle status of the API from
CREATEDtoPUBLISHED, will deploy
the API directly to the Developer Portal and API Gateway, when you push this API to WSO2 API Manager in the following step. - If you want to push this API to the Publisher Portal only, the status should be
CREATED.
- Changing the default lifecycle status of the API from
Step 3 - Publish the API
-
Push the API to WSO2 API Manager.
Navigate back to the
apictldirectory and execute the following command:Info
If you are working with a specific environment for the first time, you will be prompted to enter your account credentials on API Manager. You can use the default admin credentials as
admin/admin../apictl import-api --file ./PetstoreAPI --environment dev -kYou should now see your API deployed successfully on WSO2 API Manager.
-
Browse the Developer Portal or the Publisher Portal to view the API details.
Note
You can consume the API as explained in the following sections.